11
OS Install Methods & Data Migration
Once you have created a new volume on your SSD, there are three methods we typically recommend for setting up a new system drive
with your data on it. Which one you choose will depend on your situation and on your preferred backup method. The options are:
1. Recovery: ‘Reinstall macOS’ (i.e. a clean install) + Migration Assistant (move data after OS install)
2. Recovery: (Full) ‘Restore from Time Machine Backup’ (i.e. transfers system and user data together)
3. Transfer system and user data from a Carbon Copy Cloner backup (also transfers both together)
Notes
• If your latest backup does not include system 10.13 or later, a clean macOS install is required as a first step. [Aura Pro X, X2, N only]
• If you do not need to set up a clean OS install, please skip ahead to Page 13 to migrate both your system and user data via ‘Restore
from Time Machine Backup’, or to Page 15 if you’re using Carbon Copy Cloner.
Option 1: Reinstall the OS + Migration Assistant
This option is most commonly required when your system backup uses a version of macOS that is earlier than the SSD’s base requirement
(e.g. an Aura Pro X2 customer whose last backup uses 10.12.6 or earlier). Some people also choose this route if they were having stability
trouble with the macOS around the time it was last backed up, or just for peace of mind that the system will be installed fresh on their
new drive. To create a clean install you can stay within Recovery mode and use the macOS Utilities following the steps below.
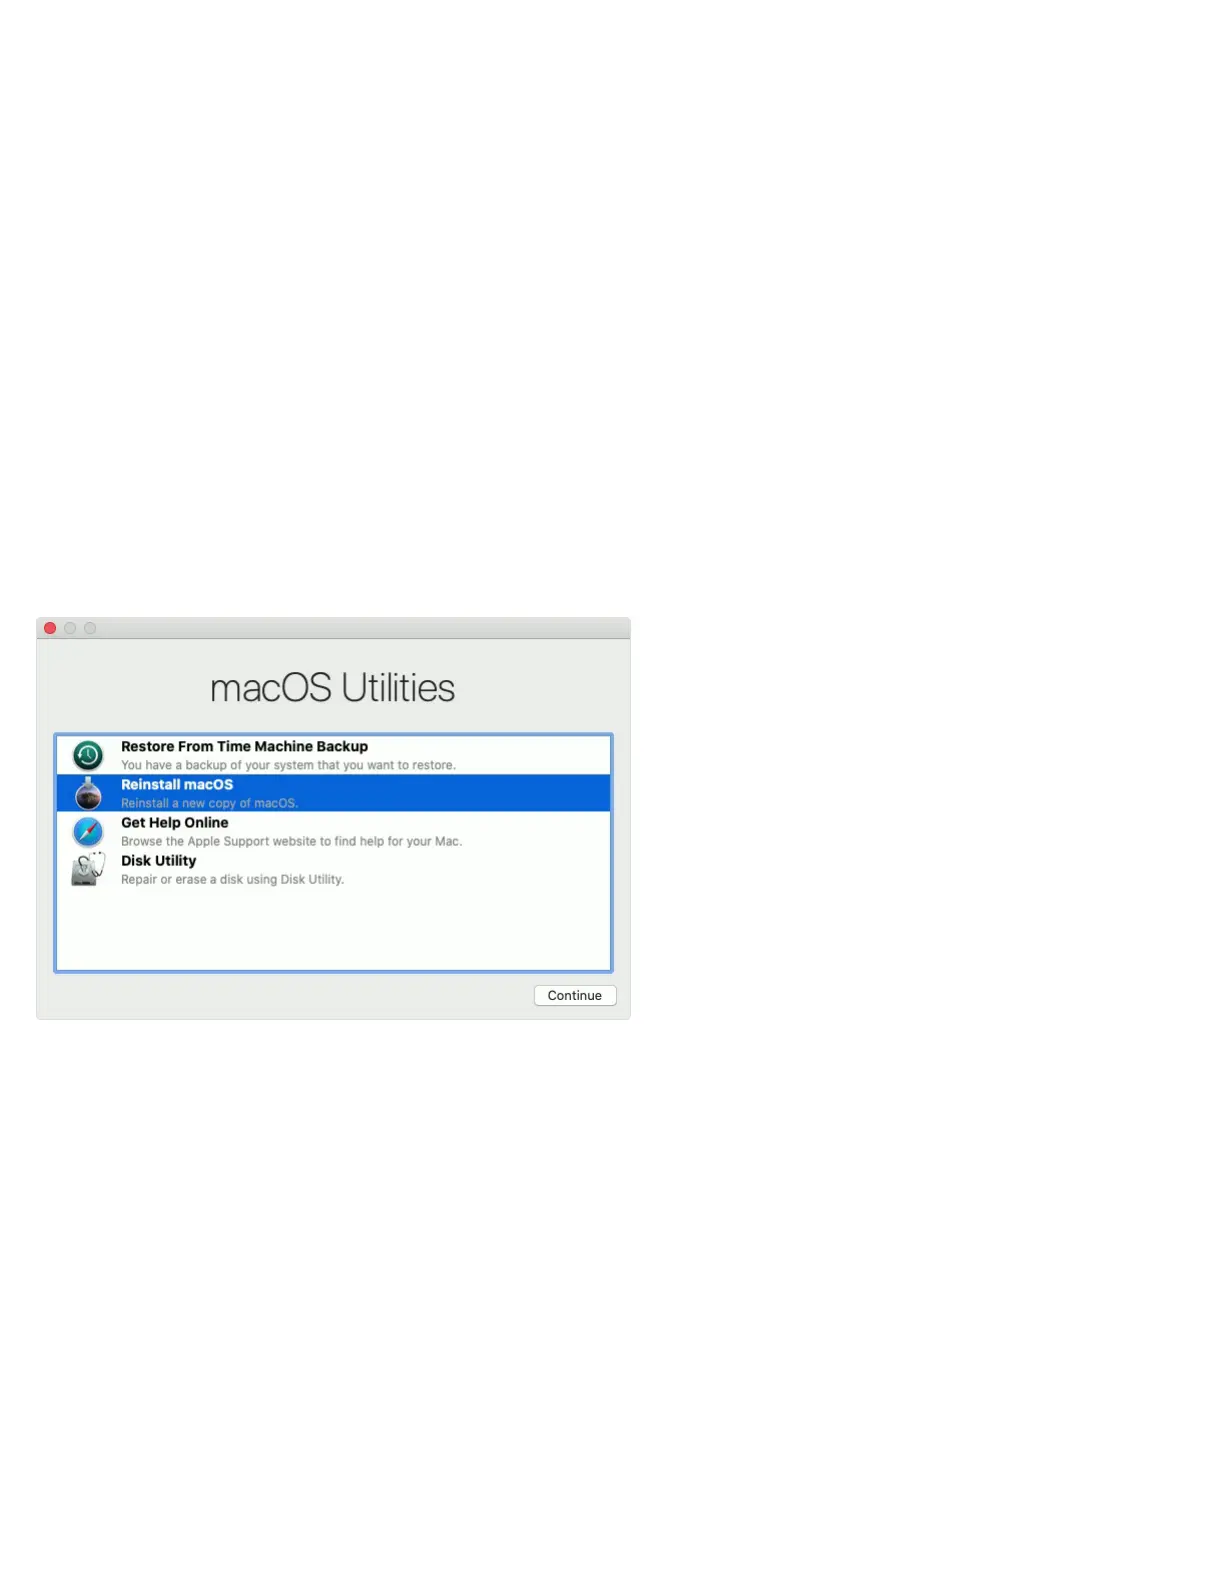
Step 1 – select the ‘Reinstall macOS’ or ‘Reinstall OS X’ option from the Utilities window. Reminder: if you’re using OS 10.7-10.11, your
window will say “OS X Utilities” but the options provided will be the same.
Step 2 – once the macOS installer opens, follow the prompts as you normally would to install the system onto a new drive). Once the
installation is complete the system will reboot to your new drive.
 Loading...