6
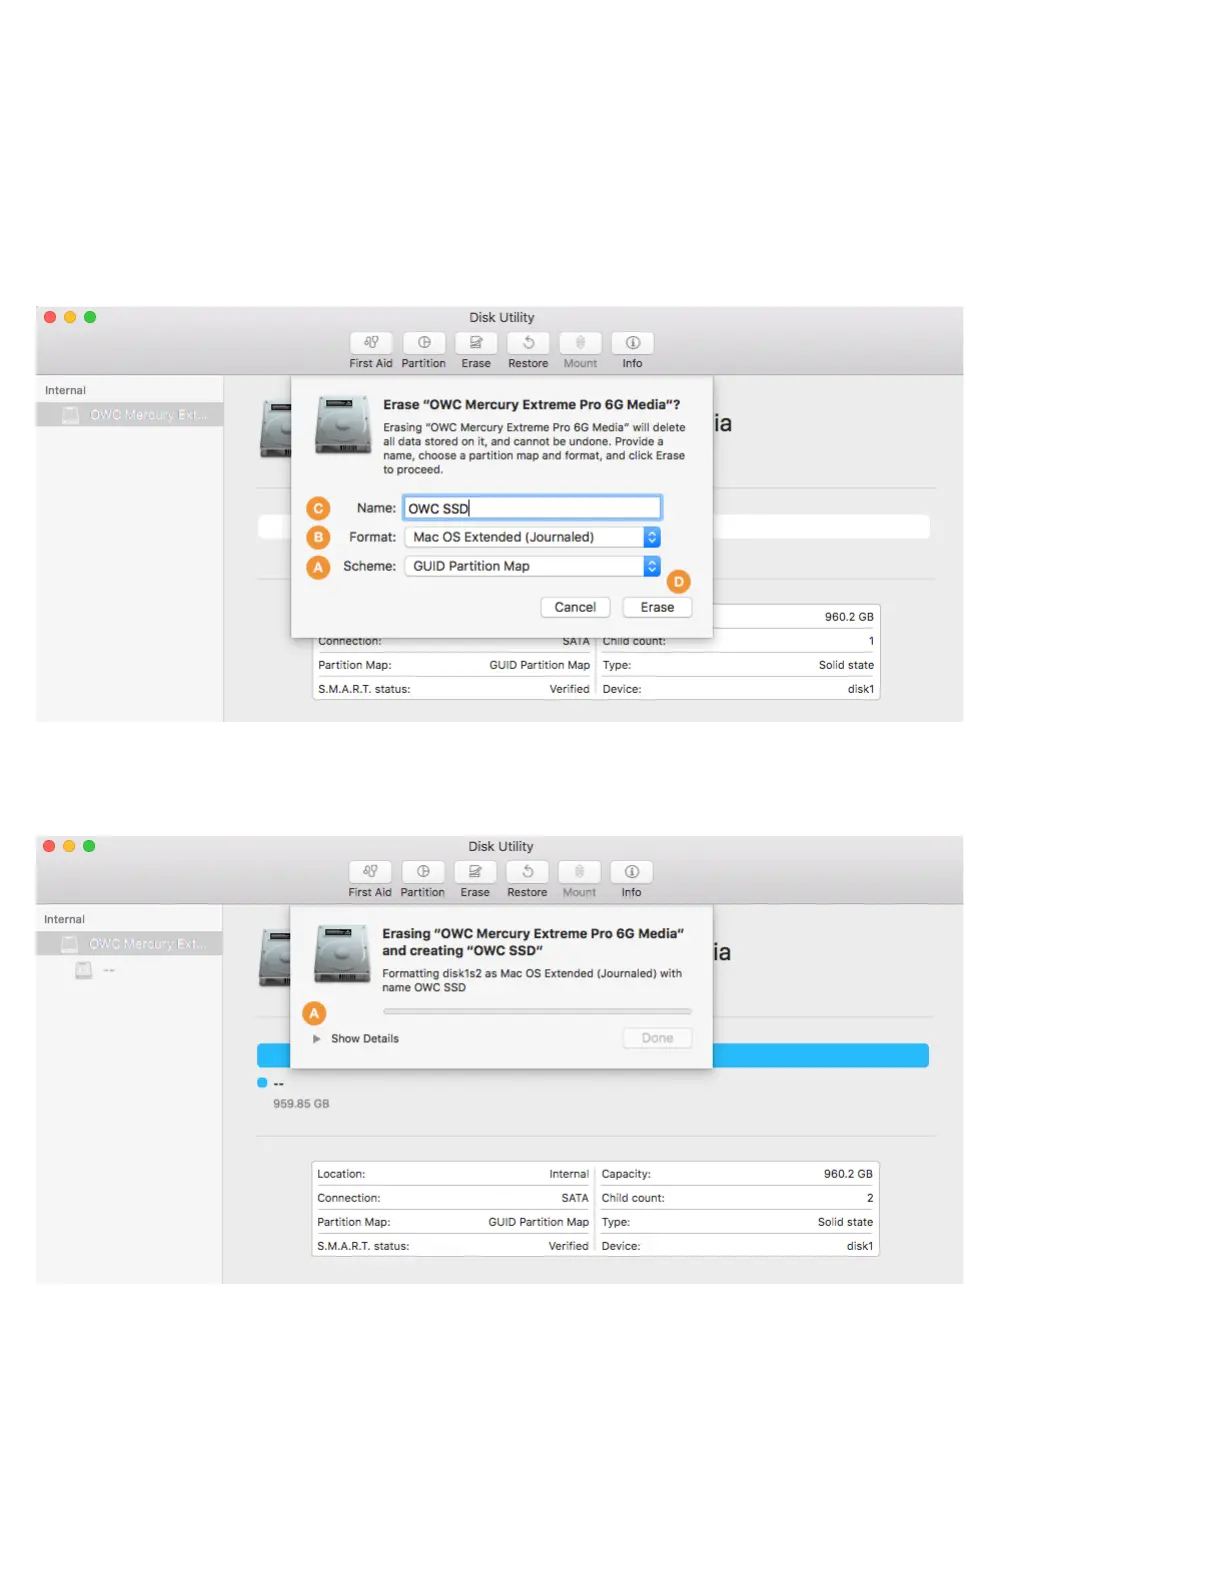
Step 4 – a sheet will open containing the settings needed to format the drive. From the ‘Scheme’ menu (item A below) set the value to
‘GUID Partition Map’ if it’s not already selected (required).
Step 5 – from the ‘Format’ menu (item B below) choose ‘Mac OS Extended (Journaled)’.
Step 6 – type a name for your new system volume in the field supplied (item C). Note: the volume names shown in later sections will not
match the one shown here because the examples are from different sources. However, whatever volume name you choose at this step,
will be applicable when choosing a destination for your system and/or data files during the migration process, as well.
Step 7 – click the ‘Erase’ button (item D) to format the drive. In many cases it will only take a few seconds.
During the format process, by default the screen will look similar to what you see below. Note that it is possible to see the details of the
formatting process by clicking the ‘Show Details’ widget (item A), but it is not necessary to complete the process.
 Loading...