micro+
WIRELESS ELECTRICITY MONITOR
Steps three and four need to be taken quickly after each other
STEP THREE
– Place the Transmitter into Pairing Mode
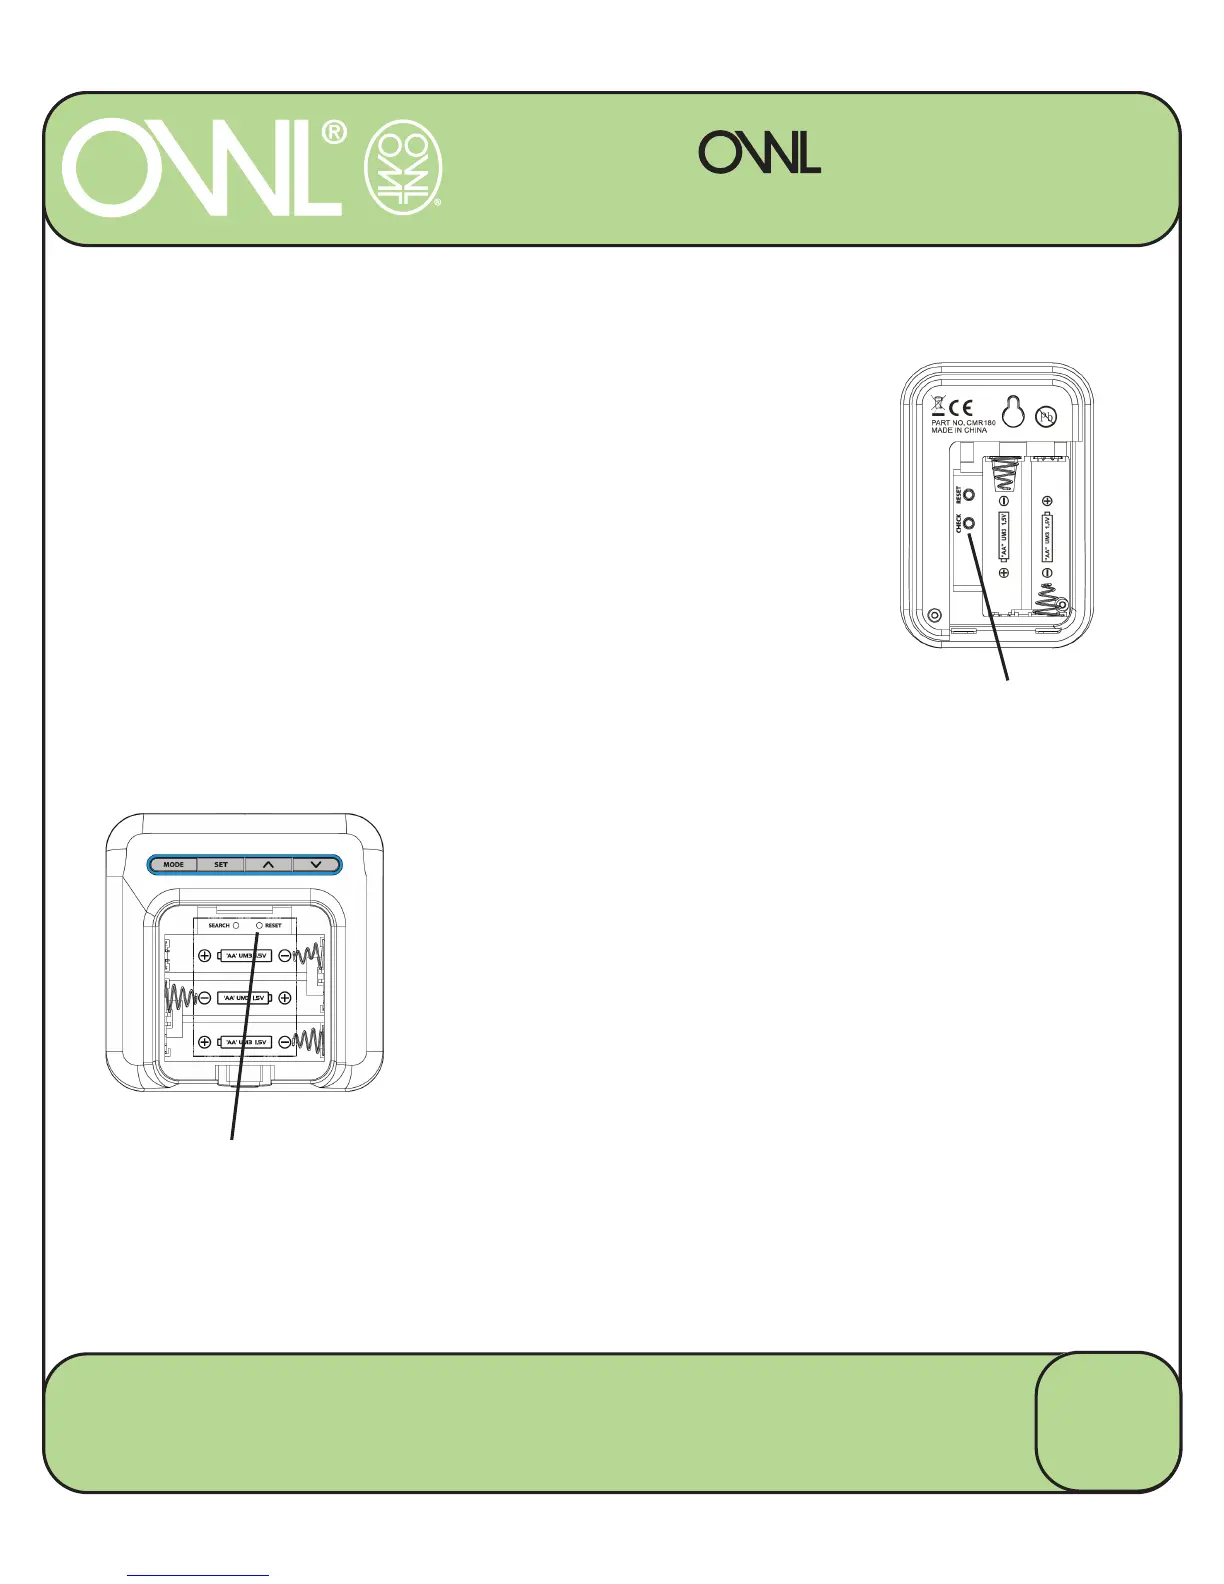
7DNHWKHVPDOOLPSOHPHQWDQGSUHVVWKH5(6(7
button in the back of the battery compartment.
3UHVVDQGKROGWKHVPDOO³&KHFN´EXWWRQLQWKH
Transmitter battery compartment until the red LED
on the front starts flashing.
7KH7UDQVPLWWHULVQRZLQ&KHFN0RGHDQGWKH
red LED on the front will start flashing every 2
seconds (for 30 seconds)
STEP FOUR
– Pairing the Display and Transmitter
7DNHWKHVPDOOLPSOHPHQWDQGSUHVVWKH5(6(7
button in the back of the display battery
compartment.
:KLOHWKHWUDQVPLWWHUDQGGLVSOD\JRWKURXJKWKH
pairing process the display will automatically go into
VHWXSIRUWKHWLPHGDWHLQWKH
display.
35(66+2/'
&+(&.%87721
35(665(6(7%87721
8
2 Save Energy Limited
Chineham Lane, Basingstoke, Hants, RG24 9LR
www.theowl.com customer.services@theowl.com