DD-75-193 R(0) Y.T.31.03.17
9
S2
R1
P1
S1
S1
S1
S2
R1
P1
Caution!
Have panel held securely while tightening or removing panel xing screw (1) to avoid dropping!
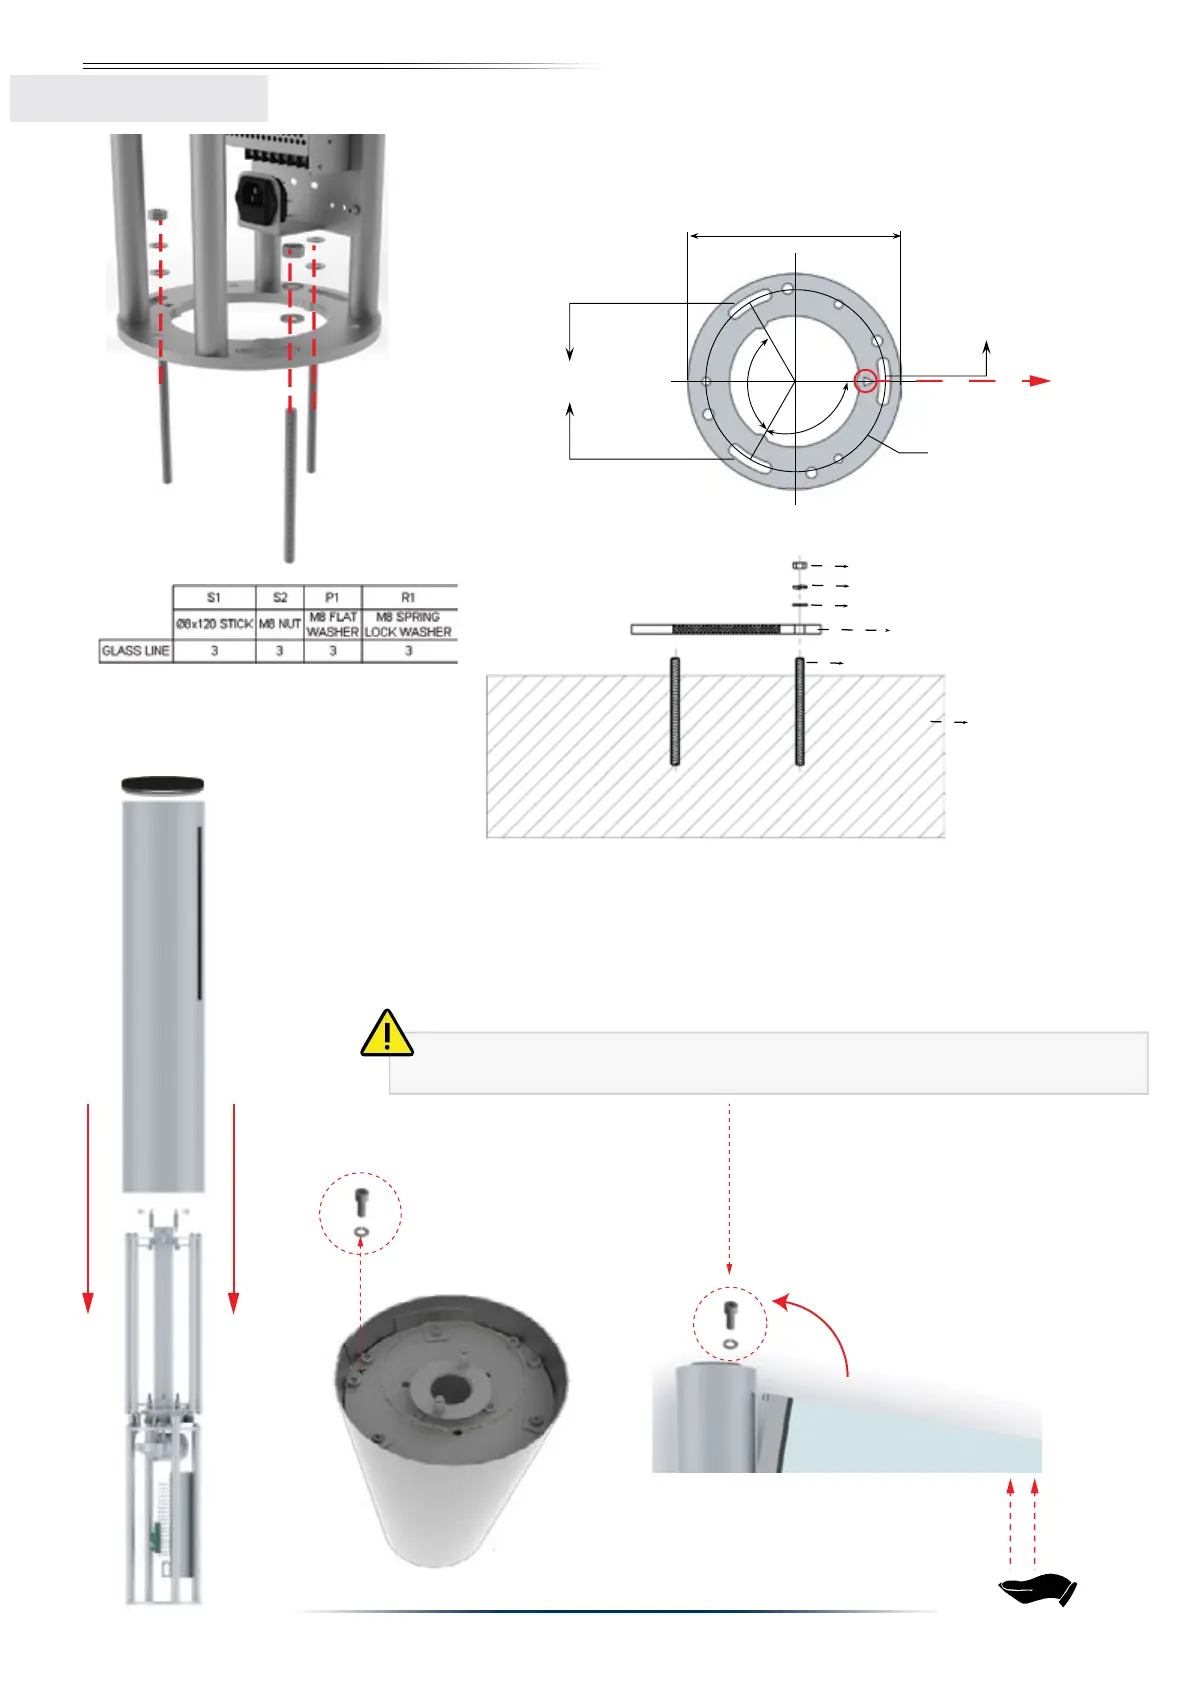
Ground
Ø8 x 120 Stick (3 pieces)
M8 Flat washer (3 pieces)
M8 Spring lock washer (3 pieces)
M8 Nut (3 pieces)
Turnstile Base Unit
Ø197 mm
Ø166.5 mm
120º
120º
MOUNTING HOLES
FOR THE FLOOR
MOUNTINGHOLES
FOR THE FLOOR
1. Mark holes and drill with a size 10 drill bit. Clean debris inside the holes by pressurized air.
2. Fill holes with chemical plaster and x anchoring bolts (size 8) in place by rotating.
Chemical plaster dries in about 25 minutes.
3. Place turnstile on anchoring bolts and tighten the nuts to secure in place. Pay attention to
triangle panel position marker during surface mounting
4. Connect power and control cables.
5. Re-install cylindirical body
6. Remove display unit mounting screw (1).
7. Remove glass xing screw (2)
8. Install panel as shown in g. 1 by tilting slightly forward and securely seat on the chasis.
9. Tighten panel xing bolt and nut.
10. Reposition and secure display unit.
11. Install granite top lid in place.
Surface Mounting
Panel Mid
Po
1
Wing Mounting
1