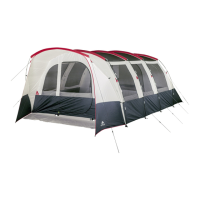
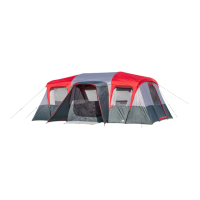
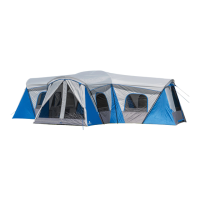
WT192117
ASSEMBLY INSTRUCTIONS
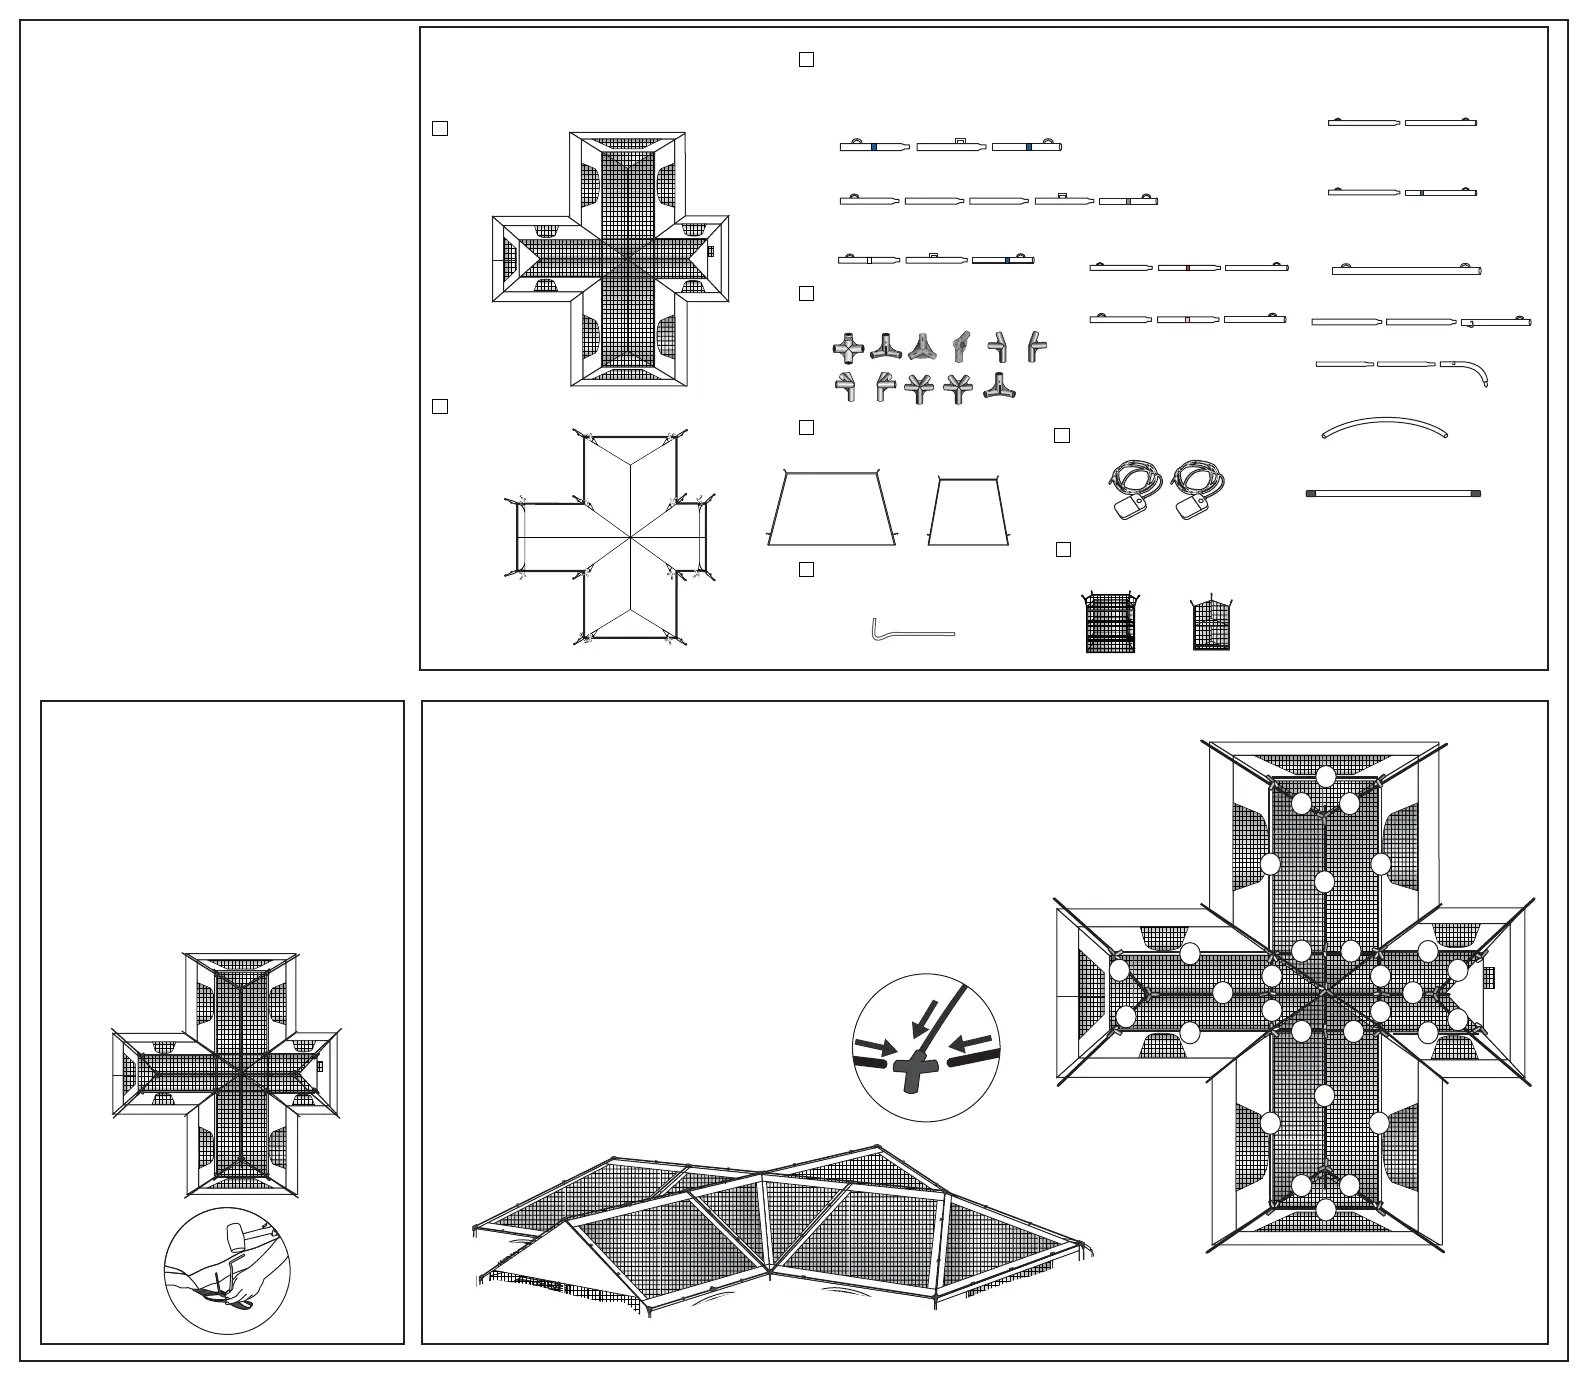
Verify Package Contents and Assemble Poles
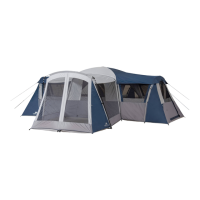
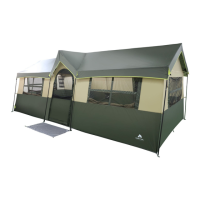
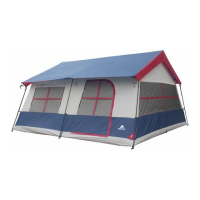
Tent : 1 each
1) Assemble the roof frame as shown below matching color-coded poles to color-coded
connectors. Use the diagram below and the replacement parts listing on page 4
as reference. Make certain the metal springs lock into place on all the connectors.
2) Attach ridge poles to pre-attached connectors:
(A) BLUE/BLUE
(B) GRAY/IVORY
(C) BLUE/WHITE
3) Attach S-hooks along the ridge line of the tent to the frame.
4) Attach roof poles to pre-attached connectors:
(F) YELLOW
(G) GREEN
5) Attach eave poles to pre-attached connectors:
(D) RED
(E) PINK
(H) ORANGE
6) Attach hooks along the roof lines to the frame.
1) Verify Package Contents and Assemble Poles
Poles : 48 (total)
( ) denotes color coding
Rainfly : 1 each
IMPORTANT NOTES:
* Assemble your tent before camping to become
familiar with the assembly.
* Two people are recommended for setup.
* Select a clean, level area for the campsite free
of debris and sharp objects, away from a
natural watercourse.
* Use of a ground cloth is recommended to
prolong the life of the tent floor and provide
additional insulation and moisture protection.
* To prevent damage to the zippers, unzip the
doors and windows of the tent prior to
disassembly allowing air to move freely.
* Seam seal the inside stitched seams of the tent.
This will improve weather resistance. Available
in sporting goods departments. Discoloration
may occur if applied to outside seams.
Hanging Shelf : 3 each
Tent Stakes : 35 each
Color Coded Conectors:
21 each
(A) Ridge Side (blue/blue) - 2 each
(B) Ridge Front (gray/ivory) - 1 each
(C) Ridge Rear(blue/white) - 1 each
Step 2: Assemble Roof Frame
Step 1: Spread and Stake Tent
1) Spread out the tent floor side down on a
flat, clean and level area.
2) Stake down the tent by inserting a stake
through the stake loops, located at the
corners of the tent.
3) Hammer the stakes into the ground at a 45
0
angle using a hammer or mallet.
4) Make certain the tent floor is pulled out
evenly and tightly.
Remote light : 2 each
WT192117 10/18
(H) Eave Shower (orange)
– 2 each
(I&J) Leg – 12 each
(K) Closet Leg – 4 each
(G) Roof Front/Rear/Inner (green)
– 12 each
(F) Roof Side Corner (yellow)
– 4 each
(E) Eave Side (pink) – 2 each
(D) Eave Front/Rear (red)
- 6 each
Divider : 3 each
2 each
2 each
1 each
1 each
(M) Closet Rod – 2 each
(L) Closet Roof – 2 each
G G
G
G G
G
G
F F
F F
G G
G
G
B C
G
D
D
D H
H
D D
A
A
D
E
E
 Loading...