9
ASSEMBLY
WARNING! Before assembly, make sure that the blower vac is switched off and
unplugged..
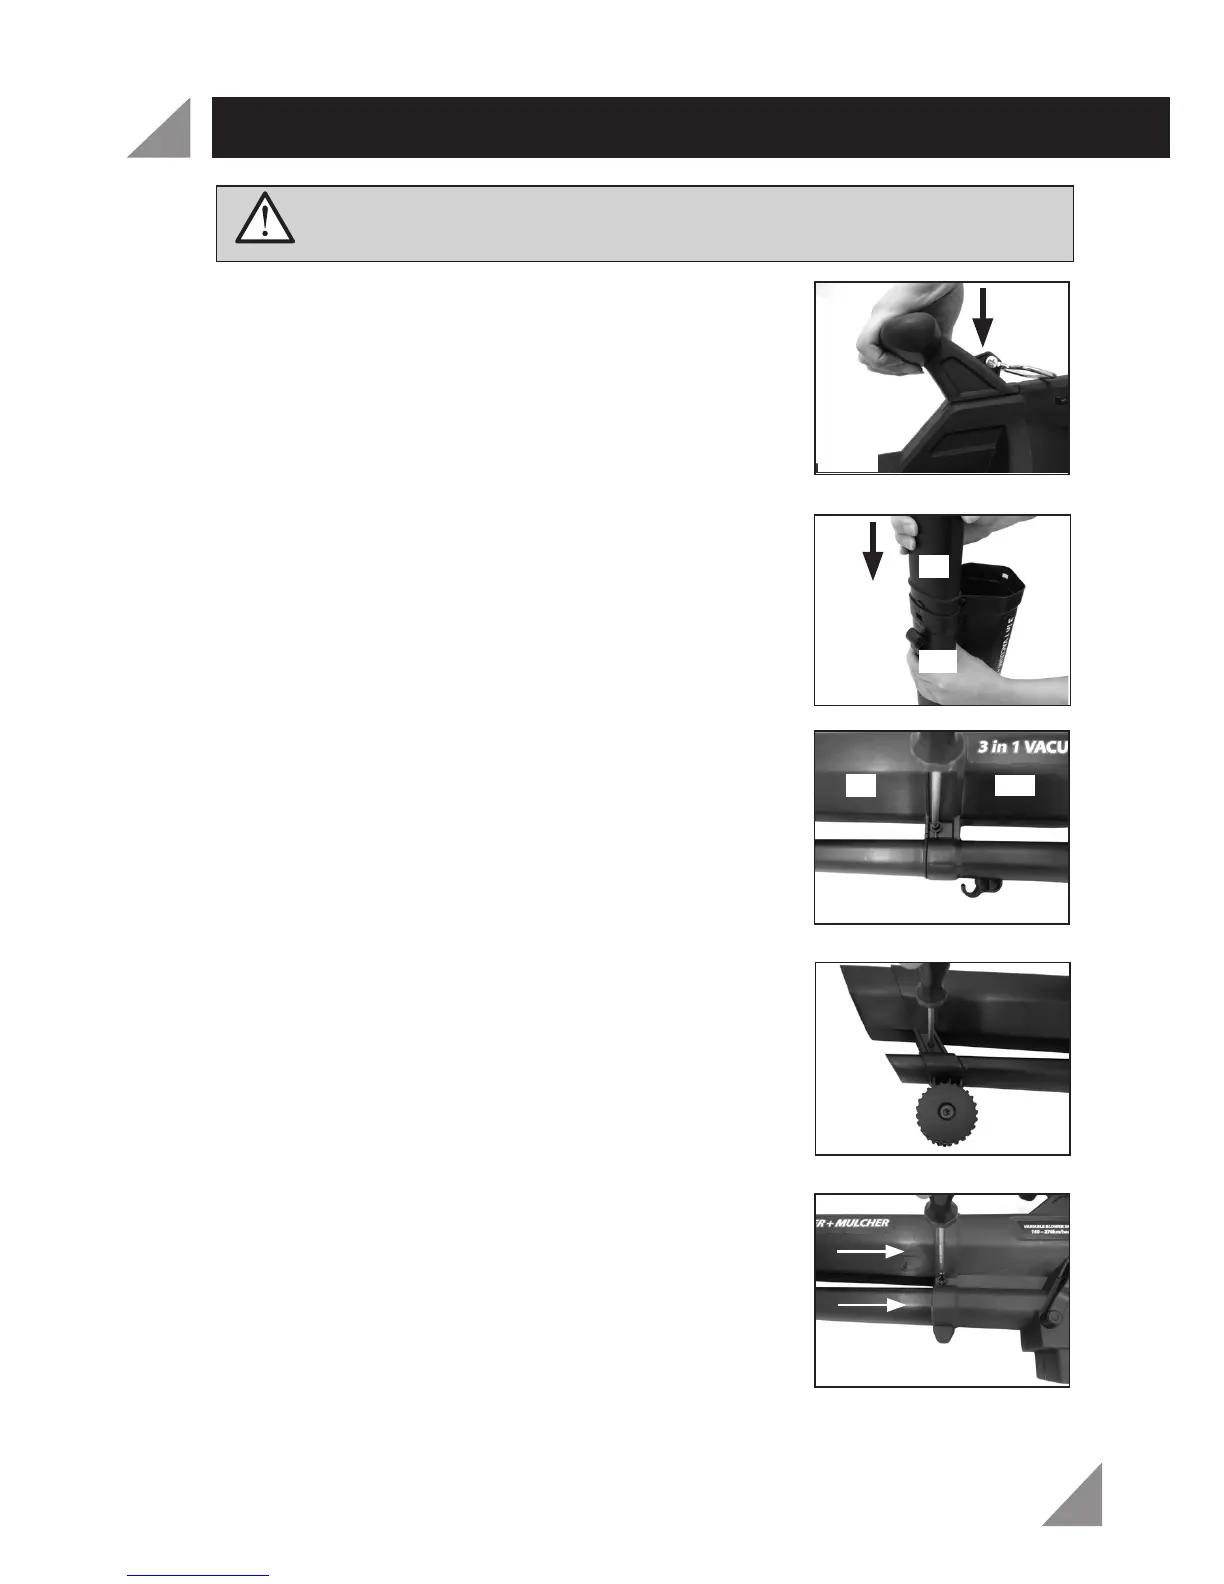
Assmbling the secondary handle (1)
1. Insert secondary handle (1) to the blower vac and push
until connected firmly (Fig. 1).
Assembling the tubes to the blower vac
1. Insert the smaller lower tube (9a) into matching upper
tube (10a) and push them together until they are
connected firmly (Fig. 2).
2. Insert the remaining larger lower tube (9b) into
matching upper tube (10b) and push them together
until they are firmly connected. Secure in place with the
supplied 45mm long screw (12) (Fig. 3)
3. Slide the nose guide wheels (8) over the lower tubes (9)
until it locates into position. Secure in place with the
supplied 20mm long screw (11) (Fig. 4).
4. Slide the assembled tubes into the motor housing and
secure in place with the 55mm long screw (13) supplied
(Fig. 5).
5. Check that the tubes are firmly secured to the motor
housing.
Caution: In the interest of safety the tubes should not be
dismantled after they have been assembled.
Fig. 1
Fig. 2
Fig. 3
Fig. 4
Fig. 5
9a
10a
9b
10b

 Loading...