9
WARNING! Before assembly, make sure that the line trimmer is switched off
and unplugged .
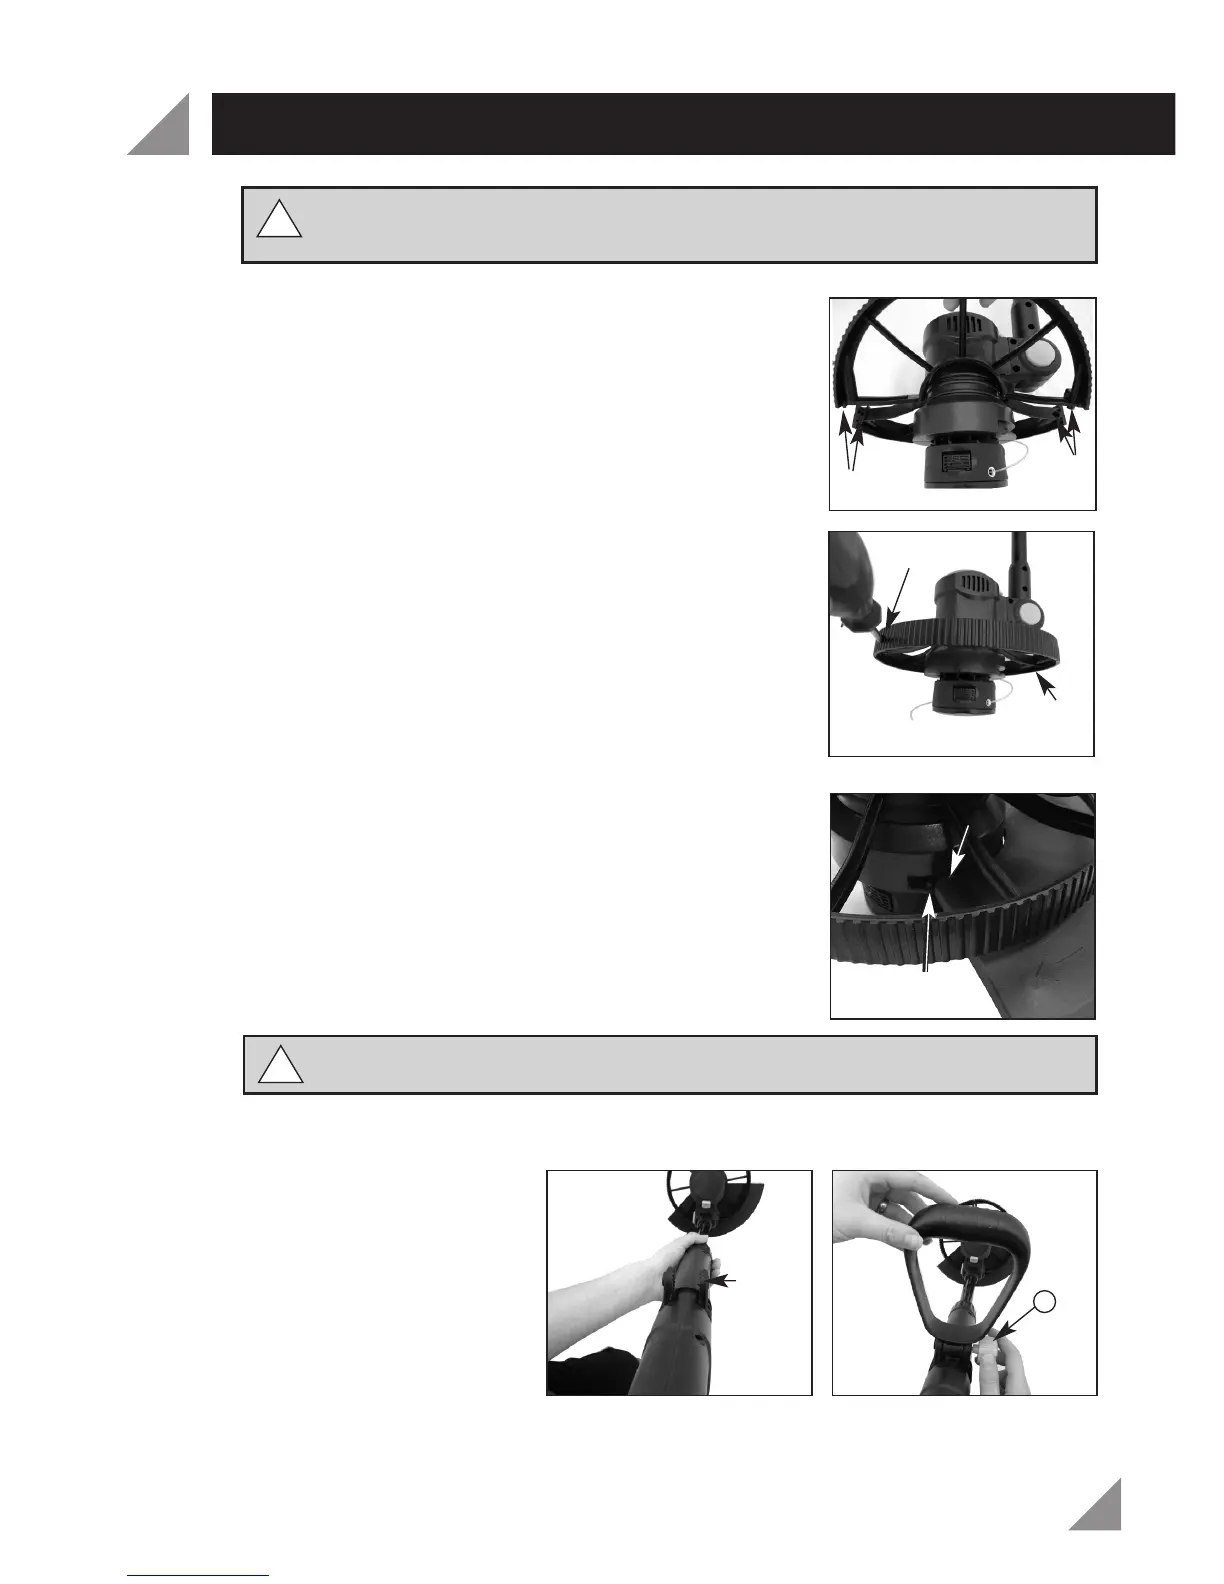
Fitting the edging wheel
Note:
Take care when unwrapping both halves of the
edging wheel (8) not to discard the two assembly screws
(ST3x12mm) attached.
1. Align both halves of the edging wheel (8) onto the
line trimmer housing as shown (Fig. 1).
2. Secure the edging wheel (8) in place with the two
screws supplied using a Phillips head screwdriver (Fig. 2).
3. When secured ensure that the edging wheel is free to
rotate on the housing.
Fitting the safety guard
1. Slide the safety guard (7) in the recess under the
edging wheel (8)
and align with the screw holes
either side of the motor housing, secure from
underneath with the two screws (ST4.2x15mm)
supplied (Fig. 3) using a Phillips head screwdriver.
Note: The edging wheel (8) should rotate on the trimmer
housing and not come into contact with the safety guard (7)
when both parts are fitted correctly.
WARNING! Never use the line trimmer unless the safety guard is properly fitted.
Fitting the auxiliary handle
1. Rotate the bracket to the
foreside of the main
handle (1) (Fig. 4).
2. Place the auxiliary handle
(12) on the bracket and
adjust the angle to a
comfortable position.
3. Insert bolt through the
bracket and auxiliary handle (12), screw the auxiliary handle locking knob (4) onto
the bolt. Do not over
tighten (Fig. 5).
ASSEMBLY
!
!
Fig. 1
Fig. 2
Fig. 3
Fig. 4
!
!
Fig. 5
Align
Align
Secure
Secure
Align
Holes
Handle
Bracket
4
 Loading...