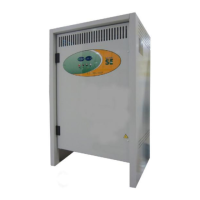
"BLT 160” ユーザーマニュアル/ / USER MANUAL 改訂版. n° 5 - 19/07/2011
P.B.M. S.r.l via Barella, Z.I. - VIGNOLA ( MO ) ITALIA
Tel. + 39 059 770 53 11 - Fax + 39 059 770 53 00
http://www.gruppopbm.it e-mail: pbm@gruppopbm.itファイル: MU001033GJ_BLT160_GB_JAP rev5_190711.doc
P. 7
D) PROGRAMMING OF MODES OF OPERATION
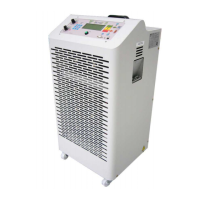
From the START mode display (e.g. following to battery connection) the user can set the operation parameters
through the front panel interface, which consists of:
- alphanumeric 4x20 display with double-height chars
- membrane keyboard with 12 function keys
- 16 mm diameter START-STOP button
- quick-setting switch (Is) for selection of discharge current
- quick-setting switch (RatV) for selection of rated battery voltage
- a buzzer
The keys on the keyboard feature following functions:
Esc : exits from secondary windows and returns to main display
à : increases a selected value
¹ : displays time
← : moves selection to the left
PRG : displays programming functions (PROG)
→ : moves selection to the right
C : resets ongoing failure indications, which are not active any longer
õ : decreases a selected value
OK : confirms and saves a selected value, then moves cursor forward
SET : enables special functions for battery management
InfoCar : enables indications concerning charge state
InfoScar : enables indications concerning discharge state
When pressing PRG from the START window, the system enters the PROG1 window:
gg/mm/aa hh:mm PROG1
RatV=xxxV RatAh=bbbb
DiscI=aaaA DT=sshttm
N.modoc=nn STV=v.vv
It is now possible to set:
RatV = Battery voltage
RatAh = Battery capacity
DiscI = Discharge current
DT = Discharge time
N.modoc=nn = Test type (modoc) and cycles number (nn)
STV = Minimum voltage for cycle stop
← and → keys move a selection through the programming setting fields. à and õ keys modify a selected
field value. The OK key confirms the set value. The Esc key exits the PROG1 window.
When pressing ¹, the date and time fields on the first
line become available for selection.
When pressing PRG , the system enters
the PROG 2 window:
It is now possible to set:
MaxCT=aahbbm PROG2
MinCT=cchddm Mag=ee%
PTaC =ffhggm
PTaD=iihllm StDrrm
 Loading...