TRIMMING LINE
WARNING
For safety reasons DO NOT use metal reinforced line.
NOTE
For replacement line, use a diameter of 2.4mm (.095in).
The spool is capable of holding up to 4m (13ft) of line on the trimmer head.
Avoid using larger line as it may cut down the trimming performance.
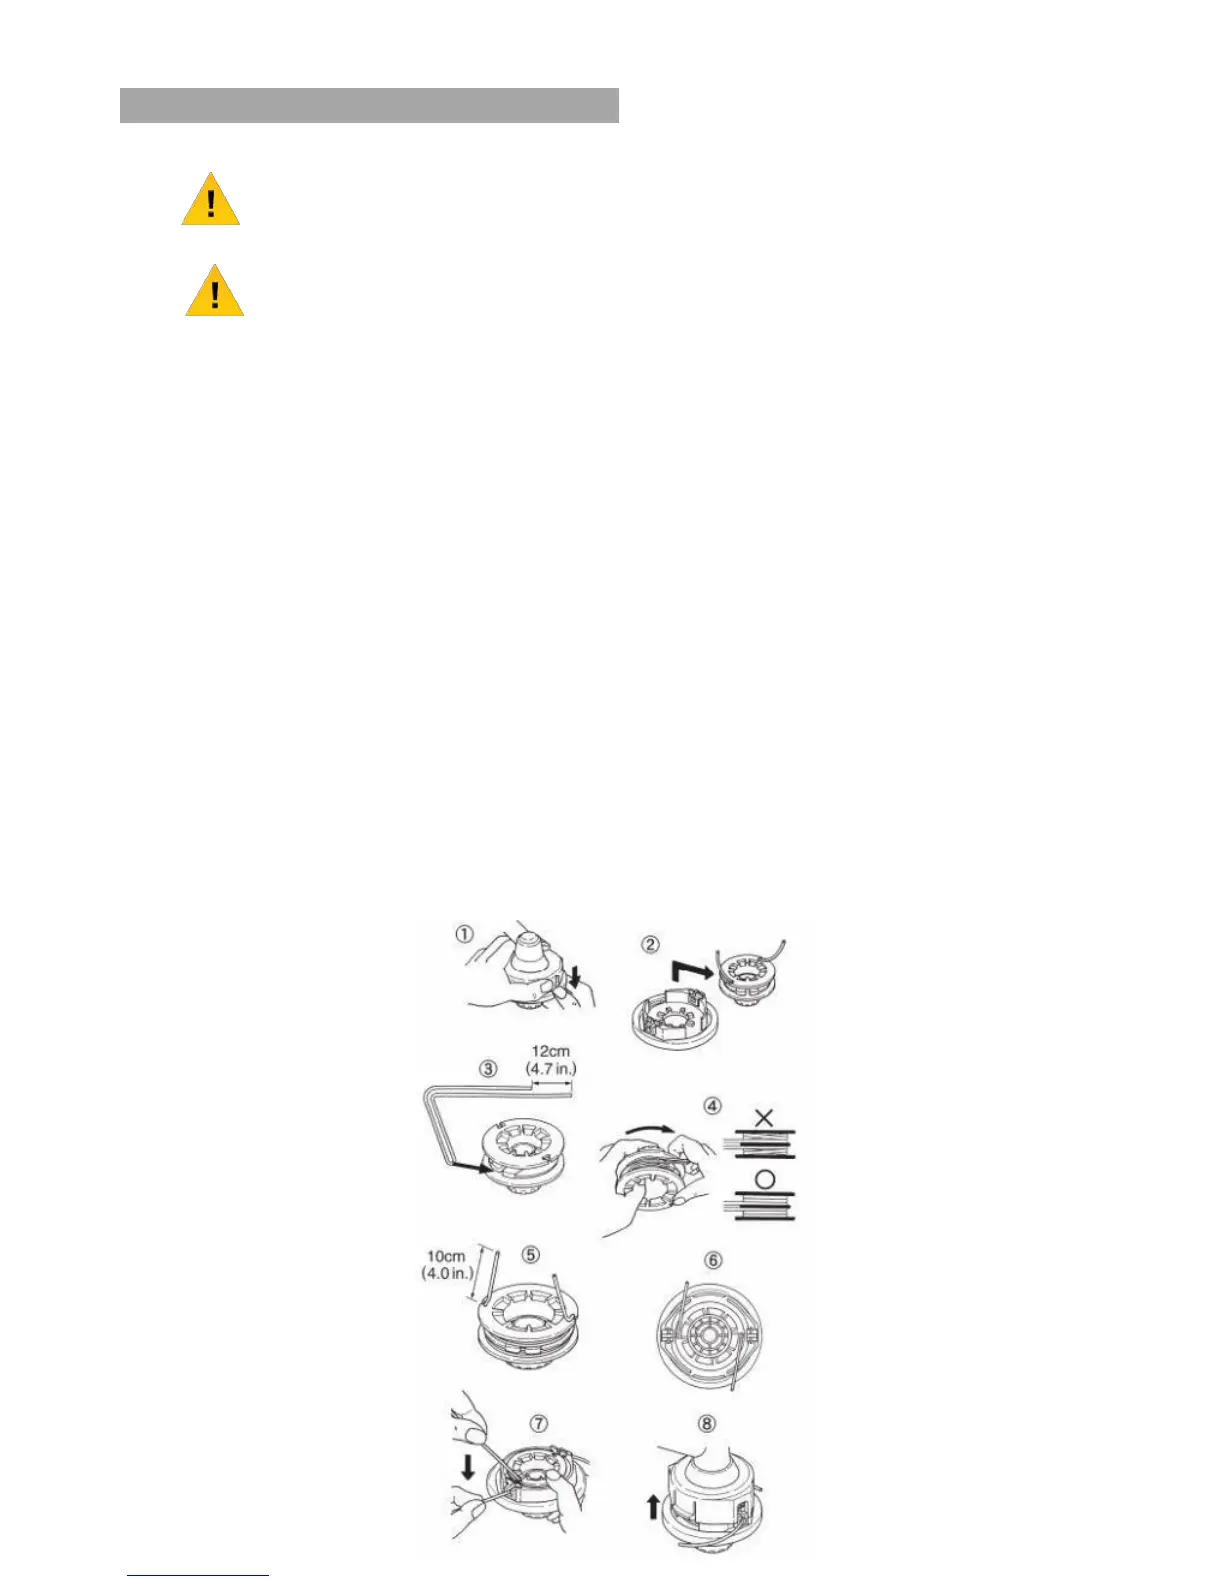
7.23
Pinch the slotted area either side of the spool housing and unhook the bottom cap.
7.24
Take out the spool and pull off the old line.
7.25
Put one end of the new line through the spool holes and pull it until the length is
equal between each part of the line.
7.26
Wind up the line in the correct direction as indicated on the spool.
7.27
Hook each end of the line in the slot on the edge of the spool and then put the ends
through the eyelets on the housing.
Make sure that the spring and the washers are in place.
7.28
While holding the spool against the housing, pull the line ends to release them from
the spool.
7.29
Line up the slot on the bottom cap with the hook on the housing.
Press the cap against the housing until it clicks.
7.30
If the machine is fitted with an easy feed spool, align the arrows and feed trimmer
line into the spool.
When 2m has been fed through the head, wind in the trimmer line.
 Loading...