7. Turn the screw cap
counterclockwise to lock it.
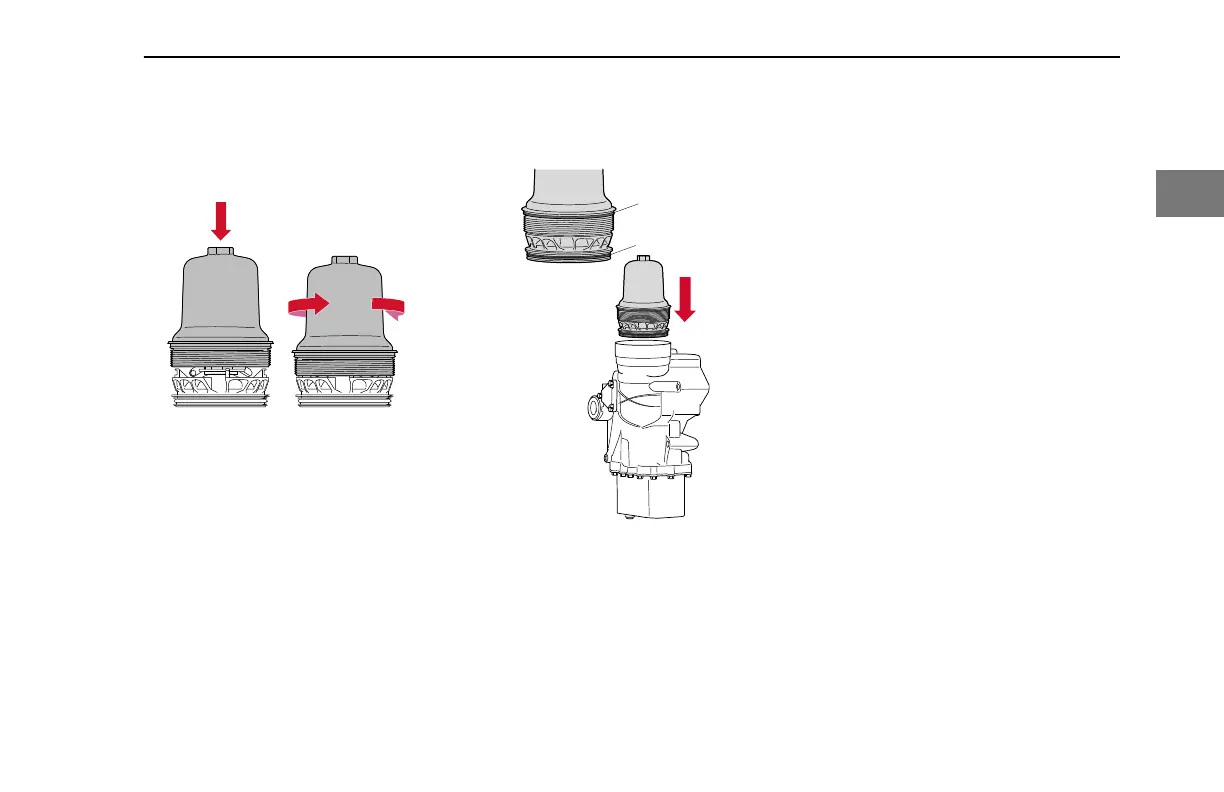
Installing and Locking Cap
8. Lightly lubricate the new O-rings
(1) with clean engine oil.
9. Fit the new O-rings (1) onto the
screw cap (1) and onto the
centrifuge base (2).
Installing O-rings onto Screw Cap and Insert into
Base
10. Position the screw cap carefully
onto the oil module.
11. Tighten the screw cap by hand until
it reaches the end position.
12. Tighten the screw cap to 52 lb-ft
(70 N·m). Use a hexagonal socket,
or box wrench, to avoid damaging
the oil filter cap.
After Replacing Engine Oil Filter(s)
Follow the steps below after installing new
oil filters:
1. Reconnect the chassis battery
cable at the negative battery
terminal. See "Oil Filter Removal
Preparation."
2. Add SAE-approved CK-4/CJ-4
engine oil to the maximum level
marked on the dipstick. If the
engine is running a different weight
of oil, be sure to top-off the engine
oil with the same brand and
viscosity of oil.
3. Make sure that all electrical
components are switched OFF and
the vehicle's transmission is in the
neutral gear position before starting
the engine.
4. Start and run the engine at idle
speed for at least one minute to
allow oil to reach all necessary
components. Check for oil leaks.
ENGINE MAINTENANCE - Maintenance Procedures
Y53-1166-1M1 (10/2020) 73
2