32
Figure 8
Figure 7
TROUBLESHOOTING (cont’d)
Hesitation of the Tread belt
Hesitation of the tread belt usually indicates slippage of either the tread belt (the belt you walk on) or the drive belt (the belt connecting the
drive roller to the motor). To determine which of these belts is slipping, first adjust the drive belt tension and test to see if the slippage
stops. If the hesitation is not corrected than the tread belt tension needs adjustment.
CAUTION: Unplug your treadmill before attempting any cleaning or maintenance.
Drive Belt Tension Adjustment
Step One:
Use a Phillips head screwdriver to remove the 2 screws that hold the front of the
motor cover in place and remove the motor cover.
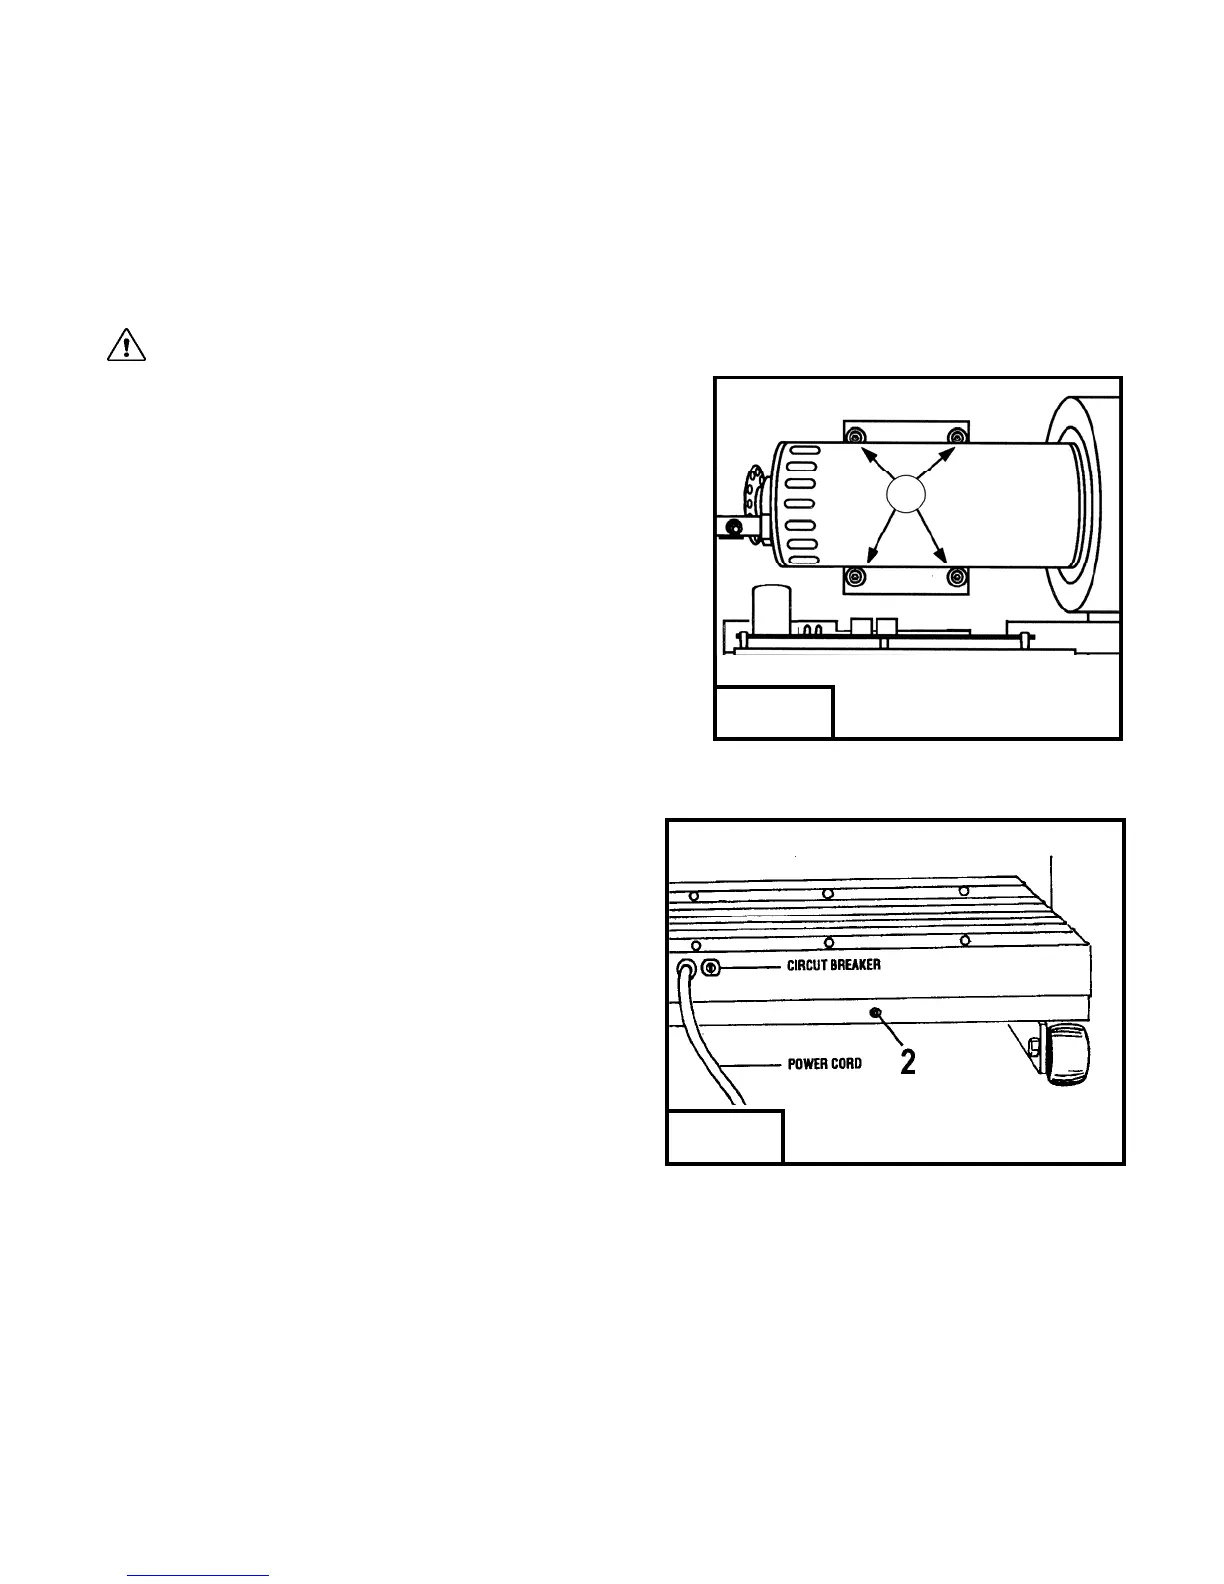
Step Two: (figure 7)
Locate the four motor mount screws (item 1 in fig 7) as shown in the diagram
and loosen them each two turns each using the 3/16" allen wrench.
Step Three: (figure 8)
Locate the drive belt adjustment screw (item 2 in fig 8) in the lower
front end of the treadmill. Insert the allen wrench into the drive belt
adjustment screw and turn the screw 1/2 turn clockwise.
Step Four: (figure 7)
Complete the adjustment by tightening the four motor mount
screws (item 1 in fig 7).
Step Five:
Walk on the treadmill to determine if the slippage is decreased or
eliminated.
Step Six:
If no improvement is observed, the hesitation may be caused by a loose tread belt - see "Tread belt tension adjustment" below. If
improvement is noticed but slippage is still present, repeat steps 2 through 5. If you tighten the drive belt adjustment screw 1 1/2 turns and
there is still hesitation (slippage) contact your authorized PaceMaster dealer. Tightening the drive belt adjustment screw more than 1 1/2
turns can result in bearing damage to the motor and/or drive roller.
1