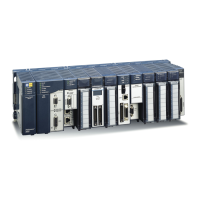
6 RX3i PROFINET Controller
GFK-2573U IC695PNC001-BBBB
LEDs on the PROFINET Controller Module
The table below summarizes LED functions. Note that there are differences between the -Ax version and the -Bxxx
version. For detailed information refer to
Installation
and
Diagnostics
in
PACSystems RX3i PROFINET I/O Controller
Manual,
GFK-2571K or later.
Indicates whether the module is able to perform normal operation.
Indicates network packets are being processed by the network interface (not just passing through the embedded
switch).
Indicates the condition of the PROFINET Controller during normal operation. It indicates whether an entry other than
the startup event is present in the module’s local log. STATUS can also indicate whether any of the MAC addresses
are invalid.
Indicates whether the module has received its configuration from the RX3i CPU.
Indicates the status of PROFINET connections.
Indicates activity on the USB port (-Ax version only).
Indicate link speed, link connection and link activity corresponding to the four possible external Ethernet ports.
Note differences between -Ax hardware implementation and behavior versus that of -Bxxx. Refer to GFK-2571K or
later.
Quick Start
Installation and initial startup procedures for the PNC001 include the following steps. Before installing and operating the
PNC001, refer to
PACSystems RX3i PROFINET I/O Controller Manual,
GFK-2571 for detailed information.
1. Pre-Installation check
2. Installing the PNC001 in an RX3i backplane
The PNC001 must be installed in the main (CPU) rack of the RX3i system, using a Universal Backplane such as
IC695CHS007, CHS012 or CHS016. The PNC001 supports insertion/removal while power is applied to the system (hot
swap). This includes backplane power and field power supplied to the PNC001.
The rear of the PNC001 (-Ax version only) has an exposed heat sink which must be engaged into the backplane. Before
inserting the module into the backplane, remove the plastic knockout from the slot where the module will be installed.
The installation slot must match the slot that is selected for the module in PME hardware configuration.
Inserting or removing a PNC001 with power applied to the system may cause an electrical arc. This
can result in unexpected and potentially dangerous action by field devices. Arcing is an explosion
risk in hazardous locations. Be sure that the area is non-hazardous or remove system power
appropriately before removing or inserting a PNC001
 Loading...