EasyManua.ls Logo

Palm III Series - User Manual

Palm III Series
8 pages
Print Icon
To Next Page IconTo Next Page
Loading...
Copyright © 1998-1999 Palm Computing, Inc. or its subsidiaries. All rights reserved. Palm Computing, HotSync, and Graffiti are registered
trademarks, and Palm, Palm III, and the Palm III logo are trademarks of Palm Computing, Inc. or its subsidiaries. Other product and brand
names may be trademarks or registered trademarks of their respective holders. Printed in U.S.A. P/N: 405-1498
Four ways to enter data into your Palm III
organizer (continued)
Using Graffiti
®
writing software
Graffiti
®
characters are similar to uppercase letters that are formed with a single stroke.
Your writing turns into text wherever the blinking cursor appears on the organizer
screen. Graffiti writing is easy, fun, accurate, and fast (up to 30 words per minute).
It’s worth taking a few minutes to learn. Just remember to write BIG and press firmly.
Write letters here
Write numbers here
Using a keyboard accessory
You can connect an optional keyboard accessory to the serial connector on your
organizer and type data directly into your organizer. This accessory is particularly
helpful if you need to enter large amounts of data quickly while you are away from
your computer.
Explore add-on software for your Palm III
organizer
1.
2.
3.
3.
Your Palm III
organizer supports much more than just the applications that come
with it. You can easily expand your organizer’s software capabilities by downloading
any of the thousands of applications available on the Internet including a wide variety
of freeware, shareware, and commercial applications. Just follow these steps:
Download applications from www.palm.com (or any add-on software web site)
to the add-on folder in the Palm
Desktop software folder (e.g., c:\palm\add-on).
Unzip the application if it is a zipped file.
Select the application you want to install by:
Opening Palm Desktop software, and clicking Install.
— or —
Running Instapp.exe from the Palm Desktop software folder,
Next select your user name, click Add and select the application you want to install,
click Open, click Done, and then click OK.
Transfer your new applications
to your organizer by placing your organizer in the cradle and pressing the HotSync
®
button on the cradle.
4.
4.
If your organizer does not turn on, try these steps before contacting
technical support:
• Adjust the contrast control.
• Make sure the batteries are fresh and properly installed.
• Some models include a reset tip inside the stylus. Unscrew the tip of the stylus, or use
an unfolded paperclip, and gently press the reset button on the back of your organizer.
• If your organizer still doesn’t turn on, perform a hard reset by holding down the power
button while doing a soft reset. Wait for the Palm Computing
®
Platform logo to appear,
then release the power button.
Important: A hard reset erases all records and entries stored in your organizer.
For technical support or service and repair information, contact Palm Computing:
Web Access http://www.palm.com
E-mail support@palm.com
Telephone (847) 262-PALM (7256) 7am-9pm CST, Mon-Fri
10am-5pm CST, Sat-Sun
Fax (847) 262-4329
Note: There are thousands of third-party applications available for the Palm Computing
platform. For questions and support, please contact the software developer directly.
To order Palm Computing products and accessories, contact Palm Computing:
Online orders http://www.palm.com
U.S. (800) 881-7256
Canada (800) 891-6342
Elsewhere (801) 431-1536
For country-specific telephone numbers, please refer to the Worldwide
Customer Support card or the International page on www.palm.com.
Palm Computing, Inc.
5400 Bayfront Plaza
Santa Clara, California 95054
United States of America
Troubleshooting and contacts
Congratulations!
You’ve connected your organizer to your computer, installed the Palm
Desktop
software, and learned how to enter data on your Palm III
organizer.
Read This First
Getting Started
TM
For the
Palm III
TM
series
Question and Answer IconNeed help?

Do you have a question about the Palm III Series and is the answer not in the manual?

Summary

Getting Started

Important First Steps

Key initial instructions and guidance before proceeding with device setup and operation.

Palm III Organizer Features Overview

Accessing Palm Applications

Locate and launch all installed applications from the main organizer screen.

Palm Graffiti Input Method

Utilize the dedicated screen area for handwriting recognition input with the stylus.

Device Power and Screen Brightness

Manage power on/off states and adjust screen backlight using the primary control button.

Data Synchronization with HotSync

Connect the organizer to the computer cradle to sync data and applications.

Infrared (IR) Data Exchange

Enable wireless data transfer with other IR-enabled Palm devices.

Adjusting Screen Contrast

Fine-tune the display contrast for optimal viewing clarity.

Navigating with the Scroll Button

Use the scroll button to move up and down through content lists and screens.

Quick Launch Application Buttons

Access frequently used applications directly via dedicated hardware buttons.

Palm III Organizer Setup Guide

Battery Installation

Properly insert AAA batteries into the organizer for initial power.

Initial Device Configuration

Complete the guided setup process, including screen protection removal.

Computer Connection Setup

Connect the organizer's cradle to your computer's serial port for data transfer.

Palm Desktop Software Installation

Install Palm Desktop Software

Run the installer from the CD-ROM to set up the companion desktop software.

Using Palm Desktop Features

Learn to navigate and utilize the core functionalities of the Palm Desktop application.

Synchronizing Organizer Data

Perform data backup and exchange between your Palm organizer and computer.

Data Entry Methods for Palm III

Computer Keyboard Data Entry

Input data into Palm Desktop software for later synchronization with the organizer.

Onscreen Keyboard Input

Enter text and numbers directly on the organizer's screen using the virtual keyboard.

Additional Palm III Data Entry Methods

Graffiti Handwriting Input

Write characters using the Graffiti system for text and number entry on the organizer.

Optional Keyboard Accessory Use

Connect an external keyboard accessory for efficient data input.

Expanding Palm III with Add-on Software

Downloading Third-Party Apps

Acquire and download new software applications from online sources.

Preparing Application Files

Uncompress downloaded application files before proceeding with installation.

Installing Add-on Applications

Choose and install applications using Palm Desktop or the Instapp.exe utility.

Transferring Apps to Organizer

Synchronize installed add-on software from your computer to the Palm organizer.

Palm III Troubleshooting and Support

Resolving Power-On Problems

Follow steps to diagnose and fix issues preventing the organizer from turning on.

Contacting Technical Support

Find contact details for technical assistance, repairs, and product support services.

Purchasing Palm Products

Information on how to order official Palm Computing products and accessories.

Overview

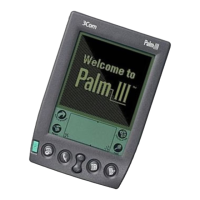
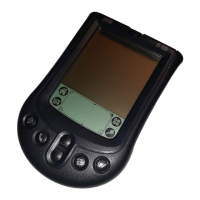
The provided manual describes the Palm III™ organizer, a handheld computing device designed for personal information management and data synchronization with a computer. This "Getting Started" guide covers initial setup, software installation, data entry methods, and troubleshooting.

Function Description:

The Palm III™ organizer serves as a portable digital assistant, allowing users to manage various types of personal data. Its core functions include:

  • Applications Launcher: Provides access to all installed Palm™ applications.
  • Personal Information Management (PIM): Features built-in applications such as Date Book, Address Book, To Do List, and Memo Pad for organizing daily tasks, contacts, appointments, and notes.
  • Data Entry: Supports multiple methods for inputting information, including Graffiti® handwriting recognition, an onscreen keyboard, and an optional external keyboard accessory.
  • Data Synchronization (HotSync®): Enables seamless exchange of data between the Palm III™ organizer and a desktop computer using the Palm™ Desktop software. This ensures that information is consistent across both devices and provides a backup mechanism.
  • Infrared (IR) Port: Allows for wireless exchange of data and applications with other infrared-enabled Palm Computing® platform handhelds.
  • Backlight Control: The power button doubles as a backlight control, allowing users to illuminate the screen for better visibility in low-light conditions.
  • Expandability: Supports add-on software, allowing users to download and install thousands of additional applications from the internet, expanding the device's capabilities beyond its core PIM functions.

Important Technical Specifications (Inferred from the manual):

  • Power Source: Requires AAA batteries for operation.
  • Connectivity:
    • Serial Port: Connects to a computer via a cradle, typically to a COM (serial) port, possibly requiring a serial port adapter.
    • Infrared (IR) Port: For wireless data exchange with compatible devices.
  • Input Methods: Stylus-based touch screen with Graffiti® writing area and onscreen keyboard.
  • Software Compatibility: Designed to work with Palm™ Desktop software for Windows (and potentially other operating systems, though not explicitly stated for non-Windows). It can also integrate with Microsoft Outlook or other organizer software for HotSync® Manager functionality.
  • Physical Interface: Includes dedicated application buttons (Date Book, Address Book, To Do List, Memo Pad), a scroll button, a power/backlight button, and a contrast control.

Usage Features:

  • Easy Setup: The initial setup involves installing AAA batteries, removing a protective screen film, and following on-screen instructions.
  • Intuitive Navigation: Dedicated hardware buttons provide quick access to main applications and scrolling functions.
  • Multiple Data Entry Options:
    • Graffiti® Writing Area: A specialized area for entering text and numbers using a simplified, single-stroke handwriting recognition system. The manual emphasizes its speed and accuracy, encouraging users to practice.
    • Onscreen Keyboard: A virtual keyboard accessible via the stylus for text input, with options to switch between alphabetic and numeric layouts.
    • Computer Keyboard: Data can be entered directly into the Palm™ Desktop software on a computer and then synchronized to the organizer.
    • Keyboard Accessory: An optional external keyboard can be connected for faster data entry, especially useful when away from a computer.
  • HotSync® Functionality: A dedicated button on the cradle initiates data synchronization, ensuring data consistency and backup. The first synchronization requires setting up a unique user name.
  • Software Exploration: The Palm™ Desktop software mirrors the organizer's main applications, allowing users to manage data on their computer and import data from other applications.
  • Add-on Software Installation: A clear four-step process is outlined for downloading, unzipping, selecting, and transferring new applications to the organizer via HotSync®.

Maintenance Features:

  • Battery Replacement: Users are instructed to install fresh AAA batteries when needed.
  • Contrast Adjustment: A physical control allows users to adjust the screen contrast for optimal viewing.
  • Soft Reset: A reset button, often accessible with a stylus tip or unfolded paperclip, can be pressed to restart the device without losing data.
  • Hard Reset: In cases where the device does not turn on or is unresponsive, a hard reset can be performed by holding down the power button while doing a soft reset. This action, however, erases all records and entries stored in the organizer, serving as a last resort troubleshooting step.
  • Troubleshooting Guide: The manual provides a dedicated section for common issues like the device not turning on, offering solutions like adjusting contrast, checking batteries, and performing resets.
  • Customer Support: Contact information for Palm Computing is provided, including web access, email, telephone, and fax, for technical support, service, repair, and ordering products/accessories. Specific numbers are given for U.S., Canada, and international inquiries, with a note to refer to country-specific information on their website or a separate card.
  • Third-Party Application Support: Users are advised to contact the software developer directly for questions and support related to third-party applications.

Palm III Series Specifications

General IconGeneral
BrandPalm
ModelIII Series
CategoryHandhelds
LanguageEnglish

Related product manuals