4. Using your Monitor for the First Time
5. Measurement Procedure
• Avoid eating and smoking as well as all forms of exertion directly before
measurement. These factors influence the measurement result. Find time to
relax by sitting in an armchair in a quiet atmosphere for about ten minutes
before taking a measurement.
• Remove any garment that fits closely to your upper arm.
• Always measure on the same arm (normally left).
5.1. Before measurement:
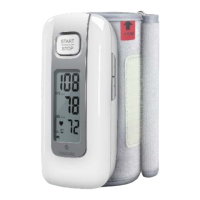
5.2. Fitting the Cuff
Picture-05
The battery is built-in chargeable Lithium battery.
Press the “START/STOP ” button, if the symbol is flickering. It means the
battery power is low and need to be recharged. The power supply should be
AC 5V/1A.
When charging, the symbol and CH will be displayed.
When the symbol appears,it means the battery power is fully recharged.
It can be used normally. If battery is not fully recharged, the symbol will
flicker and CH will be displayed.
After the battery is fully recharged, long press the START/STOP button more
than 3 seconds to ON/OFF.
4.2. System Settings
a.Start/Stop
In this state,short press the “START/STOP”button.The device will start
measurement. Press the “START/STOP” button again, the measurement will
stop.
b.Assessment of the memory record
Press MEM+ or MEM- button once, it will seek for the next/previous
assessment record.
c.Delete record
When you seek for memory record.Long press and hold the MEM+ and
MEM- ,it will clear all the assessment records.
Note:
You can’t delete one measurement record from the monitor storage at one
time, if you decide to delete the all record, please keep the record in another
way, in case you need it some days later.
4.1 Battery Power checking
Please refer to picture-05
a) The cuff is preformed for easier use. Remove tight or bulky clothing from
your upper arm.
b) Wrap the cuff around your upper left arm. Make certain the cuff lies
approximately 2 to 3cm above the elbow.
c) To secure the cuff, wrap it around your arm and press the hook and loop
closure together.
d) There should be little free space between your arm and the cuff. You
should be able to fit 2 fingers between your arm and the cuff. Cuffs that don’t
fit properly result in false measurement values. Measure your arm
circumference if you are not sure of proper fit.
e) Lay your arm on a table (palm upward) so the cuff is at the same height as
your heart. Make sure the tube is not kinked.
f)Remain seated quietly for at least two minutes before you begin the
measurement.
2-3cm