HR33417
Panasonic
QUICK
CHARGER
Model BQ-CC55A
OPERATING INSTRUCTIONS
Rechargeable Nickel Metal Hydride Batteries
• Thank you for purchasing the
Panasonic Charger,
MODEL
BQ-CC55A.
• IMPORTANT SAFETY
INSTRUCTIONS
-SAVE THESE
INSTRUCTIONS.
• DANGER-TO
REDUCE THE
RISK OF FIRE
OR ELECTRIC
SHOCK,
CAREFULLY
FOLLOW THESE
INSTRUCTIONS.
BQ-CC55A Charger Specification
1
AA
11fF
~
~Ll
~
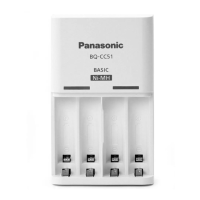
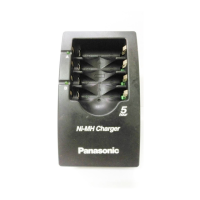
Parts location
Charging indicator lights
(Located in the battery charger)
©terminal
AAAet e
rminal
AA et erminal
Fig. 1
AAA
Fig.
2
AA size 1 - 4 pcs
&
~
AAA size 1 - 4 pcs
m
-
-
Combinations of up to four
AA or AAA batteries
;
Input
AC100-240
V
-
50/60 Hz 0.3 A Size (L, W, H) 4.75" x2.69" x 1.13", 121 x68 x29 mm
DC 1.5
V
·
750 mAx4
(AA
size)
Weight 4.14 ounces 117 grams
Output
DC 1.5
V
·
275 mA x 4
(AAA
size) Temp Range 32°F • 95°F,
o·c ·
35°C (indoor use only)
Batteries
Size mAh Charge Time (3-4
battery
cells) Charge Time (1-2 battery cells)
eneloop
AA
up to 2000 mAh Approx 3 Hours
Approx 1.5 Hours
eneloop
AAA
up to 800 mAh Approx 3 Hours Approx 1.5 Hours
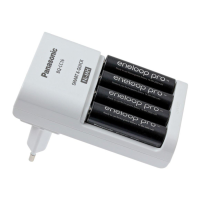
eneloop pro AA
up to 2550 mAh Approx 4 Hours Approx 2 Hours
eneloop pro
AAA
up to 950 mAh Approx 4 Hours
Approx 2 Hours
"Chatge
rime~
is
the
amount
of
time
it
takes
to charge
a
fuBy
discharged battery.
Actual
charge time
l'lill
depend on
the
remaining charge in
the
batte,ycen
and
the
ambient t9mperatute.
Table 1
ENGLISH
Please read these instructions and warnings before
using this product, and save this manual for future
use. In addition, be sure to read the warnings on the
batteries.
CAUTION
1. To reduce the risk of injury, we recommend that
Panasonic Ni-MH rechargeable batteries are used.
2. Do not use non-rechargeable batteries.
3. Do not open or disassemble the charger.
4. Do not get the charger wet or allow water or
other liquids to enter the charger.
5. Only use the charger indoors, in a dry location.
6. Do not use the charger if its plug or the
batteries are damaged.
7. Do not use the charger in direct sunlight.
8. For connection to a power supply located outside
the U.S or Canada, use the proper plug adapter.
9. This charger is intended for use in a vertical,
upright position.
Read and follow all instructions. Children should
not use this charger without adult supervision.
OPERATING INSTRUCTIONS
FOR U.S.A. ONLY
Warning: Any changes or modifications not
expressly approved by the party responsible for
compliance could void the user's authority to
operate this equipment.
FCC Note: This equipment has been tested and
found to comply with the limits for a Class B digital
device, pursuant to Part 15 of the FCC Rules. These
limits are designed to provide reasonable protection
against harmful interference in a residential
installation. This equipment generates, uses and can
radiate radio frequency energy and, if not installed
and used in accordance with the instructions, may
cause harmful interference to radio communications.
However, there is no guarantee that interference will
not occur in a particular installation. If this equipment
does cause harmful interference to radio or television
reception, which can be determined by turning the
equipment off and on, the user is encouraged to try
to correct the interference by one of the following
measures:
Reorient or relocate the receiving antenna.
Increase the separation between the equipment
and the receiver.
• Connect the equipment into an outlet on a circuit
different from that to which the receiver is
connected.
Consult the dealer or an experienced radio/
TV technician for help.
Panasonic Energy Corporation of America
Columbus, GA 31907 800-211-PANA
www.panasonic.com/support
panasonicbatteryproducts.com
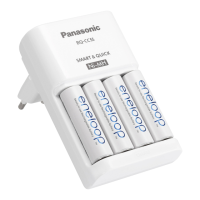
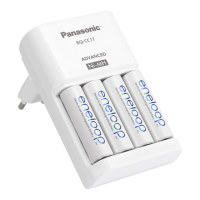
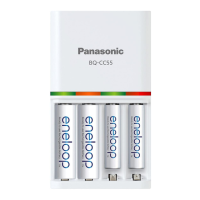
This charger allows AA and AAA Ni-MH rechargeable
batteries to be charged in multiple combinations;
from one to four batteries at a time. (fig 3)
1) Observe the correct polarity by matching the
positive
1
;-)
and negative (·) terminals on the
batteries to the positive ( +) and negative (-) on the
charger. Insert the batteries from the negative(·)
end first. (fig 2) If a AAA battery is inserted from the
positive(+) end first, the negative(·) terminal on the
charger may be damaged.
2) Plug the charger into a standard 100-240V AC
outlet.
• The green LED light moves from left to right for about 3
seconds before charging starts. Battery cell charge capacity
is being performed during this time.
3) The charger LED lights will become solid indicating
charging has begun.
The LED lights will change color according to
the charging progress.
>
·,.
Red LED light
20% or less
Charging Yellow LED light 20%to80%
Green LED light 80%ormore
Charging
Off
100%
complete
Blinking yellow
Battery replacement recommended
Error
Blinking red
Invalid batteries (i.e.,
non-rechargeable) inserted
• The remaining charge indication should only be used as a
rough estimate. Charging durations will vary depending on
the state of the batteries and the charging environment.
Therefore, be sure to charge the batteries until the LEDs
are completely turned off.
If the indicator does not light or blinks:
a) Make sure that the batteries are inserted
correctly and that proper contact is made with
each terminal.
b) Check that the power plug is correctly inserted.
c) Check that the batteries are not damaged and
are rechargeable.
4) Charging is complete when the LED turns off
after lighting green. Disconnect the charger from
the AC outlet, and remove the charged batteries.
MAINTENANCE , CARE AND CLEANING
Unplug charger from AC outlet.
• Clean with a dry cloth to remove dirt and grime.
Panasonic Canada Inc.
Mississauga, ON
L4A2T3
panasonic.ca/english/support
panasonic.ca/french/support
panasonic .ca/battery