Radio (AM/FM) Audio Settings USB (MP3/WMA)
Operation Flow
1
Press [SRC] to select the radio source.
2
Press [BAND] to select a band.
3
Select a station.
Frequency Adjustment
[6]: Lower
[7]: Higher
Note: For station search, hold down either of the buttons for
more than 0.5 seconds and release it.
Preset Station Selection
Press the corresponding preset button from [1]
through [6] to tune in a preset station.
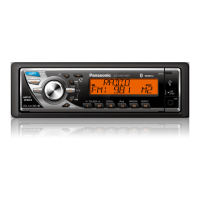
Radio Source Display
Band Frequency Preset Number
lights while receiving an FM stereo signal.
Display Change
Press [DISP] to change the display.
Radio mode display (Default)
cd
Clock display
Station Preset
Up to 6 stations can be preset in each of AM, FM1, FM2, and
FM3.
Preset stations can be simply called up by pressing [1]
through [6].
Auto Preset Memory (APM)
With this operation, stations with good receiving conditions
can be automatically stored in the preset memory.
1
Select a band.
2
Hold down [BAND] (APM) for more than 2 sec-
onds.
The preset stations under best receiving conditions are
received for 5 seconds each after presetting the stations
(SCAN). To stop scanning, press one of the buttons from
[1] through [6].
Note: New stations overwrite existing saved stations.
Manual Station Preset
1
Tune into a station.
2
Hold down one of the preset buttons from [1]
through [6] for more than 2 seconds.
(blinks once)
Note: New stations overwrite existing saved stations.
1
Press [VOL] (PUSH SEL) to open the audio menu.
Note: If no operation takes place for more than 5 seconds in audio setting (2 seconds in the volume adjustment), the display returns to the regular mode.
2
Press [VOL] (PUSH SEL) to select a mode to be
adjusted.
3
Turn [VOL] clockwise (q) or counterclockwise
(w) to adjust.
Volume
(Setting Range: 0 to 40, Default: 18) q / w : Adjustment
Bass
(Setting Range: −12 dB to +12 dB by 2 dB, Default: 0 dB) q / w : Adjustment
Treble
(Setting Range: −12 dB to +12 dB by 2 dB, Default: 0 dB) q / w : Adjustment
SQ Selection
SQ is a function that can call up various sound types in accordance with
your listening music type.
(Selectable setting: FLAT/ROCK/POP/VOCAL/JAZZ/CLUB default: FLAT)
q / w : Selection
or
[1]: FLAT/[2]: ROCK/[3]: POP/[4]: VOCAL/[5]: JAZZ/[6]: CLUB
Note: To return an adjusted SQ to the default setting, select the SQ which
to be returned to the default setting, then hold down [BAND] for mote than
2 seconds.
SQ Adjustment
(Tone/SQ adjustable range : –12 dB to +12 dB (by 2 dB))
Setting range:
SQ Low/Bass: ±12 dB (at 60 Hz, 80 Hz, 100 Hz, 200 Hz)
SQ Mid: ±12 dB (at 500 Hz, 1 kHz, 2 kHz, 3 kHz)
SQ High/Treble: ±12 dB (at 10 kHz, 12 kHz, 15 kHz, 18 kHz)
q Adjust each band.
q / w : center frequency up/down
[DISP] : Band selection
[{] [}] : Level up/down
w Hold down the numeric button [2] through [6] for more than 2 seconds.
Note:
Only SQ presetting value cannot be saved in [1] button.
Balance
(Setting Range: 15 levels each, Default: CNT (center)) q / w : Adjustment
Fader
(Setting Range: 15 levels each, Default: CNT (center)) q / w : Adjustment
Security Alarm Setting
(Selectable setting: ALARM ON/ALARM OFF, default: ALARM OFF) q / w : Selection
Notes:
¡ The volume can also be adjusted directly using [VOL] on the main unit. (a “General”)
¡ Do not activate SQ and Bass/Treble at the same time to avoid causing sound distortion.
¡ If the fader is set to front, the pre-amp. output (rear) is decreased.
DISP
VOL
PUSH
SEL
FOLDER
FILE
SCROLL RANDOM SCAN REPEAT
AUX
PWR
/APM
DISP
VOL
PUSH
SEL
FOLDER
FILE
SCROLL RANDOM SCAN REPEAT
AUX
PWR
/APM
USB
DISP
Caution
To ensure safety, never attempt to preset sta-
tions while you are driving.
[SRC] (Source)
selects a source.
[DISP] (Display)
switches the information
on the display.
[DISP] (Display)
exits from the audio menu, selects
a band in the SQ setting mode.
[BAND]
selects a band in the radio source.
(APM) (Auto Preset Memory)
executes APM in the radio source
(by holding it down for more than 2
seconds).
[VOL]
selects a value in the audio menu.
(PUSH SEL: Select)
selects items in the audio menu.
[6] [7]
decreases/increases the frequency. (For seek tuning, hold it
down for more than 0.5 seconds and release it.)
[{] [}]
adjust the sound level in the SQ
setting mode.
Preset buttons [1] through [6]
select a preset station in the radio source, preset the
current station (by holding it down for more than 2
seconds).
Preset buttons [1] through [6]
select a SQ setting in the SQ selection mode or preset the current SQ adjustment in the
SQ adjustment mode (by holding down one of the buttons for more than 2 seconds).
Notes for USB device
¡ This unit plays back MP3/WMA fi les stored on a USB
memory.
¡ Back up any important data beforehand. We cannot ac-
cept responsibility for any lost data.
¡ Refer to the section on “Compatible USB devices”
(a below).
¡ Refer to the section on “Notes on MP3/WMA”.
¡ Connect your USB device to your car audio using a stan-
dard USB extension cable. Use of a 2 m or shorter USB
2.0 cable is recommended.
Caution for USB Device
¡ Do not connect a USB device directly to this unit. If the
USB device is connected directly to this unit and an
accident occurs, or if the brakes are applied suddenly,
the driver or passenger may bump into the USB device
and may get injured.
¡ Position the USB device and USB extension cable/
optional adaptor so that they do not obstruct your
driving.
¡ Do not connect any USB device other than a USB
memory or a USB audio player. Do not connect
multiple USB devices to the USB connector. Drawing
power for multiple USB devices from the connector
could cause overheating and smoking.
Compatible USB devices
¡ USB Mass Storage Class
This refers to a type of USB device, which when con-
nected to a PC can be used as a storage device without
the need for specialized drivers or software.
For details as to whether your USB memory/USB Audio is
compatible with USB Mass Storage Class, please contact
the USB memory/USB Audio manufacturer.
¡ USB Standard Compatibility 1.1/2.0 Full Speed
¡ File system is FAT12/16/32
¡ Maximum current less than 1 A
¡ Capacity less than 4 GB (1 partition) is recommended.
Notes:
¡ The use of USB devices that contain data fi les other than
MP3/WMA stored is not recommended.
¡ Playback or display may not be possible depending on the
type of the USB device or the condition of the recording.
¡ Even if PC playback is possible, it may not be possible on
this product, because some USB devices are not compli-
ant with the USB standard.
¡ Even with a USB device in the Mass Storage Class, play-
back may not be possible in some cases.
Operation Flow
1
Press [SRC] to select the USB mode.
2
Open the USB connector cover.
3
Using a USB extension cable, connect the USB
memory to this unit.
Notes:
¡ When connecting (disconnecting) the USB memory, turn
down the volume of the unit.
¡ When connecting the cables, make sure the connector is
pushed all the way into the socket.
¡ This unit may not operate correctly, depending on USB
cable’s quality and length. Use of a 2 m or shorter USB
2.0 cable is recommended.
USB extension cable (USB 2.0, not included)
USB memory (not included)
Type A Male
Note: MP3/WMA fi les recognized by the unit are played back
automatically.
4
Select a desired portion.
Folder Selection
[}] (FOLDER): Next folder
[{] (FOLDER): Preceding folder
File Selection
[7]: Next fi le
[6]: Preceding fi le (press twice)
Note: For fast forward/reverse, hold down either of them.
Pause
Press [BAND] (h/
5
).
Press again to cancel.
File search
1
Press [ ] to activate the fi le search mode.
(root folder displayed)
Press again to exit from the fi le search mode.
2
Select a fi le for play.
Turn [VOL] clockwise or counterclockwise: Selects a
folder or a fi le in the same hierarchy.
Push [VOL] (PUSH SEL): Determines the selection.
¡ When a folder is selected, the folder is opened and a
fi le/folder inside becomes selectable. Proceed to turn
[VOL] clockwise or counterclockwise to select a fi le/
folder.
¡ When a fi le is selected, the fi le is played.
Press [
]: Returns to the 1 level higher hierarchy.
Note: Press [
] for more than 2 seconds to active the
quick return function, selection returns to the 1st fi le or
1st folder respectively within same hierarchy.
Root Folder
(Root Directory)
:Folder
:File
(to 1 level lower hierarchy)
(selected file played)
(move in the same hierarchy)
(to 1 level higher hierarchy)
DISP
DISP
USB Disconnect
Disconnect the USB memory and USB extension
cable.
Notes:
¡ Do not leave the USB device for long periods of time in
places inside the car where temperature becomes exces-
sively high
¡ To prevent dirt and dust from adhering to the USB con-
nector, close the cover of this unit when not in use.
USB Mode Display
Folder number
Lights when the USB device is loaded.
File number
Play Mode indicators
Lights when each mode is activated.
Random play
Repeat play
Folder Random, Folder Repeat, Folder Scan
Operation Flow
1
Connect a iPod.
2
Press [SRC] to select the iPod (USB) mode. Play-
back starts.
Note: If playback does not start, press [BAND] (h/
5
).
File Selection
[7]: Next fi le
[6]: Beginning of the current fi le
For the preceding fi le, press twice.
Notes:
¡ Hold down for fast forward/reverse.
¡ When fast forward comes to the end of a fi le or fast
reverse comes to the beginning of a fi le, regular play-
back starts even if the fast forward or reverse button is
pressed.
Pause
Press [BAND] (h/
5
).
Press again to cancel.
Playing Mode Selection
1
Press [ ] to activate the Playing Mode Selection
mode.
2
Turn [VOL] clockwise or counterclockwise to ad-
just.
PLAYLIST: Playback by playlist (Default)
ARTIST: Playback by artist
ALBUM: Playback by album
GENRE: Playback by genre
3
Press [VOL] (PUSH SEL) to determine the selec-
tion.
4
Turn [VOL] clockwise or counterclockwise to select
a portion to be played.
5
Press [VOL] (PUSH SEL) to determine the selec-
tion.
Note: To select a playing mode in step 2, press [ ].
Notes:
¡ To return to the previous screen, press [DISP].
¡ Files without an album name or an artist name are not
playable in the playing mode of the album or artist display
respectively.
iPod Mode Display
Current fi le
All fi les (A number up
to 999 is displayable.)
Play Mode indicators
Lights when each mode is activated.
Repeat play
Shuffl e play (songs)
Blinks when each mode is activated.
Shuffl e play (albums)
lights when a USB extension cable for iPod and iPod
devices is connected with USB connector and the
USB source is selected.
USB (Universal Serial Bus) Connector (inside of the cover)
USB (Universal Serial Bus)
Connector (inside of the
cover)
Display Change
Press [DISP].
Folder/File
d
Play time
d
Folder name/ Album*
d
File name/Title, artist*
d
Clock time
d
(Return to “Folder/File”)
*ID3/WMA Tag Setting
Hold down [3] (SCROLL) for more than 2 seconds.
cd
(Default)
When a folder name is displayed:
TAG ON: The album title is displayed.
TAG OFF: The folder name is displayed.
When a fi le name is displayed:
TAG ON: The title/artist name is displayed.
TAG OFF: The fi le name is displayed.
Notes:
¡ To have another circle scroll while a text is displayed,
press [3] (SCROLL). If the number of displayed charac-
ters is 11 or less, the characters do not scroll.
¡ “NO TEXT” is displayed when no information exists on
the USB device.
¡ ID3/WMA tag information is displayed for the album
name and title/artist name.
Random, Scan, Repeat Play
Random Play Setting
Press [4] (RANDOM) to select the random play set-
ting.
Random play
All the available fi les are played in a random sequence. (
lights.)
d
Folder random play
All the fi les in the current folder are played in a random
sequence. (
lights.)
d
Random off
Return to regular play.
Scan Play Setting
Press [5] (SCAN) to select the scan play setting.
Scan play
The fi rst 10 seconds of each fi le is played in sequence.
d
Folder scan play
From the next folder, the fi rst 10 seconds of the fi rst fi le in
each folder is played in sequence. (
lights.)
d
Scan off
Return to regular play.
Repeat Play Setting
Press [6] (REPEAT) to select the repeat play setting.
Repeat play
The current fi le is repeated. ( lights.)
d
Folder repeat play
The current folder is repeated. ( lights.)
d
Repeat off
Return to regular play.
Troubleshooting
If You Suspect Something Wr ong
Check and take steps as described below.
If the described suggestions do not solve the problem, it is
recommended to take the unit to your nearest authorized
Panasonic Servicenter. The product should be serviced only
by qualifi ed personnel. Please refer the checking and the
repair to professionals.
Panasonic shall not be liable for any accidents arising out
of neglect of checking the unit or your own repair after your
checking.
Never take measures especially those other than indicated
by italic letters in “Possible Solution” described below
because those are too dangerous for users to handle
themselves.
Warning
¡ Do not use the unit in an irregular condition, for ex-
ample, without sound, or with smoke or a foul smell,
which can cause ignition or electric shock. Immedi-
ately stop using the unit and consult your dealer.
¡ Never try to repair the unit by yourself because it is
dangerous to do so.
Trouble Possible Solution
Common
No power
¡ Start the engine. (Alternatively, turn the ignition switch to the ACC position.)
¡ Verify the wiring. (Battery lead, power lead, ground lead, etc.)
¡ Fuse blown (Consult your dealer or an authorized Panasonic Servicenter.)
¡ Ask a professional for fuse replacement.
¡ Be sure to use the same rated fuse.
No sound
¡ Disable the mute function.
¡ Verify the wiring.
¡ Wait until the dew disappears before turning on the unit.
Noise
¡ Make sure that grounding is established properly.
No sound from left, right, front, or
rear speaker
¡ Adjust the balance and fader.
¡ Verify the wiring.
Left and right sounds are reversed
¡ Connect the speaker lead correctly.
Disc Player
No sound, or disc is automatically
ejected
¡ Load the disc correctly.
¡ Clean the disc.
Sound skip, poor sound quality
¡ Clean the disc.
Sound skip due to vibration
¡ The maximum permissible tilt angle is 30°.
¡ Secure the unit.
Disc not ejectable
¡ Press [u]. If the disc is still not ejected, consult your dealer or an authorized
Panasonic Servicenter.
Radio
Frequent noise
¡ Tune in to another station of high-intensity waves.
¡ Make sure that the antenna mounted point is grounded properly.
Preset data deleted
¡ The preset memory is cleared to return to the original factory setting when the
power connector or battery is disconnected.
USB (MP3/WMA)
Music is not played back even if a
USB device is connected.
¡ Connect the USB device and USB extension cable correctly.
¡ Check if there is any music data that can be played stored on the USB device.
¡ Use a USB device with a FAT12/16/32 fi le system.
¡ Use a USB device with a current consumption lower than 1 A.
“READING” is displayed but music
is not played back.
¡ Do not use a USB Hub.
¡ When the USB device contains a number of folders/fi les, a long time may be
taken to read all the fi les.
Error Display Mes sages
Display Possible Solution
Radio
No operation by some cause.
¡ Switch the power or ACC ON/OFF. If this does not solve the problem or the unit is still out of order,
consult your dealer or an authorized Panasonic Servicenter to ask for repairs.
Disc Player
(The disc is ejected automatically.)
The disc is dirty or upside down.
¡ Check the disc.
(The disc is ejected automatically.)
The disc has scratches.
¡ Check the disc.
No operation by some cause
¡ If normal operation is not restored, consult your dealer or an authorized Panasonic Servicenter to ask
for repairs.
Cannot read the fi le
¡ Check the disc.
The WMA fi le can be copyrighted.
¡ The fi le protected by copyright is not playable.
USB (MP3/WMA)
A USB device is not connected or the connected device cannot be recognized.
¡ Use a USB memory that is suitable for this unit.
No playable fi les exist.
An unsupported USB device is connected.
¡ Use a USB memory that is suitable for this unit.
¡ Record fi les that can be played back on this unit onto the USB memory.
A USB device that exceeds the current capacity that can be supplied is connected. For some reason, an
over-current was detected.
¡ Use a USB memory that has a consumption current of less than 1 A.
¡ Switch the Source, and select the USB (MP3/WMA) mode again.
¡ Switch the power off/on, and select the USB (MP3/WMA) mode again.
¡
Check that the USB connector section is not dirty, and that there is no foreign objects.
No operation by some cause
¡
Switch the power on or set ACC to ON. If this does not solve the problem, unplug the power cord
and plug it in again (a Installation Instructions). In case the unit is still out of order, consult your
dealer or an authorized Panasonic Servicenter.
(After 5 seconds)
a To next fi le automatically
The player cannot read the fi le you are trying to play for some reason. (File recorded in an unsupported
fi le system, compression scheme, data format, fi le name extension, damaged data, etc.)
¡ Confi rm that the USB extension cable is fi rmly connected, and reconnect if not. Select a fi le that the
player can read. Check the type of data stored in the USB memory. Format the USB memory if neces-
sary.
(After 5 seconds)
a To next fi le automatically
The WMA fi le can be copyrighted.
¡ The fi le protected by copyright is not playable.
For use with iPod
The iPod is not recognized correctly.
¡ Some time could be taken for the iPod to be recognized.
¡ Check the connection.
¡ Reset the iPod, and then connect it again.
Your iPod has no playable music.
¡ Download playable music to your iPod.
Note: When iPod device is connected to this unit, then put an unsupported disc (ex. DVD/VCD disc) into disc player, the disc player will take a long time
on recognize the unsupported disc and display the proper error messages. At the same time, the iPod device occurs with temporary disconnection and
reconnection interruptions (display blinks) several times.
Please notice this phenomenon indicate there is nothing wrong with the main unit and your iPod device. When above phenomenon occurs, please wait
a while for operation.
General
Disc Player
Power On/Off
Set your car’s ignition switch to the ACC or ON position.
Power on: Press [SRC] (PWR).
Power off: Hold down [SRC] (PWR) for more than 1
second.
Source Selection
Press [SRC] to change the source.
Radio
d
Disc player
d
USB
d
AUX
When a device connected to the front AUX terminal of this
unit
d
(Return to “RADIO”)
Volume Adjustment
(Setting Range: 0 to 40, Default: 18)
Turn [VOL] clockwise to increase the volume, and
counterclockwise to decrease the volume.
Volume level (0 to 40) (default: 18)
Note: To mute the sound, set the volume level to 0.
Notes:
¡ Do not insert a disc when the
indicator lights.
¡ Refer to the sections of “Notes on Discs” and “Notes
on MP3/WMA”.
¡ This unit does not support 8 cm {3”} discs.
¡ Do not insert foreign objects into the disc slot.
Operation Flow
1
Press [SRC] to select the Disc Player source.
2
Select a desired portion.
Track/File Selection
Press [6] / [7].
Note: To perform fast forward/reverse, hold down either
of them.
Disc Player (CD-DA disc):
Previous/next track
Disc Player (MP3/WMA disc):
Previous/next fi le
Folder Selection (MP3/WMA)
[}] (FOLDER): Next folder
[{] (FOLDER): Preceding folder
Pause
Press [BAND] (h/
5
).
Press again to cancel.
Player Source Display
CD-DA Mode Display
Track number
Lights when a disc is loaded.
Play time
Play Mode indicators
Lights when each mode is activated.
Random play
Repeat play
MP3/WMA Mode Display
Folder number
Lights when a disc is loaded.
File number
Play Mode indicators
Lights when each mode is activated.
Random play
Repeat play
Folder Random, Folder Repeat, Folder Scan
DISP
VOL
PUSH
SEL
FOLDER
FILE
SCROLL RANDOM SCAN REPEAT
AUX
PWR
/APM
DISP
VOL
PUSH
SEL
FOLDER
FILE
SCROLL RANDOM SCAN REPEAT
AUX
PWR
/APM
USB
DISP
AUX Connector (3.5 mm ø stereo)
From line output of external sound/audio device
(ex. Silicon audio player, HDD player, etc.)
Caution
Set the volume level to low enough before the AUX connection is completed.
Failure to observe this may generate loud noise and accordingly damage your speakers and your hearing.
[SRC] (Source)
selects a source.
[PWR] (Power)
toggles power
on/off.
Remote Control Sensor
[VOL] (Volume)
[4] (RANDOM)/[5] (SCAN)/[6] (REPEAT)
toggles on/off each play mode.
[3] (SCROLL)
scrolls the information on the display.
Notes:
¡ The power will be turned on automatically when a disc is loaded.
¡ A disc which has both CD-DA data and MP3/WMA data on it may not be reproduced normally.
Printed side up
Display Change
Press [DISP].
Disc Player (CD-DA disc):
Track/Play time
d
Disc title
d
Track title
d
Clock time
d
(Return to “Track/Play time”)
Disc Player (MP3/WMA disc):
Folder/File
d
Play time
d
Folder name/ Album*
d
File name/Title, artist*
d
Clock time
d
(Return to “Folder/File”)
*ID3/WMA Tag Setting
Hold down [3] (SCROLL) for more than 2 seconds.
cd
(Default)
When a folder name is displayed:
TAG ON: The album title is displayed.
TAG OFF: The folder name is displayed.
When a fi le name is displayed:
TAG ON: The title/artist name is displayed.
TAG OFF: The fi le name is displayed.
Notes:
¡ To have another circle scroll while a text is displayed,
press [3] (SCROLL). If the number of displayed charac-
ters is 11 or less, the characters do not scroll.
¡ “NO TEXT” is displayed when no information exists on
the disc.
¡ ID3/WMA tag information is displayed for the album
name and title/artist name.
Random, Scan, Repeat Play
Random Play Setting
Press [4] (RANDOM) to select the random play set-
ting.
Random play
All the available songs (tracks/fi les) are played in a random
sequence. (
lights.)
d
Folder random play
(only for MP3/WMA)
All the available fi les in the current folder are played in a
random sequence. (
lights.)
d
Random off
Return to regular play.
Scan Play Setting
Press [5] (SCAN) to select the scan play setting.
Scan play
The fi rst 10 seconds of each song (each track/fi le) is played
in sequence.
d
Folder scan play
(only for MP3/WMA)
From the next folder, the fi rst 10 seconds of the fi rst fi le in
each folder is played in sequence. (
lights.)
d
Scan off
Return to regular play.
Repeat Play Setting
Press [6] (REPEAT) to select the repeat play setting.
Repeat play
The current song (track/fi le) is repeated. ( lights.)
d
Folder repeat play
(only for MP3/WMA)
The current folder is repeated. (
lights.)
d
Repeat off
Return to regular play.
Disc slot
takes a disc in with the
printed side facing up.
[{] [}] (FOLDER)
skips to the previous/next folder.
[u] (Eject)
ejects the disc.
[SRC] (Source)
selects a source.
[DISP] (Display)
switches the information on the display.
[BAND] (h/
5
) (Play/Pause)
toggles between pause and play with
the player source.
[6] [7]
skips to the previous/next track/fi le in the player mode.
For fast reverse/fast forward, hold down either of them.
DISP
VOL
PUSH
SEL
FOLDER
FILE
SCROLL RANDOM SCAN REPEAT
AUX
PWR
/APM
DISP
VOL
PUSH
SEL
FOLDER
FILE
SCROLL RANDOM SCAN REPEAT
AUX
PWR
/APM
USB
DISP
USB
[4] (RANDOM)/[5] (SCAN)/[6] (REPEAT)
toggles on/off each play mode.
[3] (SCROLL)
scrolls the information on the display.
[4] (RANDOM)/[6] (REPEAT)
toggles on/off each play mode.
[3] (SCROLL)
scrolls the information on the display.
[{] [}] (FOLDER)
skips to the previous/next folder.
[SRC] (Source)
selects a source.
[SRC] (Source)
selects a source.
[DISP] (Display)
switches the information on the display.
(
) (Return)
returns to the 1 level higher hierarchy.
[DISP] (Display)
switches the information on the display.
[BAND] (h/
5
) (Play/Pause)
toggles between pause and play with
the USB source.
[BAND] (h/
5
) (Play/Pause)
toggles between pause and
play with the iPod source.
[6] [7]
skips to the previous/next fi le
in the USB mode. For fast re-
verse/fast forward, hold down
either of them.
[6] [7]
skips to the previous/next track/fi le in the player mode.
For fast reverse/fast forward, hold down either of them.
For use with iPod
By connecting compatible with iPod devices to USB connector via a USB extension cable for iPod (USB 2.0, not included),
you can enjoy music fi les stored on the compatible with iPod devices in your vehicle.
Note: Refer to the section on “USB (MP3/WMA)” for connection.
[VOL]
selects a value in the Playing Mode Selection mode.
(PUSH SEL :Select)
selects items in the Playing Mode Selection mode.
Compatible with iPod devices/software version
(USB connector)
This unit is capable of controlling and playing music for
iPod. (video playback is not feasible)
Made for.
¡ iPod touch (4th generation)/ver. 4.2.1
¡ iPod touch (3rd generation)/ver. 4.2.1
¡ iPod touch (2nd generation)/ver. 4.2.1
¡ iPod touch (1st generation)/ver. 3.1.3
¡ iPod classic (160 GB only)/ver. 2.0.4
¡ iPod classic (120 GB only)/ver. 2.0.1
¡ iPod classic/ver. 1.1.2
¡ iPod with video/ver. 1.3
¡ iPod nano (6th generation)/ver. 1.0
¡ iPod nano (5th generation)/ver. 1.0.2
¡ iPod nano (4th generation)/ver. 1.0.4
¡ iPod nano (3rd generation)/ver. 1.1.3
¡ iPod nano (2nd generation)/ver. 1.1.3
¡ iPod nano (1st generation)/ver. 1.3.1
Made for.
¡ iPhone 4/ver. 4.2.1
¡ iPhone 3GS/ver. 4.2.1
¡ iPhone 3G/ver. 4.2.1
¡ iPhone/ver. 3.1.3
* Operation check has been completed with software avail-
able at the end of January, 2011. We do not guarantee
the operation with our future products or upgraded
software.
Notes:
¡ The shuffl e function for iPod corresponds to the RAN-
DOM function of this unit.
¡ Please make sure to detach the iPod after turning off
the vehicle engine (turning the ACC to OFF). The iPod
devices may not shut down while still connected,
which may result in battery depletion.
¡ Please do not connect for iPod accessories such as
for iPod remote control unit or headphones while
connecting for iPod with the unit. The unit may not
operate correctly.
¡ Connect this unit after turning down the volume for
the iPod.
¡ “PAUSE” appears until for iPod is recognized after
connecting for iPod. This indicates there is nothing
wrong with the main unit.
¡ We do not guarantee all the operations of connectable
devices.
¡ The SCAN function of this unit is not feasible to oper-
ate for iPod. (Because of the SCAN function is not
capable of iPod). This indicates there is nothing wrong
with this unit.
Display Change
Press [DISP].
Current fi le/all fi les (Default)
d
Play time
d
Title name
d
Album name
d
Artist name
d
Clock time
d
(Return to “Current fi le/all fi les”)
Notes:
¡ To have another circle scroll while a text is displayed,
press [3] (SCROLL). If the number of displayed charac-
ters is 11 or less, the characters do not scroll.
¡ “NO TEXT” is displayed when no information exists.
Repeat, Shuffl e Play
One Song Repeat Play Setting
Press [6] (REPEAT) to select the repeat play setting.
One song repeat play
The current fi le is repeated. ( lights.)
cd
One song repeat play off
Note: The “Repeat All Songs” function of an iPod is always
activated and cannot be canceled from this unit.
Shuffl e Play Setting
The shuffl e function of an iPod corresponds to the RANDOM
function of this unit.
Press [4] (RANDOM) to select the shuffl e play setting.
Songs
All the available fi les are played in a random sequence.
(
lights.)
d
Albums
All the playable albums are played in a random sequence.
(
blinks.)
d
Shuffl e off
Return to regular play.
[VOL]
rotates to select a fi le/folder
in the fi le search mode.
(PUSH SEL: Select)
push to determine the selec-
tion in the fi le search mode.
[
] (Search)
activates the fi le search mode.
[ ]
activates the Playing Mode Selection
mode.
 Loading...