Do you have a question about the Panasonic CQ-VA70EU and is the answer not in the manual?
Protective measures against water damage during car washing.
Instructions to seek professional repair and avoid unit disassembly.
Specifies the need for a 12-volt negative ground car battery system.
Recommendation to cool the car interior before operating the unit.
Explains that memory settings are reset upon power disconnection.
Warning against inserting small objects into the disc mechanism.
Step-by-step guide to extend and retract the display screen.
Procedure to draw out the display unit for viewing.
Instructions for setting the vertical and horizontal viewing angles.
Method for adjusting the display's upward tilt angle.
How to manually set the display's vertical and horizontal viewing angles.
Manual procedure for adjusting the display's side-to-side angle.
Instructions to return the display to center before retracting.
How to turn the unit on and switch between different operation modes.
Instructions for increasing or decreasing the sound volume.
How to use the attenuator to temporarily reduce the volume.
Enabling bass and treble enhancement for improved sound at low volumes.
Accessing and adjusting display settings like brightness and color.
Options for selecting display modes, including screen saver settings.
Adjusting audio parameters like bass, treble, balance, and fader.
Configuring audio output options, including beep sound settings.
How to modify the screen's brightness level.
Modifying the color saturation of the display image.
Adjusting the red or green balance in the display's color image.
Setting the screen brightness level using available dimmer options.
Enabling, disabling, and selecting patterns for the screen saver.
Switching to the audio control screen for adjustments.
Increasing or decreasing the bass response of the audio output.
Increasing or decreasing the treble response of the audio output.
Shifting sound volume between left and right speakers.
Shifting sound volume between front and rear speakers.
Configuring whether the unit produces beep sounds upon button presses.
Instructions for operating the unit in VTR1 and VTR2 modes.
Steps required to view video content from connected VTR sources.
Procedure to select the VTR mode for video playback.
How to switch the unit into tuner (radio) mode.
Choosing between FM1, FM2, AM1, and AM2 radio bands.
Manually adjusting the radio to specific frequencies.
Using seek tuning to automatically find and stop at the next station.
Information on storing up to 24 radio stations in memory.
Steps for manually tuning and saving a station to a preset button.
Accessing preset stations by directly pressing their assigned number button.
Cycling through saved preset stations using the tune buttons.
Automatically saving the strongest six stations to preset buttons.
Procedure to switch the unit into CD changer operational mode.
Choosing a disc from the changer in ascending or descending order.
Navigating to the next track or restarting the current track.
Using fast forward or rewind to search within a track.
Playing tracks randomly from the selected disc.
Playing tracks randomly from all discs in the changer.
Playing the initial segment of each track in sequence.
Playing the first track of all discs in the changer sequentially.
Repeating the currently playing track.
Repeating the currently playing disc.
Temporarily stopping playback or auto-pausing at track starts.
Saving specific tracks into the unit's memory for later recall.
Initiating playback of tracks stored in the memory.
Reviewing the list of track numbers saved in the memory.
Deleting all saved tracks from the unit's memory.
How to view the current time displayed on the 12-hour clock.
Steps for setting the hour and minute on the 12-hour clock.
Utilizing direct memory for quick station recall.
Saving a desired radio station into direct memory.
Retrieving stations that have been stored in direct memory.
Allows watching video programs while adjusting only audio.
Modifying the color patterns of the unit's display.
Connecting a car navigation system for video output via VTR2.
Connecting a backup camera via VTR1 for automatic display when reversing.
Configuring the MAIN-IN switch for audio input signal processing.
Instructions for replacing the battery in the remote control.
Guidelines for cleaning the unit's exterior.
Information on seeking professional servicing and contacting the service department.
Procedure for replacing a blown fuse with the correct rating.
Essential safety and operational guidance before commencing installation.
Steps for removing protective brackets before unit installation.
List of parts supplied with the unit for installation.
Procedure for inserting and securing the mounting frame into the car's dashboard.
Using tabs to firmly fasten the mounting frame within the dashboard.
Attaching the trim plate to the mounted unit for a finished look.
Methods for securing the unit to a car's mounting bracket.
Alternative method for securing the unit to an iron mounting plate.
Example illustrating tuner unit mounting using magic tape on car carpet.
Essential safety precautions and steps to take before making electrical connections.
Diagram and explanation of standard electrical connections for the unit.
How to use the reset switch to restore the unit to its initial condition.
Instructions for cleaning the exterior of the unit with a dry soft cloth.
Detailed specifications including power, output, impedance, and dimensions.
Technical performance data for the FM and AM tuner blocks.
Technical details pertaining to the display unit, such as resolution and type.
| Bluetooth | Yes |
|---|---|
| USB Port | Yes |
| Radio Tuner | FM/AM |
| Remote Control | Yes |
| Audio Formats Supported | MP3, WMA |
| Output Power | 50W x 4 |
| Preset Stations | 18 FM, 6 AM |
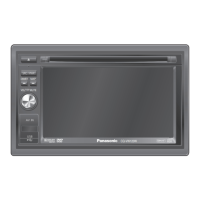
| Display | 7-inch touch screen |