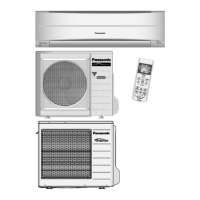
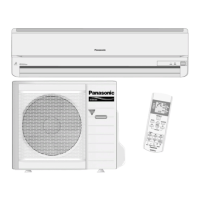
,QVWDOODWLRQ,QVWUXFWLRQ5(6.8$DQG5(6.8$
11.1 Select the Best Location
,QGRRU8QLW
x 'RQRWLQVWDOOWKHXQLWLQH[FHVVLYHRLOIXPHDUHD
VX
FKDVNLWFKHQZRUNVKRSDQGHWF
x 7KHUHVKRXOGQRWEHDQ\KHDWVRXUFH
RUVWHDP
QHDUWKHXQLW
x
7KHUHVKRXOGQRWEHDQ\REVWDFOHVEORFNL
QJWKHDLU
FLUFXODWLR
Q
x $SODFHZKHUHDLUFLUFXODWLRQLQWKHURRPLVJRRG
x $SODFHZKHUHGUDLQDJHFDQEHHDVLO\GRQH
x $SODFHZKHUHQRLVHSUHYHQWLRQLV
WDNHQLQWR
F
RQVLGHUDW
LRQ
x
'RQRWLQVWDOOWKHXQLWQHDUWKHGRRUZD\
x (QVXUHWKHVSDFHVLQGLFDWHGE\DUURZVIURPWKH
ZDOOF
HLOLQJIHQFHRURWKHUREVWDFOHV
x
5HFRPPHQGHGLQVWDOODWLRQ
KHLJKWIRULQGRRUXQLW
VKDOOEHDWOHDVWIWP
2XWGRRU8QLW
x ,IDQDZQLQJLVEXLOWRYHUWKHXQLWWRSUHYHQWGLUHFW
VXQOL
JKWRUUDLQEHFDUHIXOWKDWKHDWUDGLDW
LRQIURP
WKHFRQ
GHQVHULVQRWREVWUXFWHG
x 7KHUHVKRXOGQRWEHDQ\DQLPDORUSODQWZKLFK
FRXO
GEHDIIHFWHGE\KRWDLUGLVFKDUJ
HG
x
.HHSWKHVSDFHVLQGLFDWHGE\DUURZVIURP
ZDOO
FHLOLQJIHQFHRURWKHUREVWDFOHV
x 'RQRWSODFHDQ\REVWDFOHV
ZKLFKPD\FDXVHD
VKR
UWFLUFXLWRIWKHGLVFKDUJHGDLU
x ,ISLSLQJOHQJWKLVRYHUWKH>SLSLQJOHQJWKI
RU
DGGLWLRQDOJDV@DGGLWLRQDO
U
HIULJHUDQWVKRXOGEH
DGGH
GDVVKRZQLQWKHWDEO
H
x
5HFRPPHQGHGLQVWDOODWLRQKHLJKWIRURXW
GRRUXQLW
VKR
XOGEHDERYHWKHVHDVRQDOVQR
ZOHYHO
x
%HFDUHIXOQRWWRORFDWH
RXWGRRUXQLWGLUHFWO\XQGHU
DURRIOLQHZK
HUHIDOOLQJVQRZRULFHFDQFDXV
H
GDPDJ
HRUGULSSLQJZDWHUFDQLQFUHDVHL
FH
DFFXPXO
DWLRQDQGGHIURVWF\FOHV
0RGHO
&DSDFLW\
%WXK
3LSLQJVL]H
6WG
/HQJWK
0D[
(OHYDWLRQ
0LQ
3LSLQJ
/HQJWK
0D[
3LSLQJ
/HQJWK
$GGLWLRQDO
5HIULJHUDQW
3LSLQJ
/HQJWK
IRUDGG
JDV
*DV /LTXLG
5(6.8$
PP
PP
IW
P
IW
P
IW
P
IW
P
R]IW
JP
IW
P
5(6.8$
PP
([DPSOH)RU5(6.8$
,IWKHXQLWLVLQVWDOOHGDWIWPGLVWDQFHWKH
TXDQWLW\RIDGGLWLRQDOUHIULJHUDQWVKRXOGEHR]
JIW[R]IW R]
P[JP J
,QGRRU2XWGRRU8QLW,QVWDOODWLRQ
'LDJUDP
1
31
/
32
"
(50 mm)
or more
2
9
/
16
"
(
65 mm)
or m
ore
8 ft
(2.4 m)
or
m
or
e
(Left and right are identical)
Floor / Grade level
Vinyl tape
3
15
/
16
"
(100 mm)
or m
or
e
39
3
/
8
"
(
1000 mm
)
o
r m
ore
3
15
/
16
"
(100
mm)
or
more
11
13
/
1
6
"
(3
00 mm)
or more
It is advisable to
avoid more than 2
blockage directions.
For better ventilation
& multiple-outdoor
installation, please
consult authorized
dealer/specialist.
Installation plate
1
Sleeve (
)
Bushing-Sleeve (
)
Bend the pipe as
closely on the wall as
possible, but be careful
that it doesn’t break.
Saddle (
)
Conduit
(Power supply cord (
))
Control Board cover
Remote control holder fixing screws
Remote
control
Additional drain hose (
)
Gas side piping (
)
Conduit
(Connection cable)
Putty (
)
(Gum Type Sealer)
Installation parts you
should purchase ()
Vinyl tape (wide) (
)
• Apply after carrying
out a drainage test.
• To carry out the
drainage test,
remove the air filters
and pour water into
the heat exchanger.
Liquid side piping (
)
Piping direction Do not bend up
drain hose
(Front side)
Right
Rear
Right
bottom
Left
Rear
Left bottom
Left
Indoor/Outdoor Unit Installation Diagram
Insulation of piping connections
Attaching the remote control holder to the wall
• Carry out insulation after
checking for gas leaks and
secure with vinyl tape.
Remote control holder
6
5
3
x
7KLVLOOXVWUDWLRQLVIRUH[SODQDWLRQSXUSRVHVRQO\
7KHLQGRRUXQLWZLOODFWXDOO\
IDFHDGLIIHUHQWZD\
 Loading...
