EN14
English
HOW TO INSTALL
O
F
F
M
A
O
F
F
M
A
O
F
F
M
A
O
F
F
M
A
CL
E
A
N
I
NG
F
IL
TE
R
OFF
M
A
OFF
M
A
OFF
M
A
OFF
M
A
C
L
E
A
N
I
N
G
F
ILT
E
R
Figure 1
Figure 2
For DH-3VL1 / DH-3VS1 /
DH-3WL1 / DH-4VL1 /
DH-4VS1/ DH-6VS1
For DH-3VP1 / DH-4VP1
1.5 m ~
1.7 m
1.5 m ~
1.7 m
Main Pipe Rising Level
Cold Water
Tank
Service Valve
33 ft (10 meter) maximum
recommended height between
bottom of cold water tank
and top of Home Shower
Unit.
* Maximum total length
of feeding pipe should
be below 10 meter.
* The feeding pipe
should be 1/2 inch.
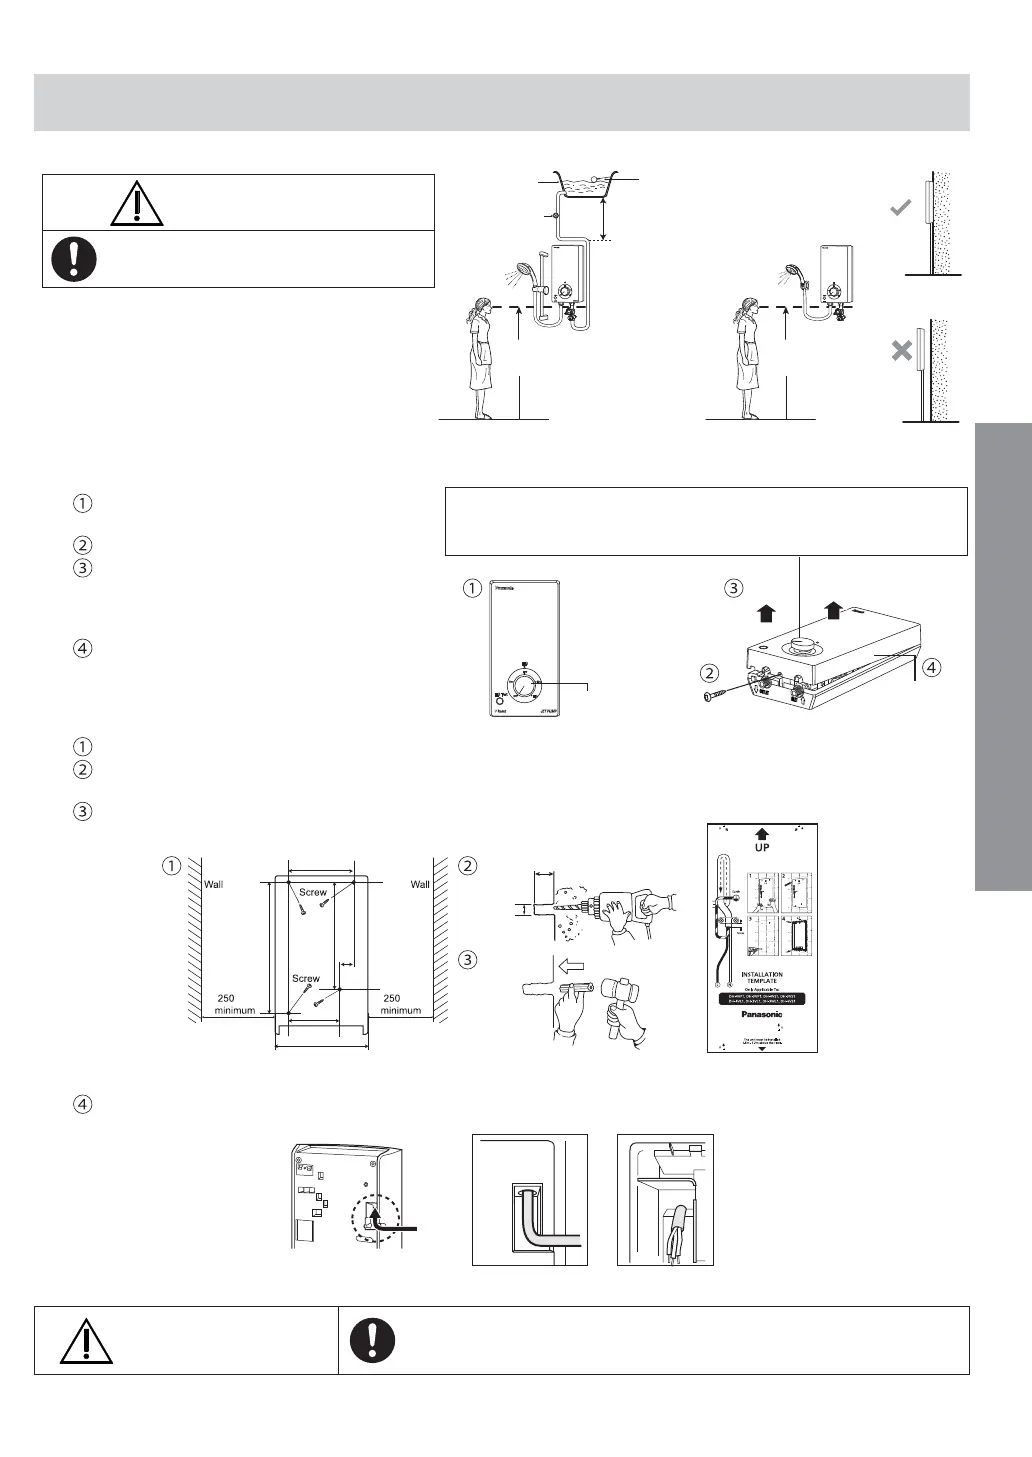
WARNING
During installation process make sure
electric and water supply is turn OFF.
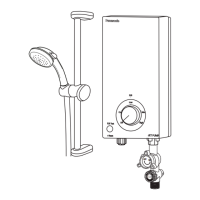
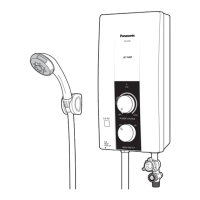
1. Where to install the Unit.
• Be sure to install the Unit on the wall as illustrated
in Figure 1 (vertical position with the water fi ttings
pointing downward).
• Do not install the Unit away from wall surface as
shown in Figure 2.
• The Unit must be installed at 1.5 m ~ 1.7 m
above the fl oor.
2. How to remove the Front Plate.
Front Plate
Lift up
Screw
Power Knob
Note:
Power Knob is attached to Front Plate. Do not remove Power Knob
from Front Plate.
Make sure the Power Knob is at Off
condition.
Remove the screw at the bottom of the Unit.
Lift up the Power Knob to make it loose
(Power Knob is attached to shaft inside the
Unit). Make sure the Power Knob is not
detached from the Front Plate.
Remove the Front Plate by lifting up the
bottom side and then unhook the top side.
3. How to fi x Electric Home Shower.
The distance of the Unit should be more than 250 mm from the right and left of the wall.
Make 4 holes in the wall using a drill. The location of the hole position as shown in the INSTALLATION TEMPLATE
provided.
Drive a Wall Plug into the hole.
25 mm
Ø6 mm
Wall Plug
118
mm
86 mm
188
mm
32
mm
317
mm
348
mm
mm
mm
Installation Template
Lead the Flexible Cord to the set thru Portion 1 as shown below for electric wiring process.
View from inside of the Unit
Portion 1
CAUTION
Flexible Cord must enter the Unit thru designated point only
(do not make additional holes).