EN15
English
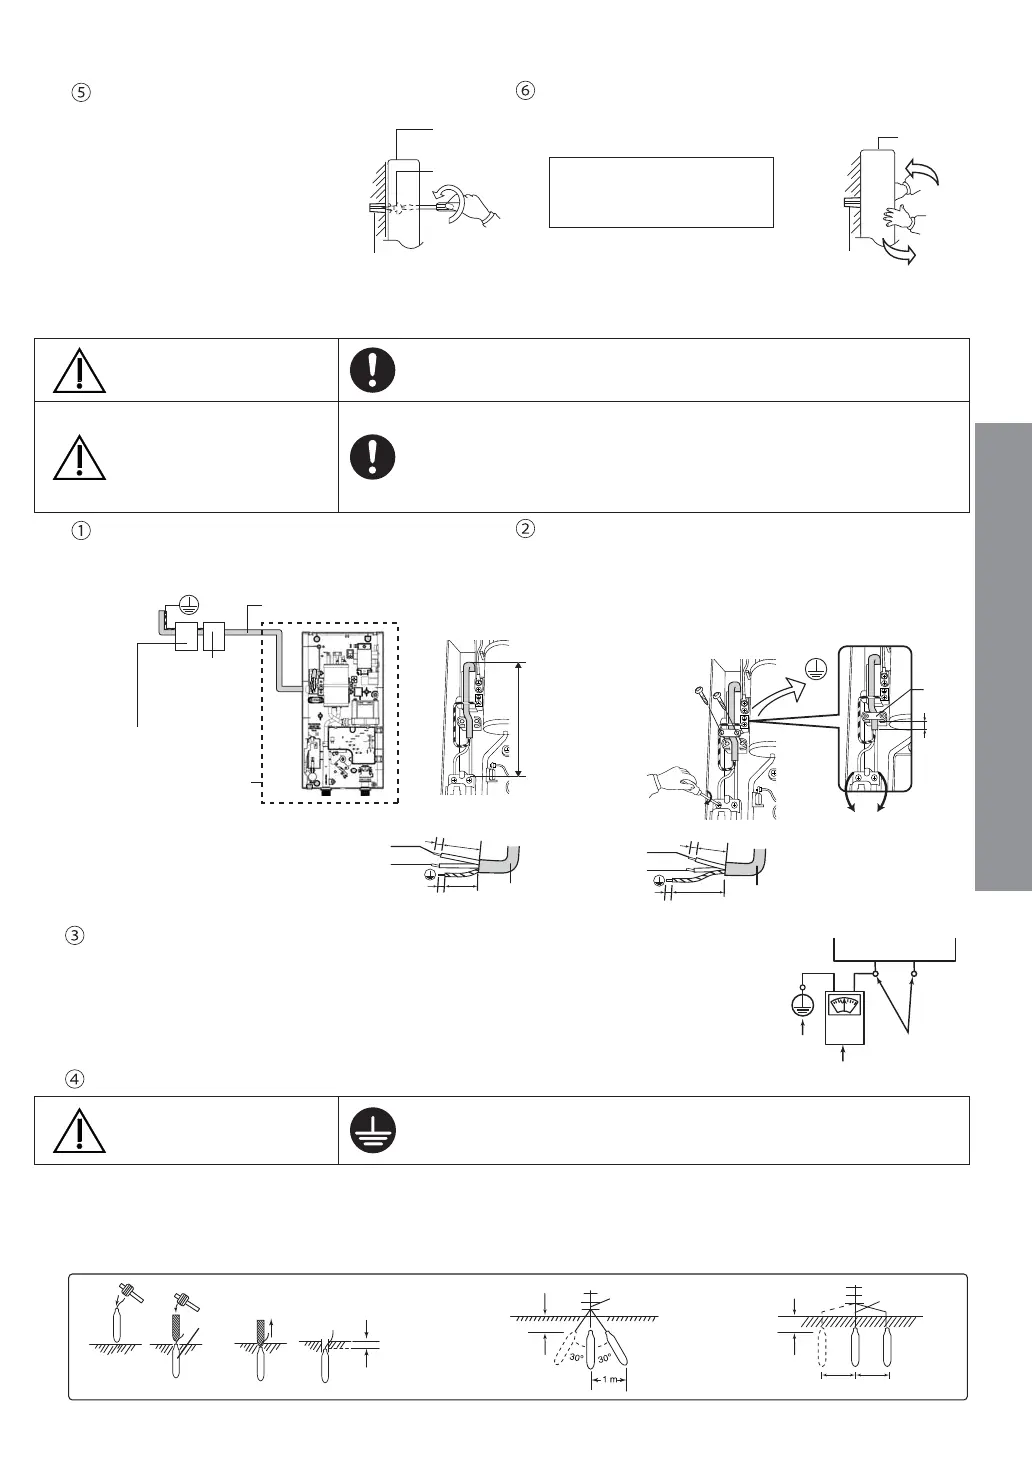
• Mount the Unit on the wall
with 4 screws.
• Drive each Screw into the
two upper Wall Plugs through
the screw holes on the Back
Plate and make sure the
mounting screws do not
contact any metallic
elements in the wall.
• After tighten up the two
upper Screws, tighten up the
remaining two Screws.
Back
Plate
Screw
Wall
Wall Plug
Please ensure the Unit fi xed
tightly on wall by shaking it left
and right.
Note:
The Unit must be mounted
with 4 Screws.
Back
Plate
Wall
Wall Plug
4. Electric wiring.
WARNING
Proper size of Flexible Cord and electric wiring must be installed to
avoid smoke emission and fi re hazards.
WARNING
The Home Shower must be permanently connected to the electric
supply through the ON/OFF DP (double pole) Switch having a contact
separation of at least 3 mm in all poles incorporated in the fi xed wiring.
This switch must be clearly identifi able but out of reach of a person
using a fi xed bath or shower.
Lead the Flexible Cord connected to ELB terminal
inside the Unit: DH-6VS1: 4.0 mm², 3 core Flexible
Cord, Other models: 2.5 mm², 3 core Flexible Cord
1ڞP
Ground
Point
PP
L N
(/%7HUPLQDO
Cord
Holder
L
N
75 mm
70 mm
13 mm
13 mm
Flexible
Cord
L
N
65 mm
75 mm
13 mm
13 mm
Flexible
Cord
DH-3VL1 / DH-3VS1 /
DH-4VL1 / DH-4VS1 /
DH-3VP1 / DH-4VP1 /
DH-3WL1:
DH-6VS1:
Miniature Circuit
Breaker (MCB)
Bath Room
ON/OFF DP
(double pole) Switch
DH-6VS1: 4.0 mm², 3 core Flexible Cord
Other models: 2.5 mm², 3 core Flexible Cord
Earth
DH-6VS1
Flexible Cord
L = 205 mm
(approximately)
DH-3VL1 / DH-3VS1 /
DH-4VL1 / DH-4VS1 /
DH-3VP1 / DH-4VP1 /
DH-3WL1
Flexible Cord
L = 185 mm
(approximately)
Unscrew the Cord Holder and fi x the Flexible Cord.
Strip the lead wire (coating). Fasten the live wire (L)
and neutral wire (N) to the ELB (L,N) and earth wire
to the Ground Point with 1 N•m (10 kgf.cm) torque.
Fix back the Cord Holder to its position to clamp the
Flexible Cord.
Connect wires in correct polarity (L,N).
Main Power Board
Power-Supply
Terminals
Earth
• Connect the wires in wrong polarity (L,N) causes an abnormal condition which may lead
to electric leaking, burning, etc.
• Before wiring, please check polarity (L,N) with voltage range of a tester or voltmeter by
connecting one terminal of the meter to earth while the other to one of the Power Supply
terminals.
• When the needle of the meter defl ects greatly, the polarity of the Power Supply terminal is ‘L’.
Earth Rod.
WARNING
The Unit must be earthed.
Improper grounding could cause an electric shock.
• The Unit must be earthed.
• Earth Rod fi xing procedure. Select adapter place to bury the optional Earth Rod (DQ-6H) for at least 70 cm below ground
surface.
• Ensure that the ground resistance is less than 100 . If it is not, drive the Earth Rod deeper into ground surface or use 2
or 3 Rods.
Ground
Surface
Burying tool
Earth Rod
70 cm at least
(Bevel Style) (Parallel Style)
70 cm at least
Connection
70 cm at least
Connection
About 2 m About 2 m
 Loading...