EasyManua.ls Logo

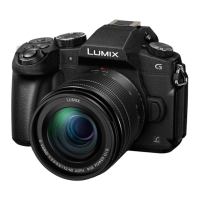
Panasonic DMC-G80 User Manual

Panasonic DMC-G80
339 pages
To Next Page IconTo Next Page
Page #1 background imageLoading...
Page #1 background image
Please read these instructions carefully before using this product,
and save this manual for future use.
Operating Instructions
for advanced features
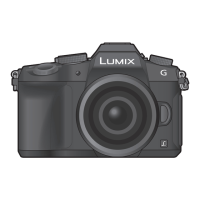
Digital Camera
Model No. DMC-G80
DMC-G81
DVQP1006ZA
F0916HN0
until
2016/11/14
Message Display P318
Troubleshooting P320
Finding the information you need P2
Contents P4
Contents by Function P9
Menu list P185

Table of Contents

Question and Answer IconNeed help?

Do you have a question about the Panasonic DMC-G80 and is the answer not in the manual?

Panasonic DMC-G80 Specifications

General IconGeneral
Sensor TypeLive MOS
Sensor Size17.3 x 13.0 mm
Camera TypeMirrorless
Image Sensor FormatFour Thirds
Lens MountMicro Four Thirds
ConnectivityWi-Fi
Image ProcessorVenus Engine
Built-in FlashYes
External FlashHot shoe
Effective Pixels16.0 Megapixels
Image Stabilization5-axis
Autofocus SystemContrast Detect (Depth From Defocus)
ViewfinderOLED Live View Finder, 2.36M dots
LCD Screen3.0" LCD, 1.04M dots
Video Recording4K UHD at 30p
Battery LifeApprox. 330 shots
Weight505g (body only)
Continuous Shooting9 fps
Weather SealingYes
BatteryDMW-BLC12
Shutter Speed1/4000 to 60 sec
Dimensions128.4 x 89 x 74.3 mm
ISO Sensitivity200-25600 (extendable to 100-25600)

Summary

2. Getting Started/Basic Operations

Charging the Battery

Detailed guide on how to charge the camera's battery correctly.

Basic Operations

Fundamental techniques for holding and operating the camera for optimal shooting.

Shutter button (Taking pictures)

Explains the two-step operation of the shutter button for taking photographs.

Motion picture button (Recording motion pictures)

Details on how to start and stop recording motion pictures using the dedicated button.

Mode dial (Selecting a Recording Mode)

Guide to selecting different recording modes using the camera's mode dial.

Touch screen (Touch operations)

Explains how to interact with the camera using touch gestures like touch, drag, and pinch.

Taking Pictures Using the Touch Function

Using the touch screen to focus and automatically take pictures with the Touch Shutter.

Easily Optimising the Brightness for a Specified Area (Touch AE)

Adjusting brightness for specific areas of the image using the Touch AE function.

Setting menu items

Guide to navigating and setting various camera functions through the menu system.

Calling frequently-used menus instantly (Quick Menu)

Accessing common settings quickly via the Quick Menu for efficient operation.

Customising the Quick Menu settings

How to personalize the Quick Menu by adding or removing frequently used items.

Assigning frequently used functions to the buttons (function buttons)

Customizing camera buttons to quickly access frequently used functions.

3. Recording Modes

Taking Pictures using the Automatic Function (Intelligent Auto Mode)

Using the camera's automatic mode for optimal settings for any scene.

Taking handheld shots of night scenes ([iHandheld Night Shot])

Capturing clear handheld night shots with reduced blur and noise.

Combining pictures into a single picture with rich gradation ([iHDR])

Merging multiple exposures to create a single image with enhanced detail and gradation.

Taking a picture with a blurred background (Defocus Control)

Creating a shallow depth of field effect to blur the background and emphasize the subject.

Recording motion pictures with manually set aperture value/shutter speed (Creative Video Mode)

Manually controlling aperture and shutter speed for creative motion picture recording.

Registering your preferred settings (Custom Mode)

Saving and recalling specific camera settings for different shooting situations.

Recording using registered custom set

How to activate and use previously saved custom camera settings.

4. Focus, Brightness (Exposure) and Colour tone Settings

Adjusting Focus Automatically

Letting the camera automatically adjust focus based on the subject and scene conditions.

Focus Mode (AFS/AFF/AFC)

Selecting the appropriate autofocus mode for different types of subjects and movements.

Auto Focus Mode

Choosing the best autofocus method based on subject position and number.

Optimising the focus and brightness for a touched position

Adjusting focus and brightness simultaneously by touching the desired subject on the screen.

Adjusting Focus Manually

Manually controlling the focus for precise adjustments when autofocus is not desired.

Fixing the Focus and the Exposure (AF/AE Lock)

Locking focus and exposure settings to maintain composition and lighting.

Compensating the Exposure

Adjusting the overall brightness of the image to correct for over or underexposure.

Setting the Light Sensitivity

Adjusting the camera's sensitivity to light (ISO) for shooting in various lighting conditions.

Adjusting the White Balance

Correcting the colour cast of images to accurately represent white under different lighting conditions.

5. 4K Photo and Drive Settings

Select a Drive Mode

Changing how the camera behaves when the shutter button is pressed.

Taking Pictures using Burst Mode

Capturing a rapid sequence of images by holding down the shutter button.

Recording 4K Photos

Capturing high-resolution still images from video sequences at 30 frames per second.

Selecting pictures from 4K burst file and saving

Choosing and saving individual still images from a 4K burst video file.

Controlling Focus After Recording (Post Focus/Focus Stacking)

Adjusting focus after shooting or merging multiple focus points for greater depth of field.

Recording with the Post Focus function

Capturing images with adjustable focus points after the shot is taken.

Merging multiple pictures to widen the focus range (Focus Stacking)

Combining multiple images with different focus points to achieve a wider depth of field.

Taking Pictures with the Self-timer

Using the self-timer to delay the shutter release for steady shots.

Taking Pictures with Time Lapse Shot/Stop Motion Animation

Creating time-lapse or stop-motion videos by taking sequential pictures.

Creating Stop Motion Pictures ([Stop Motion Animation])

Splicing individual pictures together to create stop-motion animation.

Taking Pictures While Adjusting a Setting Automatically (Bracket Recording)

Automatically taking multiple shots with variations in exposure, aperture, or focus.

6. Stabiliser, Zoom and Flash

Image Stabiliser

Reducing camera shake and jitter for sharper images and steadier videos.

Taking Pictures with the Zoom

Adjusting magnification to bring distant subjects closer or widen the field of view.

Raising the telescopic effect

Utilizing Extra Tele Conversion for further digital magnification without significant quality loss.

Taking pictures by using the flash

Utilizing the built-in flash to illuminate subjects in low-light conditions.

Setting the Flash Functions

Configuring various flash settings like firing mode and output for optimal lighting.

Changing Flash Mode

Selecting different flash modes such as forced flash, slow sync, or forced flash off.

Adjust the flash output

Manually adjusting the flash brightness to control exposure and prevent over/underexposure.

Taking Pictures with Wireless Flashes

Controlling multiple flashes wirelessly for advanced lighting setups.

7. Recording Motion Pictures

Recording Motion Picture/4K Motion Picture

Capturing high-definition and 4K video with stereo audio recording.

Recording still pictures while recording motion pictures

Simultaneously capturing still images while recording video for dynamic shooting.

Setting the format, size and recording frame rate

Configuring video settings like format, resolution, and frame rate for desired output.

How to set focus when recording a motion picture ([Continuous AF])

Ensuring sharp focus during video recording using continuous autofocus modes.

Recording Motion Pictures that Pan and Zoom While Maintaining a Fixed Camera Position ([4K Live Cropping])

Creating dynamic panning and zooming effects from 4K footage while keeping the camera static.

8. Playing Back and Editing Images

Playing Back Pictures

Viewing still images captured by the camera, with options for forward/rewind.

Playing Back Motion Pictures

Viewing recorded video files on the camera's screen or via connected devices.

Creating Still Pictures from a Motion Picture

Extracting high-quality still images from recorded motion picture footage.

Deleting Pictures

Removing unwanted still or motion pictures from the camera's memory card.

9. Using Menu Functions

[Photo Style]

Selecting pre-defined or custom image styles to control color, contrast, and sharpness.

Adjusting the picture quality

Fine-tuning image quality parameters like contrast, sharpness, and saturation.

[Filter Settings]

Applying creative image effects or filters to enhance photographs.

[HDR]

Combining multiple exposures into a single image with a wider dynamic range to capture detail in highlights and shadows.

[Face Recog.]

Automatically detecting and prioritizing faces for optimal focus and exposure.

Face Settings

Registering personal information like names and birthdays for face recognition.

[Cust.Set Mem.]

Saving and recalling custom camera settings for quick access.

[Silent Mode]

Disabling operational sounds and flash for discreet shooting.

[AF/AE Lock]

Locking focus and exposure settings to maintain composition and lighting.

[Wi-Fi]

Configuration and management of the camera's Wi-Fi functionality.

[Wi-Fi Function]

Activating and configuring the camera's Wi-Fi connection.

[Wi-Fi Setup]

Setting up Wi-Fi parameters like password, network, and device name.

[4K PHOTO Bulk Saving]

Saving multiple still images from a 4K burst file simultaneously.

[Light Composition]

Combining multiple frames from 4K burst files to create images with enhanced brightness.

[Clear Retouch]

Removing unwanted objects or details from images using touch controls.

10. Using the Wi-Fi function

What you can do with the Wi-Fi® function

Overview of capabilities enabled by the camera's Wi-Fi connectivity.

Displaying pictures on a TV

Viewing camera images and videos on a compatible TV via Wi-Fi or HDMI.

Printing Wirelessly

Sending images directly to a PictBridge-compatible printer for wireless printing.

Sending images to PC

Transferring images and videos from the camera to a personal computer.

Using Web services

Uploading images and videos to social media or cloud storage services.

Connecting to a smartphone/tablet

Establishing a wireless connection between the camera and a smartphone or tablet.

Connecting without using the password

Setting up a direct camera-to-smartphone connection without needing a password.

Using a password to set up a connection

Securing the Wi-Fi connection by using a password or QR code.

Taking images via a smartphone/tablet (remote recording)

Remotely controlling the camera and capturing images using a smartphone or tablet.

11. Connecting to other equipment

Watching 4K motion pictures on a TV/ Saving 4K motion pictures on your PC or recorder

Viewing and saving high-resolution 4K videos on external devices.

Saving still pictures and motion pictures on your PC

Transferring images and videos from the camera to a computer for storage and editing.

Downloading software

Obtaining and installing necessary software for managing camera files on a PC.

12. Others

Message Display

Explains common confirmation and error messages displayed by the camera.

Troubleshooting

Guidance on diagnosing and resolving common camera operational problems.

Cautions for Use

Important safety and handling guidelines to ensure proper and safe camera operation.

Battery

Information about the camera's rechargeable battery, its care, and disposal.

Wi-Fi function

General information and tips for using the camera's Wi-Fi capabilities effectively and securely.

Related product manuals