Do you have a question about the Panasonic LUMIX DMC-GM1 and is the answer not in the manual?
Navigate information via the main table of contents for quick topic access.
Identify camera parts and their functions for operational understanding.
Browse and locate settings via the camera's menu structure.
Resolve operational issues and common problems with the camera.
Understand symbols indicating modes available for camera functions.
Learn the meaning of icons and symbols used throughout the manual.
Guidelines for maintaining the camera's condition and preventing damage.
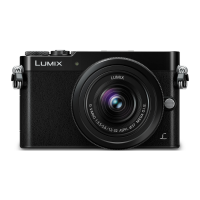
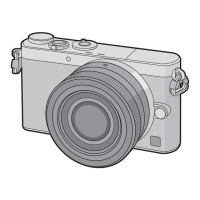
Detailed identification and explanation of camera body parts and controls.
Information regarding compatible lenses and their specific features or limitations.
Instructions for charging the camera battery using the provided charger.
Guide on how to properly insert and remove memory cards and the battery.
Process for preparing a memory card for use in the camera, erasing all data.
Overview of accessing and navigating the camera's menu system for settings.
Customization of camera buttons to assign specific functions for faster access.
Step-by-step guide on capturing still photographs using the camera.
Instructions for recording video clips with the camera.
How to choose different shooting modes like Auto, Manual, and Scene modes.
Procedures for viewing recorded photos and videos on the camera's screen.
How to remove unwanted photos and videos from the memory card.
Using the camera's automatic settings for effortless shooting in various scenes.
Manual control over aperture and shutter speed for precise exposure and depth of field.
Full manual control over exposure settings including aperture, shutter speed, and ISO.
Selecting scene modes that automatically optimize settings for specific environments.
Applying artistic filters and effects to images during shooting for creative expression.
Applying preset styles like Vivid, Natural, or Monochrome to alter image appearance.
Correcting color casts caused by different light sources to ensure accurate white balance.
Configuring image resolution, aspect ratio, and file size for optimal storage and display.
Capturing and merging multiple exposures to create images with a wider dynamic range.
Utilizing the camera's autofocus system for sharp and clear images automatically.
Precisely controlling focus manually for creative depth-of-field effects or challenging shots.
Locking focus and exposure settings on a subject to recompose the shot without losing settings.
Adjusting the overall brightness of the image to correct for under or overexposure.
Adjusting ISO sensitivity to control image brightness, especially in low-light conditions.
Choosing how the camera measures light for exposure calculation (e.g., Spot, Center-weighted).
Selecting between electronic front curtain and electronic shutter for different shooting scenarios.
Choosing shooting modes like single shot, burst, auto bracket, or self-timer.
Capturing a rapid sequence of photos by holding down the shutter button.
Using the self-timer to take photos without camera shake or to include the photographer.
Capturing images at predetermined intervals to create time-lapse videos.
Producing stop-motion animation by capturing sequential frames of moving objects.
Overlaying multiple images onto a single frame for creative multi-exposure effects.
Activating silent mode to mute camera sounds and lights for discreet shooting.
Registering faces to prioritize focus and exposure for recognized individuals.
Activating the O.I.S. system to reduce camera shake and produce sharper images.
Using the zoom function to frame subjects from wide-angle landscapes to telephoto close-ups.
Operating the built-in flash for illumination in various lighting conditions.
Selecting different flash modes like Auto, Forced On, Slow Sync, or Red-Eye Reduction.
Fine-tuning the intensity of the flash output for optimal lighting.
Basic steps for starting and stopping video recording.
Configuring autofocus behavior for continuous focus tracking during video recording.
Capturing still photos during video recording for simultaneous capture.
Selecting video formats (AVCHD, MP4), resolution, and frame rates for motion pictures.
Viewing pictures organized into groups, such as burst shots or time-lapse sequences.
Extracting individual still frames from recorded motion pictures.
Accessing playback functions like slide shows, protection, and editing tools.
Erasing unwanted objects or imperfections from pictures directly on the camera.
Adjusting the composition of images by trimming unwanted areas.
Safeguarding important pictures from accidental deletion.
Overview of the camera's wireless capabilities and their applications.
Using a smartphone or tablet to remotely control the camera and capture images.
Establishing a wireless connection between the camera and a mobile device.
Transferring images from the camera's internal memory to a connected device.
Sending images to a mobile device by remotely controlling the camera.
Streaming photos and videos from the camera to a television screen wirelessly.
Sending images to a compatible printer for wireless printing.
Transferring photos and videos from the camera to a personal computer via Wi-Fi.
Creating and managing a LUMIX CLUB account for enhanced connectivity and services.
Configuring various Wi-Fi settings, including network connections and device names.
Setting a password to secure the camera's Wi-Fi function and protect personal information.
Instructions for capturing and viewing 3D images using an optional 3D lens.
Connecting the camera to a TV for viewing photos and videos on a larger display.
Transferring images and videos from the camera to a PC for storage and management.
Information about included software for managing and editing camera content.
Step-by-step process for connecting the camera to a PC via USB for image transfer.
Information about available accessories like hand grips, AC adapters, and filters.
Understanding the information displayed on the camera's monitor screen during various operations.
Explanations of common messages and error codes displayed by the camera.
Solutions for common problems and issues encountered while using the camera.
Important safety warnings and precautions for optimal and safe camera operation.
Instructions for cleaning the camera body, lens, and image sensor.
Information about the rechargeable battery, its care, and disposal.
Handling and care instructions for memory cards, including formatting and transfer procedures.
| Filter size | 37 mm |
|---|---|
| Digital zoom | 4 x |
| Optical zoom | - x |
| Extra/Smart zoom | 2.4 x |
| Focal length range | 12 - 32 mm |
| Lens mount interface | Micro Four Thirds (MFT) |
| Maximum aperture number | 5.6 |
| Minimum aperture number | 3.5 |
| Number of diaphragm blades | 7 |
| Number of aspheric elements | 3 |
| Lens structure (elements/groups) | 8/7 |
| Maximum focal length (35mm film equiv) | 64 mm |
| Minimum focal length (35mm film equiv) | 24 mm |
| Megapixel | 16 MP |
| Camera type | MILC |
| Sensor type | Live MOS |
| Image stabilizer | Yes |
| Total megapixels | 16.84 MP |
| Image sensor size | - \ |
| Image formats supported | JPG, MPO, RAW |
| Supported aspect ratios | 1:1, 3:2, 4:3, 16:9 |
| Image sensor size (W x H) | 17.3 x 13 mm |
| Image stabilizer location | Lens |
| Still image resolution(s) | 4592 x 3448 3232 x 2424 2272 x 1704 1824 x 1368 4592 x 3064 3232 x 2160 2272 x 1520 1824 x 1216 4592 x 2584 3232 x 1824 1920 x 1080 1824 x 1024 3424 x 3424 2416 x 2416 1712 x 1712 |
| Internal memory | - MB |
| Compatible memory cards | SD, SDHC, SDXC |
| Wi-Fi standards | 802.11b, 802.11g, Wi-Fi 4 (802.11n) |
| Near Field Communication (NFC) | No |
| Focus | TTL |
| Focus adjustment | Auto/Manual |
| Auto focusing (AF) modes | Continuous Auto Focus, Flexible Spot Auto Focus, Single Auto Focus |
| Closest focusing distance | 0.2 m |
| Light metering | Centre-weighted, Evaluative (Multi-pattern), Spot |
| ISO sensitivity | 125, 200, 400, 800, 1600, 3200, 6400, 12800, 25600 |
| Light exposure modes | Aperture priority AE, Manual, Shutter priority AE |
| ISO sensitivity (max) | 25600 |
| ISO sensitivity (min) | 125 |
| Light exposure control | Program AE |
| Light exposure correction | ± 5EV (1/3EV step) |
| Camera shutter type | Electronic |
| Fastest camera shutter speed | 1/16000 s |
| Slowest camera shutter speed | 60 s |
| Flash modes | Auto, Forced off, Forced on, Red-eye reduction, Slow synchronization |
| Flash sync-speed | 0.02 s |
| Flash range (wide) | - m |
| Video resolutions | 640 x 480, 1280 x 720, 1920 x 1080 pixels |
| Motion JPEG frame rate | 30 fps |
| Video formats supported | AVCHD, MP4 |
| Maximum video resolution | 1920 x 1080 pixels |
| Analog signal format system | NTSC, PAL |
| Resolution at capture speed | 640x480@30fps, 1280x720@30fps, 1920x1080@30fps |
| Audio system | stereo |
| Audio formats supported | AAC |
| Field of view | 100 % |
| Display diagonal | 3 \ |
| Display aspect ratio | 3:2 |
| Vari-angle LCD display | - |
| Display resolution (numeric) | 1036000 pixels |
| USB version | 2.0 |
| HDMI connector type | Micro |
| Scene modes | Children, Night landscape, Party (indoor), Portrait, Sunset |
| Photo effects | Black&White, Skin tones, Vivid |
| White balance | Auto, Cloudy, Daylight, Flash, Incandescent, Shade |
| Camera playback | Movie, Single image, Slide show, Thumbnails |
| Self-timer delay | 2, 10 s |
| Camera file system | DCF, Exif 2.3, RAW |
| On Screen Display (OSD) languages | ENG, ESP |
| Power source type | Battery |
| Battery type | H-H020A |
| Battery voltage | 7.2 V |
| Battery capacity | 680 mAh |
| Battery life (CIPA standard) | 220 shots |
| Number of batteries supported | 1 |
| Product color | Blue |
| Operating temperature (T-T) | 0 - 40 °C |
| Operating relative humidity (H-H) | 10 - 80 % |
| Bundled software | PHOTOfunSTUDIO 9.2 AE |
| Depth | 30.4 mm |
|---|---|
| Width | 98.5 mm |
| Height | 54.9 mm |
| Weight | 173 g |
| Lens weight | 70 g |
| Lens diameter | 55.5 mm |
| Weight (including battery) | 204 g |

 Loading...