Do you have a question about the Panasonic Lumix DMC-G1 and is the answer not in the manual?
TO REDUCE THE RISK OF FIRE, ELECTRIC SHOCK OR PRODUCT DAMAGE, DO NOT EXPOSE THIS APPARATUS TO RAIN, MOISTURE...
Danger of explosion if battery is incorrectly replaced. Dispose of used batteries according to manufacturer’s instructions.
Check that all the accessories are included before using the camera.
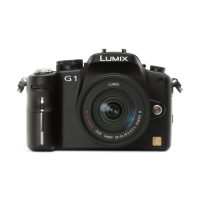
Lists components like Flash, Sensor, AF assist lamp, Lens release button, Mount, etc.
Details components of the H-FS014045 lens: Lens surface, Focus ring, Zoom ring, O.I.S. switch.
Align the lens fitting marks and rotate the lens until it clicks.
Press the lens release button while turning the lens to detach it.
Connect the AC cable, attach the battery, and wait for the charge indicator.
Battery becomes warm after use. Battery life may shorten with frequent charging.
Push it fully until it clicks being careful about the direction you insert it.
Push the card until it clicks, then pull the card out upright.
Turn on camera, press MENU/SET, select items and press MENU/SET to set.
Press [Q.MENU] to display quick menu, select item and setting.
Set the time in your home area and travel destination.
Assign [REC] mode menu or [CUSTOM MENU] menu to button.
Set the length of time that the picture is displayed after taking it.
Irretrievably deletes all data. Check data carefully before formatting.
Automatically switches between viewfinder and LCD monitor based on eye proximity.
Adjust the diopter to suit your vision so you can see the Viewfinder clearly.
Intelligent Auto Mode and Program AE Mode.
Portrait, Scenery, Sports, Close-up, Night portrait modes.
Scene detection, Face detection, Intelligent ISO sensitivity control are activated automatically.
Press shutter button halfway to focus. Focus indication (green) lights when focused.
Set mode dial to P, focus mode dial to AFS or AFC.
Focus is fixed when you press the shutter button halfway.
Use [STABILIZER], tripod, self-timer, or remote shutter.
Change preset aperture/shutter speed without changing exposure.
Optical zoom, Extended optical zoom (EZ), and Digital zoom.
Press playback button, use cursor buttons to select picture.
Press [DISPLAY] to switch between Normal, Detailed, Histogram, Highlight, No display.
Rotate front dial left to display calendar, select date to play back pictures.
Select picture, press [ ], select YES, then press [MENU/SET].
Select [DELETE MULTI] or [DELETE ALL], select pictures to delete.
Automatically switches between viewfinder and LCD monitor based on eye proximity.
Adjust the diopter to suit your vision so you can see the Viewfinder clearly.
Select [FLASH] in [REC] mode menu to set AUTO, Red-eye, Forced ON, Slow sync.
Aim camera at white paper, fill center frame, press [MENU/SET].
Set color temperature manually in Kelvin (2500K to 10000K).
Set ISO sensitivity (AUTO, Intelligent ISO, or manual values 100-3200).
Select from 9 types of film modes (STANDARD, DYNAMIC, NATURE, etc.).
Set aperture value, shutter speed is determined automatically.
Set shutter speed, aperture value is determined automatically.
Set aperture value and shutter speed manually for full exposure control.
Check depth of field by closing leaf shutter to aperture value.
Set mode dial, select advanced scene mode, press [MENU/SET].
Normal, Soft Skin, Outdoor Portrait, Indoor Portrait, Creative Portrait.
Set mode dial to Scene, select mode, press [MENU/SET].
Takes pictures of babies with healthy complexion, sets birthdays for age display.
Adjust color, brightness, or saturation before taking a picture.
Register up to 3 sets of current camera settings as custom sets.
Select aspect ratio (4:3, 3:2, 16:9) for printing or playback.
Compensates jitter during picture taking for blur-free images.
Adjust flash output for small subjects or high/low reflectivity.
Adjusts contrast/exposure for big brightness differences between background/subject.
Play back pictures on TV screen, skip unwanted pictures if [FAVORITE] set.
Mark pictures as favorites for slide shows or deletion of others.
Set protection for pictures to prevent accidental deletion.
Use USB connection cable to acquire pictures to PC.
Select picture, set print options, and start printing.
Connect camera to HDMI compatible TV using HDMI mini cable for high quality.
Connect remote shutter to [REMOTE] socket, press button to take picture.
Connect AC cable and DC cable for camera operation without battery.
Information displayed in Program AE mode (LCD monitor style & Finder style).
Camera won't operate, LCD turns off, camera turns off immediately, CHARGE lamp flashes.
Picture not recorded, shutter not active, whitish picture, too bright/dark, blurred picture.
Flash not activated, flash activated twice, noise on picture.
Power Source, Consumption, Pixels, Image Sensor, Zoom, Focus, Shutter.
Flash range, sync speed, recording media, picture size, quality, interface, terminals.
List of available accessories like batteries, lenses, cables, filters, and memory cards.
Contact information for product information, service centers, and parts.
| Megapixel | 13.1 MP |
|---|---|
| Camera type | Compact camera |
| Sensor type | CMOS |
| Image stabilizer | Yes |
| Supported aspect ratios | 4:3 |
| Maximum image resolution | 4000 x 3000 pixels |
| Filter size | 52 mm |
| Digital zoom | - x |
| Focal length range | 14 - 45 mm |
| Number of diaphragm blades | 7 |
| Lens structure (elements/groups) | 12/9 |
| Interface | USB 2.0, Mini HDMI Type C (1.3b) |
| Digital SLR | No |
| Camera shutter speed | 1/4000 - 60 s |
| Effective sensor resolution | 12100000 pixels |
| Focal length (35mm film equivalent) | 28 - 90 mm |
| Auto focusing (AF) modes | multi point auto focus, single auto focus |
| Closest focusing distance | 0.30 m |
| Compatible memory cards | mmc, sd |
| Display diagonal | 3 \ |
| Display resolution (numeric) | 460000 pixels |
| Magnification | 1.4x / 0.7x x |
| Viewfinder type | Optical |
| USB version | 2.0 |
| Scene modes | Children, Night portrait, party (indoor), Portrait, Sports, Sunset, Landscape (scenery) |
| Image editing | resizing, rotating, trimming |
| White balance | auto, Cloudy, daylight, flash, Shade |
| Camera playback | single image, slide show |
| Self-timer delay | 2 s |
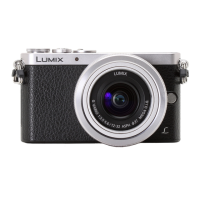
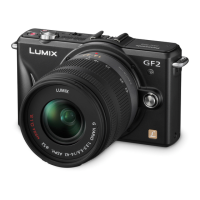
| Product color | Black |
| Battery capacity | 1250 mAh |
| Battery life (CIPA standard) | 330 shots |
| Bundled software | PHOTOfunSTUDIO -viewer- 2.1 E / SILKYPIX Developer Studio 3.0 SE / USB Driver |
| Operating temperature (T-T) | 0 - 40 °C |
| Operating relative humidity (H-H) | 10 - 80 % |
| Flash modes | auto, Flash off, Red-eye reduction, Slow synchronization |
| Light metering | Centre-weighted, Spot |
| Light exposure modes | aperture priority AE, auto, manual, shutter priority AE |
| Depth | 45.2 mm |
|---|---|
| Width | 124 mm |
| Height | 83.6 mm |
| Weight | 385 g |