ENGLISH-11
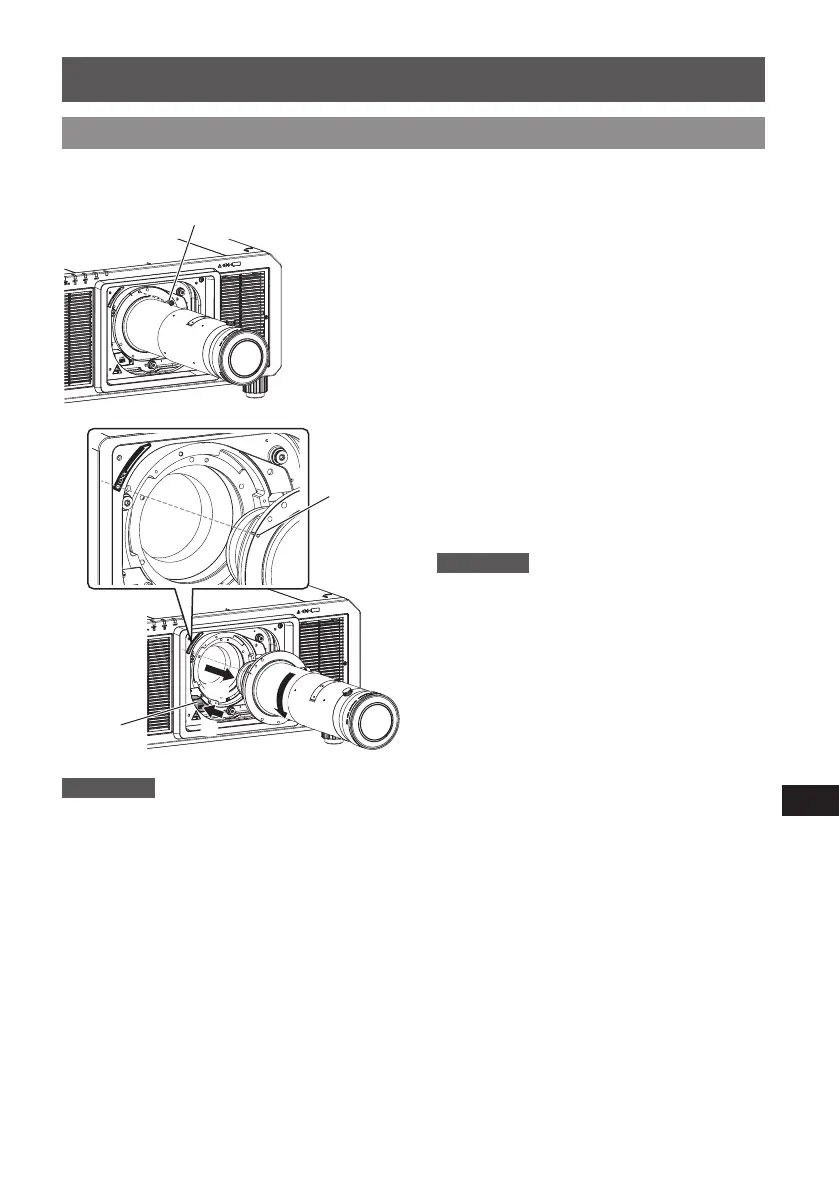
Detaching the Lens
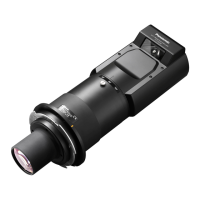
The illustrations in this procedure depict use of the
PT-RZ21K as an example.
1) Remove the lens drop prevention
screw.
z
Use a Phillips screwdriver to remove the
screw in rst hole to the right of the marker
(orange) on the sheye lens.
2) While pressing the lens release
button, turn the sheye lens
counterclockwise, and remove it.
z
Turn the sheye lens counterclockwise until
its marker (orange) aligns with the marker on
the projector (○ to the left of "LOCK").
Attention
z
Store the removed sheye lens safely without
subjecting it to vibration or impact.
z
Store the removed lens drop prevention screw
safely for future use.
z
Attach the supplied lens cover before storing the
lens.
Lens drop prevention screw
Orange color
Lens
release
button
(
ii
)(
ii
)
(
iii
)(
iii
)
(
i
)(
i
)
Attention
z
For projectors that have a projection lens cover, remove it rst. In addition, there are cases where the
attachment method or removal method of the projection lens cover differs from the procedure (illustration)
described above depending on the model being used. For details, see "Attaching/removing the projection lens
(optional)” in the operating instructions for the projector you are using.
Attaching the Lens / Detaching the Lens (continued)