6-ENGLISH
Attaching the Lens / Detaching the Lens (continued)
Attention
z
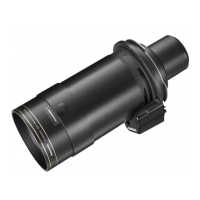
Turn the projection lens counterclockwise, and verify that it is secure.
z
Store the removed lens hole cover safely for future use.
z
After attaching the projection lens, turn on the projector and perform lens calibration.
(
page 8)
4)
Use the lens drop prevention
screw supplied with the
projector to secure the
projection lens.
z
Use a Phillips screwdriver to secure
the screw in hole A to the right of the
marker (orange) on the projection
lens.
目印(オレンジ色)
ねじ穴 A
レンズ落下防止ねじ
Marker (orange)
Screw
hole A
Lens drop prevention screw
3)
(i) Insert the projection lens
while aligning its marker
(orange) with the marker on
the projector (
to the left
of “LOCK”), and (ii) turn it
clockwise until it clicks into
place.
 Loading...
