Do you have a question about the Panasonic F-P15HU2 and is the answer not in the manual?
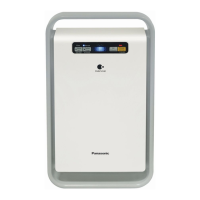
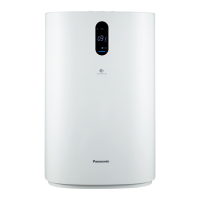
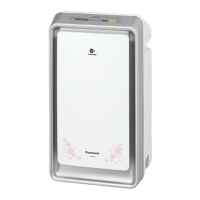
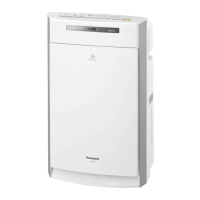
Overview of the control panel, speed lamps, auto lamp, and air quality indicator bar.
Details on what the micro dust sensor detects and its operational notes.
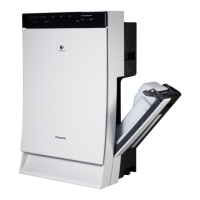
Step-by-step guide to install the filter unit and air intake grille.
Instructions for plugging in the unit and setting HEPA/Deodorize filter reset switches.
Explanation of the six-position power/speed switch and operation modes.
How to operate the unit manually or in automatic mode based on air quality.
Instructions for wiping the main unit with a damp cloth and drying it.
Procedures for removing and cleaning the air intake grille and the filter unit.
General timetable for replacing HEPA and Deodorizing filters based on usage and indicator lamps.
Steps for replacing filters and resetting the corresponding switches.
How to clean the filter frame, with notes on handling the sealing material.
Detailed steps for cleaning the micro dust sensor's lenses using the provided cleaning pad.
Key technical data including power, air speed levels, consumption, dimensions, and weight.
Information on part numbers for HEPA and Deodorizing filters and how to order them.
This document provides operating instructions for the Panasonic Air Purifier, specifically models F-P15HU2 and F-P20HU1. It covers safety precautions, parts identification, functions of the micro dust sensor, how to operate the unit, and care and maintenance procedures, including troubleshooting.
The Panasonic Air Purifier is designed to improve indoor air quality by filtering out airborne particulates and odors. It features a multi-stage filtration system that includes a HEPA filter and a deodorizing filter. The unit is equipped with a micro dust sensor that detects the level of airborne particulates and adjusts the fan speed automatically in "Auto" mode to maintain optimal air quality.
The air purifier operates by drawing in room air through the air intake grille, passing it through the filter unit, and then expelling cleaned air through the air outlet grille. The micro dust sensor continuously monitors the air quality, providing real-time feedback through an illuminated air quality indicator bar. This bar changes color from green to red, with increasing red illumination indicating higher levels of particulates.
The micro dust sensor is capable of detecting various airborne particles such as tobacco smoke, pollen, oil mist, drops, and general dust. However, it does not detect alcohol or gases. The sensor's operation can be influenced by airflow in the room, proximity to humidifiers or sources of soot, or dusty outdoor air entering the room, which might cause the indicator bar to remain red continuously. It primarily detects airborne particles; dust that has settled on surfaces may not be detected unless disturbed. Aerosol sprays like air fresheners or furniture polish can also be detected by the sensor, causing the indicator bar to turn red until the air clears.
The unit offers multiple fan speed settings: Low, Med, Hi, and Super, in addition to an "Auto" mode. In "Auto" mode, the unit automatically selects the appropriate fan speed (Low, Med, Hi) based on the air quality detected by the micro dust sensor. The "Super" speed is not used in "Auto" mode. There is also a "Monitor" position, which displays the current air speed and mode.
Before first use, the filter unit must be installed. This involves removing the air intake grille, taking out the plastic sheet covering the filter unit, reinstalling the filter unit with the "Front" indication facing up, and then reattaching the air intake grille. The unit has holding tabs on the air intake grille for easy removal and reinstallation.
Once the filter unit is installed, the power plug can be inserted into an electrical outlet. The unit is energized as long as it is plugged in, and the air quality indicator bar will be illuminated. To completely turn off the unit, it must be unplugged. The appliance uses a polarized plug, designed to fit into a polarized outlet in one specific way to reduce the risk of electric shock.
After installation and plugging in, the "HEPA" and "Deodorize" filter reset switches should be pressed using a small, narrow-tipped object. This action initiates an internal electronic counter that tracks the usage time of both filters. A beep sound confirms each switch press. The red indicator lamps for "HEPA" and "Deodorize" will illuminate when it's time to replace the respective filters, typically around 3 years for the HEPA filter and 1 year for the deodorizing filter, though actual timing may vary based on usage.
The operation mode and fan speed are controlled by a six-position Power/Speed switch. Each press of this switch cycles through the operation modes: Low, Med, Hi, Super, Auto, and Monitor. An operation indicator lamp illuminates to show the selected mode. For manual operation, users can select their desired air speed (Low, Med, Hi, or Super). For automatic operation, selecting "Auto" mode allows the unit to detect air quality and automatically adjust the fan speed.
The air purifier should not be used in place of a fan or kitchen range hood, as this can significantly diminish filter life and potentially damage the product. It is also advised against using the unit in places exposed to high temperature, humidity, or wet areas like bathrooms, as this could lead to electric leakage, shock, or fire. Greasy or oily environments, such as kitchens, should also be avoided to prevent premature clogging of the filter unit. The unit should not be used near open flames or flammable materials to prevent ignition. Foreign objects like pins or wires should not be inserted into the air intake or outlet grilles or any gaps. Harsh chemicals like benzine or thinner, or insecticides, should not come into contact with the unit. When unplugging, always grasp the power plug, not the cord, to prevent damage and potential hazards. This unit is designed for placement on a firm surface and is not intended for wall mounting.
Regular care and maintenance are crucial for optimal performance and longevity of the air purifier. Before any maintenance, the power plug must be unplugged to prevent accidental operation and potential injury or electric shock. Benzine or thinner should not be used for cleaning, as they can damage the unit.
The main unit should be cleaned by dampening a soft cloth with lukewarm water or a diluted neutral kitchen detergent, wringing it out, wiping off any stains, and then drying with another soft cloth.
The HEPA filter and deodorizing filter can be replaced separately. Filters should be changed when the filter check lamp's red light illuminates (approximately 3 years for the HEPA filter and 1 year for the deodorizing filter, depending on usage), or if odors are not quickly removed, cigarette smoke persists, or the operating sound becomes louder than normal. Even when the lamp is on, the unit will continue to operate. New filters can be purchased through a local dealer or parts distributor using specific part numbers. After replacing a filter, the corresponding reset switch ("HEPA" or "Deodorize") must be pressed while the unit is plugged in, which will be confirmed by a beep sound.
The filter frame can be cleaned by wringing out a soft cloth dampened with lukewarm water or a diluted neutral detergent, wiping off any stains, and drying with another cloth. Care should be taken not to rub the label too hard or scrub the black sealing material on the filter frame, as this can cause damage and loss of performance.
If dust accumulates on the micro dust sensor, the air quality monitor may not display correctly. Frequent maintenance is recommended, even during the first year of use, depending on the environment.
The manual includes a troubleshooting guide to address common issues such as the product not operating, no air coming out, abnormal operating sounds, continuous operation in AUTO mode, odors not being removed, smoke not being removed, the product not activating despite high dust levels, or the air quality indicator bar remaining green. Each symptom is linked to a check point and the relevant page in the manual for resolution. For example, if the product does not operate, check if the power plug is disconnected or if the plastic sheet has been removed from the filter unit. If odors are not removed, clean the main unit or air intake grille, or replace the deodorizing filter. If the micro dust sensor is dirty, clean it with the cleaning pad.
| Model | F-P15HU2 |
|---|---|
| Type | Air Purifier |
| Filter Type | HEPA |
| Coverage Area | 13 sq ft |
| Dimensions | 280 x 160 x 360 mm |