STEP 3
STEP 5
STEP 6
English
9
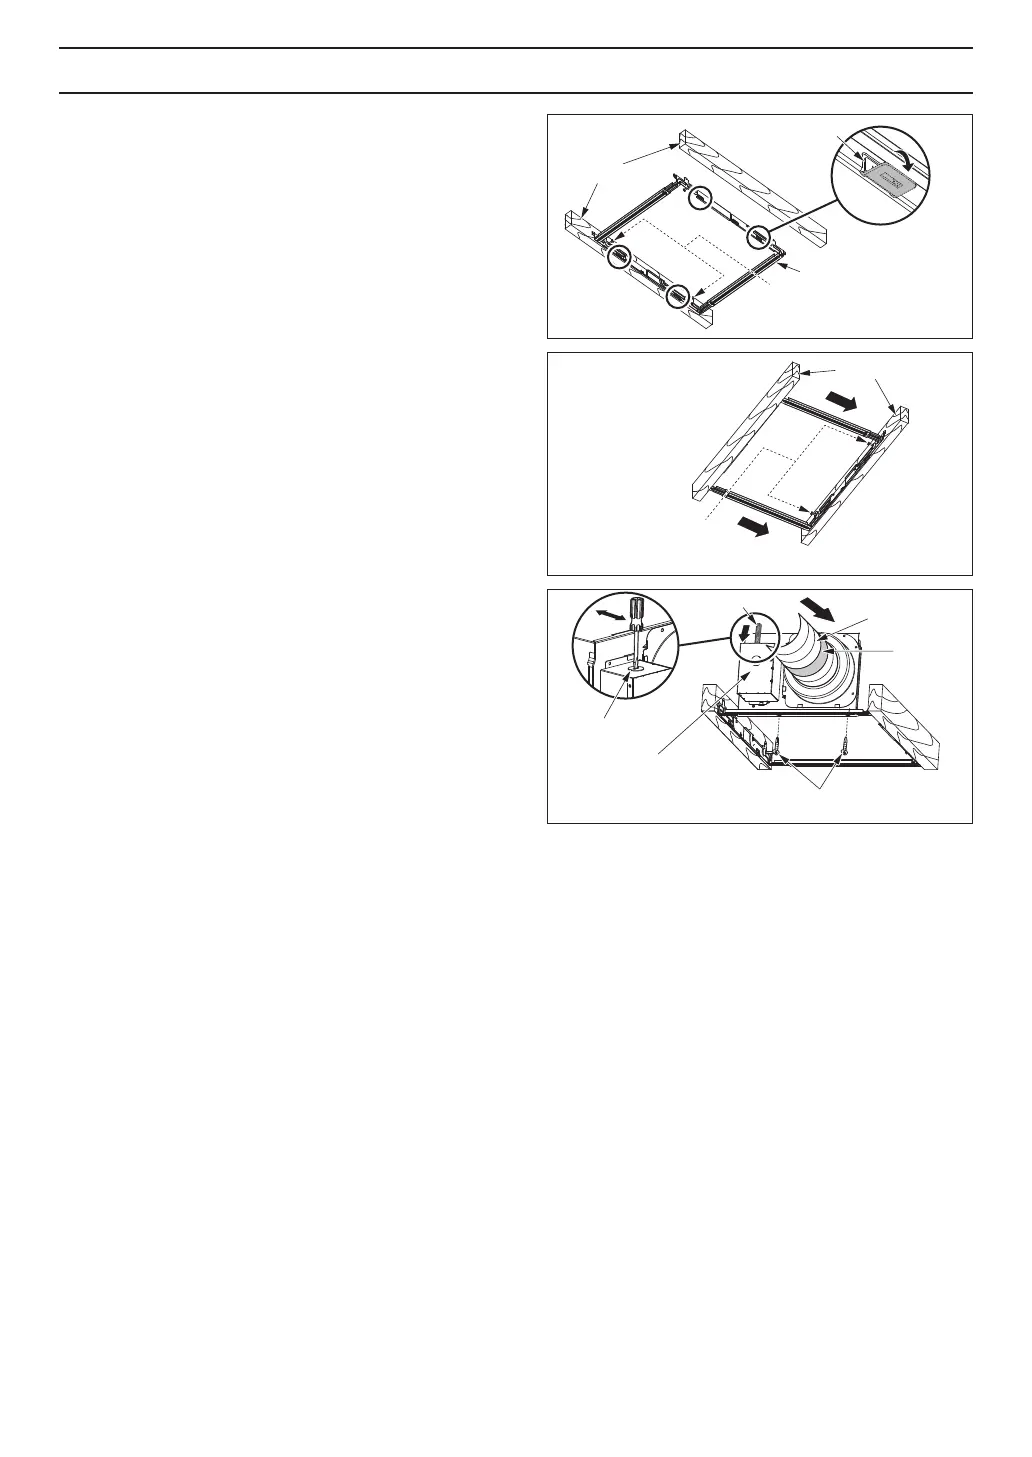
STEP 2
Bend down 4 tabs for positioning, install the
Flex-Z Fast™ bracket to joists by drilling 2
tapping screws (pre-fixed on the Flex-Z Fast™
bracket). (Fig.2)
Adjust the length of the Flex-Z Fast™ bracket
to the spacing between joists, and install to
joists with the other 2 tapping screws (pre-fixed
on the Flex-Z Fast™ bracket). (Fig.3)
STEP 4
Remove junction box cover and secure conduit
or stress relief to junction box knock-out hole.
(Fig.4)
Install the adaptor to the Flex-Z Fast™ bracket
by using 2 self-drilling screws. (Fig.4)
Install a duct and secure it with clamps or ties.
Seal it with mastic or approved foil tape.
A 4 or 6 inch circular duct is needed to connect
to relevant part of adaptor. (Fig.4)
Fig.2
Fig.3
2 Tapping screws
(ST4.2X20)
Flex-Z Fast™
bracket
2 Tapping screws
(ST4.2X20)
Bend down 4 tabs
Joist
Joist
Fig.4
2 Self-drilling screws
Junction box
cover
Circular duct
Conduit
Mastic or
approved
foil tape
Knock-out
hole
INSTALLATION
(
NEW CONSTRUCTION
)
CONTINUED
 Loading...