EasyManua.ls Logo

Panasonic FV-08VQL6 User Manual

Panasonic FV-08VQL6
12 pages
To Next Page IconTo Next Page
Page #1 background imageLoading...
Page #1 background image
Back cover
Back cover
Back cover
Thank you for purchasing this Panasonic product.
2-3
11
6-8
5
5
FV-08VQL6 FV-11VQL6
FV-15VQL6
FV-08VQL6 FV-11VQL6
FV-15VQL6
Question and Answer IconNeed help?

Do you have a question about the Panasonic FV-08VQL6 and is the answer not in the manual?

Panasonic FV-08VQL6 Specifications

General IconGeneral
BrandPanasonic
ModelFV-08VQL6
CategoryFan
LanguageEnglish

Summary

Read and Save These Instructions

General Safety Information

Key Safety Precautions

Lists critical safety measures to prevent fire, electric shock, and injury.

General Safety Information Continued

Grounding Requirement

Mandates proper grounding of the product for electrical safety.

Voltage and Frequency Specification

Specifies required electrical supply as AC 120V, 60Hz.

Compliance with Codes and Standards

Instructs to follow all electrical and safety codes, including NEC and OSHA.

Power Disconnection for Maintenance

Requires disconnecting power before any work on the unit.

Wiring Diagram

Installation I: Joist Mounting (Part 1)

Installation I: Joist Mounting (Part 1) Continued

Step 4: Duct Installation

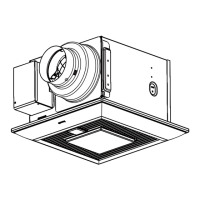
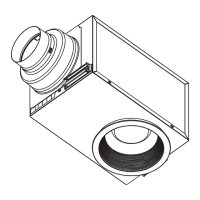
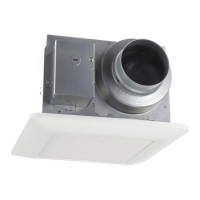
Instructions for installing and securing a 4 or 6-inch circular duct.

Step 5: Junction Box Connection

How to secure conduit or stress relief to the junction box knock-out hole.

Step 6: Electrical Wiring

Instructions for connecting house power wires to fan wires using approved wire nuts.

Step 7: Ceiling Hole Alignment

Ensuring the ceiling hole is aligned with the fan flange edge.

Installation II: Suspension Brackets Mounting

Step 2: Attaching Suspension Brackets

How to attach suspension brackets I, II, III, or IV to the fan body/adaptor.

Suspension Bracket Connection Method

Details on connecting suspension brackets I and II using screw I.

Step 3: Securing Brackets to Joists

How to install suspension brackets and frame flange to joists.

Installation III: Joist Mounting (Part 2)

Step 1: Aligning with Joists

Instructions for joist spacing of 10.5-11.5 inches.

Maintenance I: Cleaning

Warning: Power Disconnection

Requires disconnecting power source before performing any maintenance.

Maintenance II: Replacement of Lamp

Warning: Lamp Handling and Cooling

Highlights fragility of lamps, threaded base of night lamp, and cooling requirements.

Product Service

Warning Concerning Removal of Covers

Emphasizes that the unit should only be serviced by qualified technicians.

Service Contact Information

Provides contact numbers for service and parts inquiries in USA and Canada.

Related product manuals