Do you have a question about the Panasonic FV-NLF46RES and is the answer not in the manual?
Explains hazard symbols and provides critical safety warnings for installation and operation.
Details safety guidelines regarding temperature limits, voltage, wiring, ventilation, and prohibited uses.
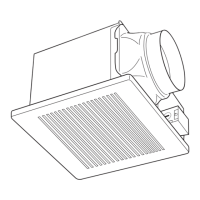
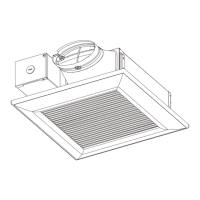
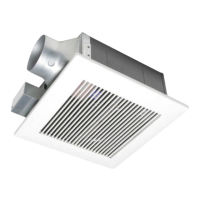
Describes the luminaire's design, features, LED lamp compatibility, and FCC compliance.
Guides on unpacking the unit and verifying all included accessories and parts.
Provides detailed measurements of the luminaire for installation planning.
Illustrates the correct electrical wiring connections for the luminaire.
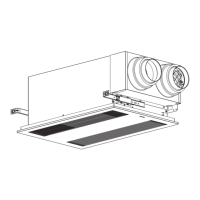
Step-by-step instructions for installing the luminaire between ceiling joists using suspension brackets.
Details connecting ventilation ducts and finishing the ceiling around the luminaire.
Instructions for routine cleaning and safe replacement of the LED lamp.
Lists model details, electrical requirements, power consumption, and weight.
Information on obtaining service, parts, and customer support.
This document provides comprehensive installation and maintenance instructions for the Panasonic Recessed Luminaire, Model No. FV-NLF46RES. This product is designed for recessed lighting applications and includes features for both lighting and, optionally, air exhaust.
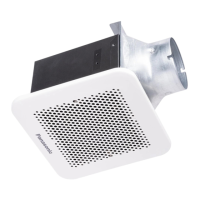
The Panasonic Recessed Luminaire FV-NLF46RES is a lighting device primarily designed for recessed installation in ceilings. It utilizes an 11W BR30 shape LED lamp (model: 11BR30G4DIM/927/GU24 from Green Creative), which provides illumination comparable to a standard 65W incandescent lamp. The luminaire is listed by UL under file No. E484859, ensuring compliance with safety standards.
A key feature of this model is its versatility in installation. It can be used solely as a downlight for general lighting purposes. Alternatively, when equipped with a damper and adaptor, it can function in conjunction with a Panasonic product that has a ventilation function, allowing for air exhaust. This dual functionality makes it suitable for various room types, though it is explicitly stated not to be used in cooking areas or for exhausting hazardous or explosive materials and vapors. The unit is designed for air exhaust only, not air supply, to prevent electric shock.
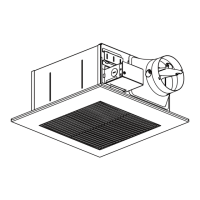
The luminaire incorporates a spring-loaded, quick-remove trim ring for ease of installation and maintenance. A damper is provided to prevent air counterflow when the ventilation function is utilized. The design includes provisions for secure mounting between joists, accommodating various joist spacings.
The luminaire is designed for use with an AC 120V, 60Hz electrical supply. It is IC-Inherently Protected, meaning it is suitable for direct contact with insulation. The product is compatible with optional dimmer switches, and users are advised to consult the dimmer switch instruction instructions for proper use.
For installation, the unit can be mounted between joists with spacings ranging from 12 inches (305mm) to 24 inches (609mm) on center. If the joist spacing is 12 inches, specific cutting of the suspension brackets is required. The installation process involves securing suspension brackets to the luminaire body and then to the joists, ensuring the luminaire body is level and square with the joists. Electrical wiring must be performed by qualified personnel in accordance with all local electrical and safety codes, including the National Electrical Code (NEC). House power wires are connected to the recessed luminaire wires using UL-approved wire nuts.
A circular ceiling hole of 6 1/2 inches (165mm) in diameter is required for installation, with a minimum gap of >1/8 inches (3.2mm) between the bottom of the luminaire body and the ceiling. After ceiling work, the gap between the flange and ceiling should be filled with caulk or other sealant to prevent air leakage.
When the luminaire is used with the damper and adaptor for ventilation, it is intended to be operated with specific Panasonic ventilation products. Users are advised to contact a local dealer for compatible product models to ensure optimal performance. If used without the damper and adaptor, it functions as a standalone downlight.
Routine maintenance, specifically cleaning, should be performed annually. Before any servicing or cleaning, the power source must be disconnected at the service panel and locked to prevent accidental re-energization.
The trim ring is designed for easy removal. It can be pulled down by squeezing the mounting springs, allowing access for cleaning and lamp replacement. The trim ring should be cleaned using a non-abrasive kitchen detergent and wiped dry with a clean cloth. It should not be soaked in hot water (over 140°F or 60°C).
For the luminaire body, dust and dirt can be removed using a vacuum cleaner. Any remaining dirt can be cleaned with a cloth dampened with kitchen detergent, followed by wiping dry with a clean cloth. Harsh chemicals such as gasoline, benzene, or thinner should never be used for cleaning the recessed luminaire.
The LED lamp is also replaceable. To replace the lamp, the trim ring is first removed, then the existing LED lamp is unscrewed. The replacement lamp must be an 11W BR30 shape LED lamp (model: 11BR30G4DIM/927/GU24 from Green Creative). It is crucial to ensure that the lens and lighting unit have cooled down before attempting lamp replacement. The lamp base is a GU24 type, and care must be taken when handling the lamp as it is fragile and heavy. After replacing the lamp, the trim ring is reattached.
The product is designed for minimum maintenance, but in case of service or parts requirements, users are directed to contact the Panasonic Call Center. All service should be performed by qualified technicians.
| Airflow | 400 CFM |
|---|---|
| Sound Level | 0.3 Sones |
| Voltage | 120V |
| Housing Material | Galvanized Steel |
| Duct Size | 6 in |