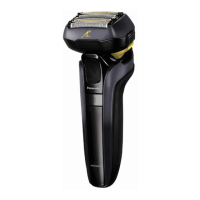
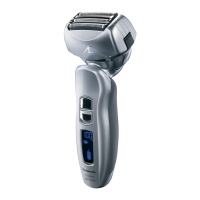
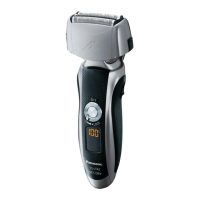
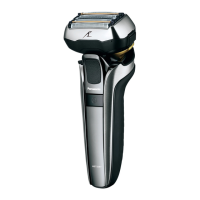
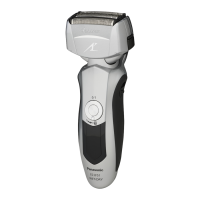
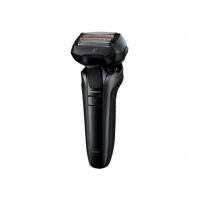
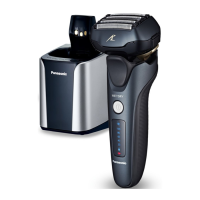
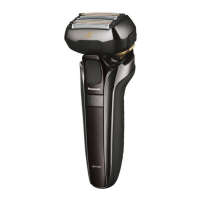
This document describes the Panasonic Model No. ES-TSTFN Rechargeable Shaver, designed for household use. It is a WET/DRY shaver, suitable for both wet shaving with lather and dry shaving, and can be used and cleaned with water in the shower or bath.
Function Description
The ES-TSTFN is a rechargeable shaver that utilizes a "shaving sensor" to automatically adjust power based on beard thickness. It delivers high power for dense beard areas and reduces power for thinner areas, minimizing skin burden. The shaver features a system outer foil and inner blades for cutting hair, a trimmer for longer beards and sideburns, and a cleaning shutter for easy maintenance. It can be operated by pressing a power switch, which also has a lock function to prevent accidental activation during transport or storage.
Important Technical Specifications
- Power Source Type: Charging type
- Rated Voltage: AC110-240 V 50-60 Hz
- Rated Current: 180 mA
- Charging Time: Approximately 1 hour (at room temperature 10 °C – 35 °C)
- Battery: Lithium-ion battery (600 mAh)
- Power Consumption: Approximately 6 W (with AC110 V while charging)
- Main Unit Mass: Approximately 145 g (excluding carrying holder)
- AC Adaptor Model: RE7-87
- Charging Stand Model: RC9-86
- Plug Type: A-2 plug (for 110-240 V regions; a plug adaptor may be needed for other regions).
- Battery Life: Approximately 3 years, though this can vary based on usage and storage conditions.
Usage Features
Charging:
The shaver can be charged using either the supplied charging stand or directly with the AC adaptor.
- Using the charging stand: Insert the appliance plug into the charging stand, place the shaver on the stand, and then plug the adaptor into a household outlet. The red charge status lamp will glow, indicating charging.
- Using the AC adaptor: Connect the appliance plug to the shaver and then plug the adaptor into a household outlet. The red charge status lamp will glow.
Charging takes approximately 1 hour. The red lamp turns off when charging is complete. If the red lamp blinks (once per second) after pressing the power button, the shaver needs to be charged. A full charge provides approximately 2 weeks of use (based on one 3-minute dry-shave use per day), but this duration can vary.
Shaving:
The shaver can be used for both wet and dry shaving.
- Wet Shaving: Apply water, face wash, or shaving cream to your face. Press the power switch and shave.
- Dry Shaving: Simply press the power switch and shave.
For optimal shaving, apply the system outer foil perpendicularly against the skin and glide the shaver slowly against the grain of the beard. For areas like the chin and throat, stretching the skin can help the beard stand up for a closer shave. Avoid applying excessive pressure or using only a part of the system outer foil to prevent skin injury and damage to the foil. The shaver can also be held with a "pen grip" for control.
Trimmer:
The shaver includes a trimmer for sideburns and pre-shaving longer beards. To use, press the trimmer handle until the trimmer raises up, then press the power switch and shave. Apply the trimmer edge perpendicularly to the skin and move it downward.
Switch Lock:
The power switch can be locked to prevent accidental operation.
- Locking: With the shaver operating, press the power switch for more than 2 seconds. The shaver will stop, and the blue switch lock lamp will light up for about 5 seconds.
- Unlocking: With the shaver off and locked (indicated by a blinking blue lamp), press the power switch for more than 2 seconds. The shaver will start operating.
Maintenance Features
Cleaning:
The shaver should be cleaned after each use. Turn off the shaver and disconnect the AC adaptor before cleaning.
- Light Dirt (Rinsing with water): Close the cleaning shutter. Rinse the system outer foil with water and apply hand soap or cleaning solution (sold separately). Press the power switch and operate the shaver for several seconds. Slide the cleaning shutter down to open the water inlet. Rinse the shaver head under running water for about 20 seconds, then press the power switch to stop. Rinse thoroughly through both sides of the water inlet and shake the shaver up and down several times to remove water.
- Heavy Dirt (Thorough cleaning): Remove the outer foil section (refer to "Replacing the System Outer Foil and the Inner Blades" section) and clean it under running water.
- Drying: After cleaning, wipe away water droplets with a towel and allow the components to air-dry in the shade. Removing the blades can speed up drying.
- Lubrication: Apply one drop of oil to each of the system outer foils and the trimmer after cleaning to maintain smooth blade movement and a comfortable shave. Press the power switch, wait about 5 seconds, then press again to stop. Wipe off any excess oil.
Cleaning with a Brush:
Remove the foil frame and inner blades. Use the long brush to remove beard trimmings from the foil frame, system outer foil, shaver body, and trimmer. Use the short brush to clean the inner blades, moving parallel to the blades to avoid dulling them.
Replacing Blades:
For a comfortable shave, it is recommended to replace the system outer foil every 1 year and the inner blades every 2 years.
- Removing the foil frame: Press the left and right system outer foil release buttons to detach the foil frame.
- Removing inner blades: Hold the side of each inner blade and remove them one by one.
- Attaching inner blades: Attach each inner blade one by one by holding its side.
- Attaching the foil frame: Align the foil frame and press firmly on the left and right sides until it clicks into place. Do not press the buttons with excessive force during attachment.
Carrying Holder:
The supplied carrying holder protects the system outer foil during transport and allows the shaver to be stored vertically.
- Attaching: With the protrusion facing the front, securely attach the carrying holder to the shaver, aligning it with the shaver head's orientation until it clicks.
- Removing: Press down on both sides of the carrying holder to remove it.