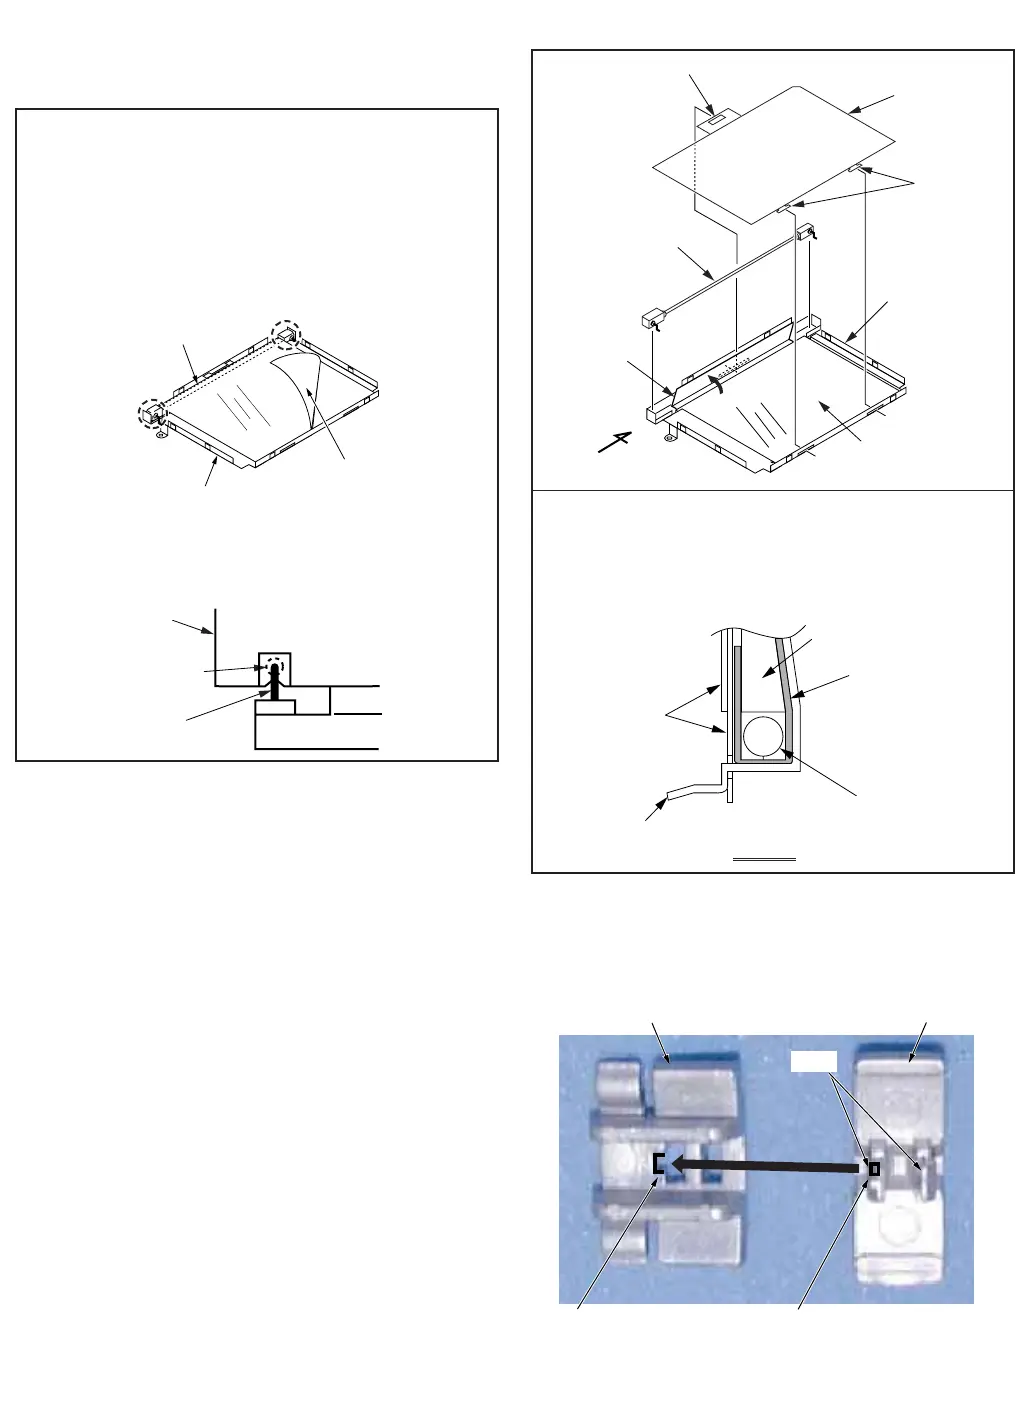
16. Removal of LCD Case B
When removing the LCD Case B, pull the LCD Unit out of
the slots while raising the lower portion of the LCD Unit.
17. Installation of LCD Panel Unit, Lead Light Panel Unit
When replacing the Lead Light Panel Unit, make sure
to remove the Protection Sheet as shown below.
Use extreme care when handling the Lead Light Panel
Unit and the LCD Panel Unit to avoid damage, dust,
and spots (especially fingerprints, etc.).
The use of clean cotton gloves is highly recommended.
Be careful not to apply any pressure to Portion "a" or
"b" of the Lamp Unit as shown below.
After replacing the Lead Light Panel Unit, confirm
that the Terminal of the Lamp Unit is soldered
correctly as shown below.
a.
b.
c.
d.
Protection Sheet
Lead Light Panel Unit
Lamp Unit
Portion "b"
Portion "a"
LCD C.B.A.
Terminal of
Lamp Unit
Solder
Fig. D14
18. Installation of Lamp Unit
Lamp Unit
LCD Panel Holder
LCD Panel
Holder
LCD
Reflect
Sheet
LCD Reflect Sheet
Open
Lead Light Panel
Lead Light Panel
When installing the Lamp Unit, confirm that the Lamp
Unit is positioned as shown below.
Use extreme caution when handling the Lead Light
Panel and the LCD Sheet Unit to avoid damage, dust,
and spots (especially fingerprints, etc.).
a.
b.
LCD Sheet
Unit
LCD
Sheet
Unit
(L-3)
Lamp Unit
(L-3)
View A
View A
Fig. D15
19. Installation of Magic VU Knob Holder, Magic VU Knob
Install them into the Front Cover, verifying that the direction
of the Magic VU Knob Holder and the Magic VU Knob are
correct.
Magic VU Knob Holder
notch protrudence
Magic VU Knob
(L-0)
Fig. D16
 Loading...