EasyManua.ls Logo

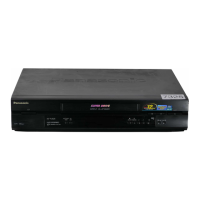
Panasonic NV-F66A - BEFORE REQUESTING SERVICE

Panasonic NV-F66A
48 pages
To Next Page IconTo Next Page
To Previous Page IconTo Previous Page
Loading...
Before requesting
service,
check the following
points
once
again.
SYMPTOM
CAUSE
REMEDY
Power
doesn't turn on.
Mains lead is
not connected.
Connect mains lead to
mains outlet.
The Timer
Record Function
is set to
"On"
Set the Timer
Hecord Function to
"Off".
Power
is on but unit
doesn't
operate.
Dew
condensation inside
the VTR.
Wait
untilthe Dew Indicator
"
|l
"
goes
off.
Safety devices
are operating.
Turn off the VTR
On/Off Switch, disconnect
mains
cord from outlet, then reconnect
mains
cord
to
mains outlet
and
turn
on the VTR
On/Off Switch
again.
TV
programmes
cannot be
recoroeo.
Cor.nection
of aerial lead is
not correct.
Connect
aerial lead
correctly.
Reception
channel is not
properly
tuned.
Tune reception
channel.
The Input
Signal Selector
is not
set correctly. Set the Input
Signal
Selector to
,,Tuner,,.
OTR Function
(One-Touch
Timer Recording)
cannot be
performed.
Clock is flashing
"0:00".
Set
clock to
present
time.
Unattended timer
recording
cannot
be
performed.
Recording
start or recording
stop time
setting is incorrect.
Set recording
start
and recording
stop time
correctly.
The
Timer Record
Function is
set to
"Off".
Sel the Timer
Record Funclion
to
'On
Clock shows incorrect
time.
Adjust clock to
present
time.
Clock is flashing
at
"0:00"
Set
clock time and
perlorm
timer
setting.
The
Input
Signal Selector is not
set to
"Tuner".
Set the Input
Signal
Selector to
"Tuner".
Recording
via external input
The Input Signal
Selector is not set
correctly. Set the Input
Signal Selector to
"Line/Audio"
terminals cannot
be
performed.
Recorded
programmes
wjth
two-channel
sound
(stereo,
bilingual
or Simulcast) can not
be
played
back.
Setting of the Audio
Output l\4ode Selector
Button
(Remote
Controller) is not
correct.
Press the Audio
Output l\.4ode
Selector Button
(Remote
Controller) to
select the desired
audio
playback
mode.
(See page
25.)

Related product manuals