Do you have a question about the Panasonic NV-HS1000EC and is the answer not in the manual?
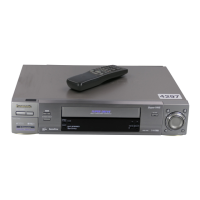
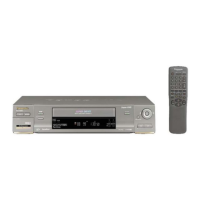
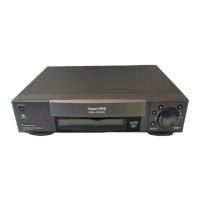
Identifies the specific Panasonic Video Cassette Recorder model NV-HS1000EC.
Explains the ShowView system for easier programming using newspaper schedule numbers.
Details the AI circuit for automatic tape calibration and optimizing playback.
Key warnings regarding electrical hazards and exposure to environmental elements.
Instruction not to remove the outer cover due to electric shock hazard.
Advice on temperature, humidity, dust, heat, and magnets to protect the VTR.
Guidance on avoiding internal access, water damage, cleaning, and stacking.
Information on condensation formation and video head clogging issues.
Details on making standard connections for recording and playback via a TV.
Instructions for connecting the VTR to a TV using a 21-pin Scart terminal.
Guide for connecting the VTR to a stereo amplifier for audio output.
Explains the advantages of S-Video for enhanced resolution and picture clarity.
Connecting a decoder and using the AV LINK function to switch modes.
Explanation of the VTR mode and TV mode functionalities and indicators.
Procedure to output a test pattern for tuning the TV to the VTR.
How to adjust the RF transmitting channel using the CH ADJ. screw.
Step-by-step guide to setting the VTR clock using the remote controller.
Information about the clock's backup system and setting procedure.
Procedure for setting the VTR clock directly from the VTR unit.
Details on the clock's backup system during power interruptions.
How to reset the clock to a specific time.
Instructions for adjusting the clock for summer time.
Overview of the VTR's tuner capability for preset station tuning.
Step-by-step guide for storing TV broadcast channels into the VTR.
Tuning TV stations by directly inputting channel numbers.
How to blank or skip unoccupied programme positions during tuning.
Steps for fine-tuning TV station reception for best picture quality.
A table mapping channel indications to TV channels.
Steps to prepare the remote for ShowView, including clock and guide number entry.
Procedure to input TV station guide numbers and programme positions.
Guide to entering ShowView numbers directly when guide numbers are unknown.
Procedure to set the remote controller to operate a specific TV manufacturer.
Note on the compatibility of the remote controller with various TV models.
Important precautions for safely replacing batteries in the remote controller.
Instructions and diagrams for installing batteries into the remote controller.
How to configure sound settings (AUTO, ON, OFF) through the on-screen menu.
Instructions for selecting the desired language for the VTR's on-screen interface.
Guide to accessing and viewing the VTR's demonstration mode.
Explanation of how VITC signals are read during playback and written during recording.
Important notes and limitations concerning the application of the VITC function.
Steps for inserting a cassette and initiating playback.
How to pause, fast forward, and rewind playback.
Instructions for viewing a still picture and resuming playback.
Methods for changing playback speed using the shuttle ring or remote.
How to accurately locate specific scenes using pause and jog dial.
Tips for viewing high-speed picture during fast forward or rewind.
Steps to insert a cassette and power on the VTR for recording.
How to select a TV station and start recording.
Instructions on how to stop the recording process.
How to select tape speed and pause/resume recording.
Guide to recording one programme while viewing another.
How to display and set the remaining tape time.
Procedure to set timer programme number, position, date, and start/end times.
Instructions for setting daily and weekly timer recording schedules.
How to perform timer recording from external AV or S-Video sources.
Explanation of the Programme Delivery Control/Video Programme System feature.
Steps to set programme position and date using the remote controller.
How to set the start and end times for timer recording using the remote.
Details on selecting specific days for daily and weekly timer recordings.
How to view programmed timer details and cancel them.
Preparation for ShowView, including cassette and programme position setup.
Process for entering and verifying ShowView numbers for programming.
Instructions for recording and erasing index signals on tapes.
How to view and hide information using the On Screen Display.
How to schedule the VTR to power off automatically.
Considerations for playing NTSC tapes on a PAL TV set.
Details on auto playback, VTR-off playback, and auto rewinding.
Recording NICAM stereo and dual-sound broadcasts.
Recording NICAM monaural broadcasts and audio settings.
Key information about NICAM operation during test transmissions.
Instructions for recording Pay TV programmes.
How to watch Pay TV while recording normal TV, and vice versa.
Details on connecting VTRs using edit cables for editing operations.
Configuration for using the VTR as a recording or playback unit.
Important considerations and limitations for VTR editing connections.
Overview of Copying, Insert, AV Insert, and Audio Dubbing.
Overview of Assemble, Insert, AV Insert, and Audio Dubbing programme editing.
Description of Copying and Insert Editing functions.
Procedures for AV Insert Editing and Audio Dubbing.
Guide to performing assemble editing by selecting scenes from tapes.
Information on using VITC for precise picture-based editing.
Diagram showing the screen sequence for manual editing.
Diagrams illustrating screen sequences for settings and programme editing.
Detailed steps for executing assemble editing.
Detailed steps for executing insert editing.
Detailed steps for executing AV insert editing.
Detailed steps for executing audio dubbing.
Preparation and step-by-step guide for the copying operation.
How to locate edit start points on playback and recording VTRs.
Steps to execute editing and stop the process.
Steps to prepare for insert editing, AV insert, and audio dubbing.
How to initiate the insert editing process.
How to set edit start and end points for insert and AV insert.
Steps to execute insert and AV insert editing, with VITC note.
Preparation steps for assemble editing, including connections.
How to begin the assemble editing operation.
How to define edit start and end points for assemble editing.
Steps to perform assemble editing and complete the process.
Explanation of programme types for insert editing.
How to start insert, AV insert, or audio dubbing operations.
How to set edit start and end points for insert and AV insert.
Steps to execute insert and AV insert editing.
Important notes and limitations for programme editing, including VITC.
How the VITC function impacts programme editing and display.
How to review and modify programmed editing sequences.
Procedure for canceling programmed editing sequences.
How to preview editing operations before execution.
How to review edited segments after execution.
How to compensate for timing deviations during editing.
Procedure to clear all programmed editing sequences.
How to connect and use the VTR as a recorder without an edit socket.
Steps for performing assembly editing without an edit cable.
How to perform synchronized editing with external equipment.
Steps for insert editing without using an edit cable.
Steps for AV insert or audio dubbing without an edit cable.
Identification and function of basic controls on the VTR and remote.
Explanation of the AV LINK feature and the S-VHS indicator light.
How to operate the S-VHS switch and use the display functions.
Details on buttons for recording, playback, speed selection, and rewind.
Adjusting Hi-Fi recording level and setting the VTR clock.
How to adjust picture sharpness and utilize the Time Base Corrector.
Configuration for displaying 16:9 or 4:3 aspect ratio images.
Explanation of sound indicators and setting input selection.
Settings for edit mode, Hi-Fi/Normal Mix, and video mode.
Functions of AI, Mono, Timer Recording, and Editing control buttons.
Location of infrared receiver and explanation of VTR status indicators.
Description of AV, S-Video, and Edit input sockets for external connections.
Connection points for Sync Edit, microphone, and headphones.
RF OUT connection and settings for signal testing.
Detailed pinouts and usage of AV1 (Scart) and AV2 sockets.
Description of Video Out, S-Video Out, and AC Power Input connections.
Identification of buttons in the upper section of the remote.
Identification of buttons in the central section of the remote.
Identification of buttons in the lower section of the remote.
Functionality of OPERATE, TV/AV, DISPLAY, PAUSE/STILL, SLOW.
Functionality of programme selection, INDEX, and VOLUME controls.
Functionality of DATE, SHOWVIEW, RECORDING SP/LP, CONFIRM buttons.
Functionality of OSD, CLOCK/PRESET, ERASE, WRITE, TAPE SELECT, TRACKING.
Functionality of Number Buttons, PDC/VPS, TRANSMIT, CANCEL, CHECK buttons.
Functionality of OFF, ON, and TIMER REC buttons.
Troubleshooting steps when the VTR display is blank.
Troubleshooting steps for VTRs with illuminated displays but no operation.
Troubleshooting noisy, out-of-colour, or distorted playback pictures.
Troubleshooting steps for recording issues like tape errors or tuning problems.
Troubleshooting steps when the remote controller is not functioning correctly.
Specifications for power, video system, heads, tape speed, format, and time.
Specifications for video input/output levels, modulation system, and resolution.
Specifications for audio input/output levels, frequency response, and dynamic range.
Physical dimensions and list of standard accessories provided.
| Type | VCR |
|---|---|
| Video Format | VHS |
| Hi-Fi Audio | Yes |
| Video Head | 4-head |
| Tuner | Yes |
| Timer | Yes |
| Remote Control | Yes |
| Inputs | Composite, S-Video |
| Outputs | Composite, S-Video |
| Power Supply | AC 220-240V, 50Hz |
| Playback System | NTSC |
| Audio System | Stereo |
| Playback Speed | SP, LP |
| Connections | SCART |
| Dimensions | 430 x 360 x 100 mm |
| Recording System | Helical scan |