EasyManua.ls Logo

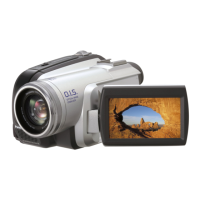
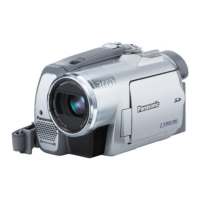
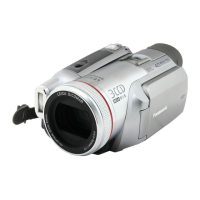
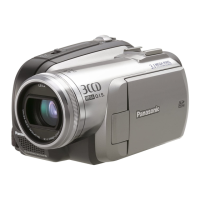
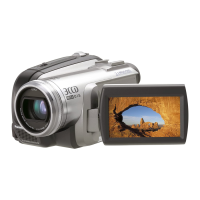
Panasonic Palmcorder PV-GS300 User Manual

Panasonic Palmcorder PV-GS300
88 pages
To Next Page IconTo Next Page
Page #1 background imageLoading...
Page #1 background image
Spanish Quick Use Guide is included.
Guía para rápida consulta en español está incluida.
LSQT0974 A
For USA assistance, please call: 1-800-211-PANA(7262) or, contact us via the web at: http://www.panasonic.com/contactinfo
For Canadian assistance, please call: 1-800-561-5505 or visit us at www.panasonic.ca
Digital Video Camcorder
Operating Instructions
Model No. PV-GS300
Mini
Before connecting, operating or adjusting this product,
please read the instructions completely.
P PC
LSQT0974_ENG.book 1 ージ 2005年11月7日 月曜日 午前11時58分

Table of Contents

Question and Answer IconNeed help?

Do you have a question about the Panasonic Palmcorder PV-GS300 and is the answer not in the manual?

Panasonic Palmcorder PV-GS300 Specifications

General IconGeneral
BrandPanasonic
ModelPalmcorder PV-GS300
CategoryCamcorder
LanguageEnglish

Summary

Things You Should Know

Safety Precautions

Warnings regarding fire, shock hazard, and proper usage to prevent damage and injury.

Precautions

USE & LOCATION

Guidelines for safe and proper use and placement of the camcorder to avoid hazards and damage.

Quick Guide

Attaching the battery

How to properly attach the battery pack to the camcorder until it clicks.

Inserting/removing a cassette

Instructions on how to open the cassette cover and insert or remove a cassette.

Inserting/removing a card

Steps to open the card slot cover and insert or remove an SD memory card.

Power supply

Charging the battery

Steps to charge the battery pack before using the camcorder for the first time.

Fitting the battery

How to attach and secure the battery pack to the camcorder's battery holder.

Connecting to the AC outlet

Instructions for connecting the camcorder to an AC outlet using the AC adapter.

Turning the Camcorder on

How to turn on the power

Steps to turn on the camcorder by setting the switch to ON.

How to turn off the power

Steps to turn off the camcorder by setting the switch to OFF.

Setting date and time

Quick Start

Selecting a mode

How to use the joystick

Using the menu screen

Adjusting LCD monitor/viewfinder

Adjusting the brightness and color level

How to adjust the brightness and color level of the LCD monitor and viewfinder.

Using the remote control

Selecting the remote control mode

Record mode

Check before recording

Essential checks and preparations before starting important recordings.

Setting SP/LP mode

How to switch between Standard Play (SP) and Long Play (LP) recording modes.

Recording on a tape

Detailed steps for starting, pausing, and stopping recording onto a tape.

Recording check

Recording still pictures on a card while recording image onto a tape

Recording still pictures onto a card (Photoshot)

Zoom in/out function

Digital zoom function

Backlight compensation function

MagicPix functions

Tele macro function

Fade in/fade out function

Using the built-in flash

Self-timer recording

Wide/4:3 function

Optical image stabilizer function

RapidFire Consecutive Photoshot

Recording in various situations (Scene mode)

Recording in natural colors (White balance)

Manual white balance adjustment

How to manually adjust white balance for accurate color reproduction under different lighting.

Manual focus adjustment

Manual shutter speed/aperture adjustment

Manual shutter speed and aperture adjustment

How to manually adjust shutter speed and aperture for exposure control.

Manual iris/gain adjustment

How to manually adjust iris/gain values for exposure control.

Playback mode

Playing back tape

Steps to play back recorded video from a cassette tape using the camcorder.

Slow-motion playback/frame-by-frame playback

Playback on TV

Deleting files recorded on a card

Formatting a card

Edit mode

Recording from a tape onto a card

How to record still pictures from a cassette tape onto a memory card.

Connecting with the optional DV cable: PV-DDC9/PV-DDC9-K

Using the DV Cable for Recording (Digital Dubbing)

Audio dubbing

Printing pictures by directly connecting to the printer (PictBridge)

With a PC

Using the Camcorder with a PC

Steps for transferring images and installing software for PC connection.

Using as a Web camera

Installing USB Driver

Steps to install the USB driver required for PC connection and webcam functionality.

Connecting the Camcorder to personal computer (For Use as a Web Camera)

Procedure for connecting the camcorder to a PC for webcam use.
Installation of Quick Movie Magic/MotionDV STUDIO

To start Quick Movie Magic or MotionDV STUDIO

To disconnect USB cable safely

Related product manuals