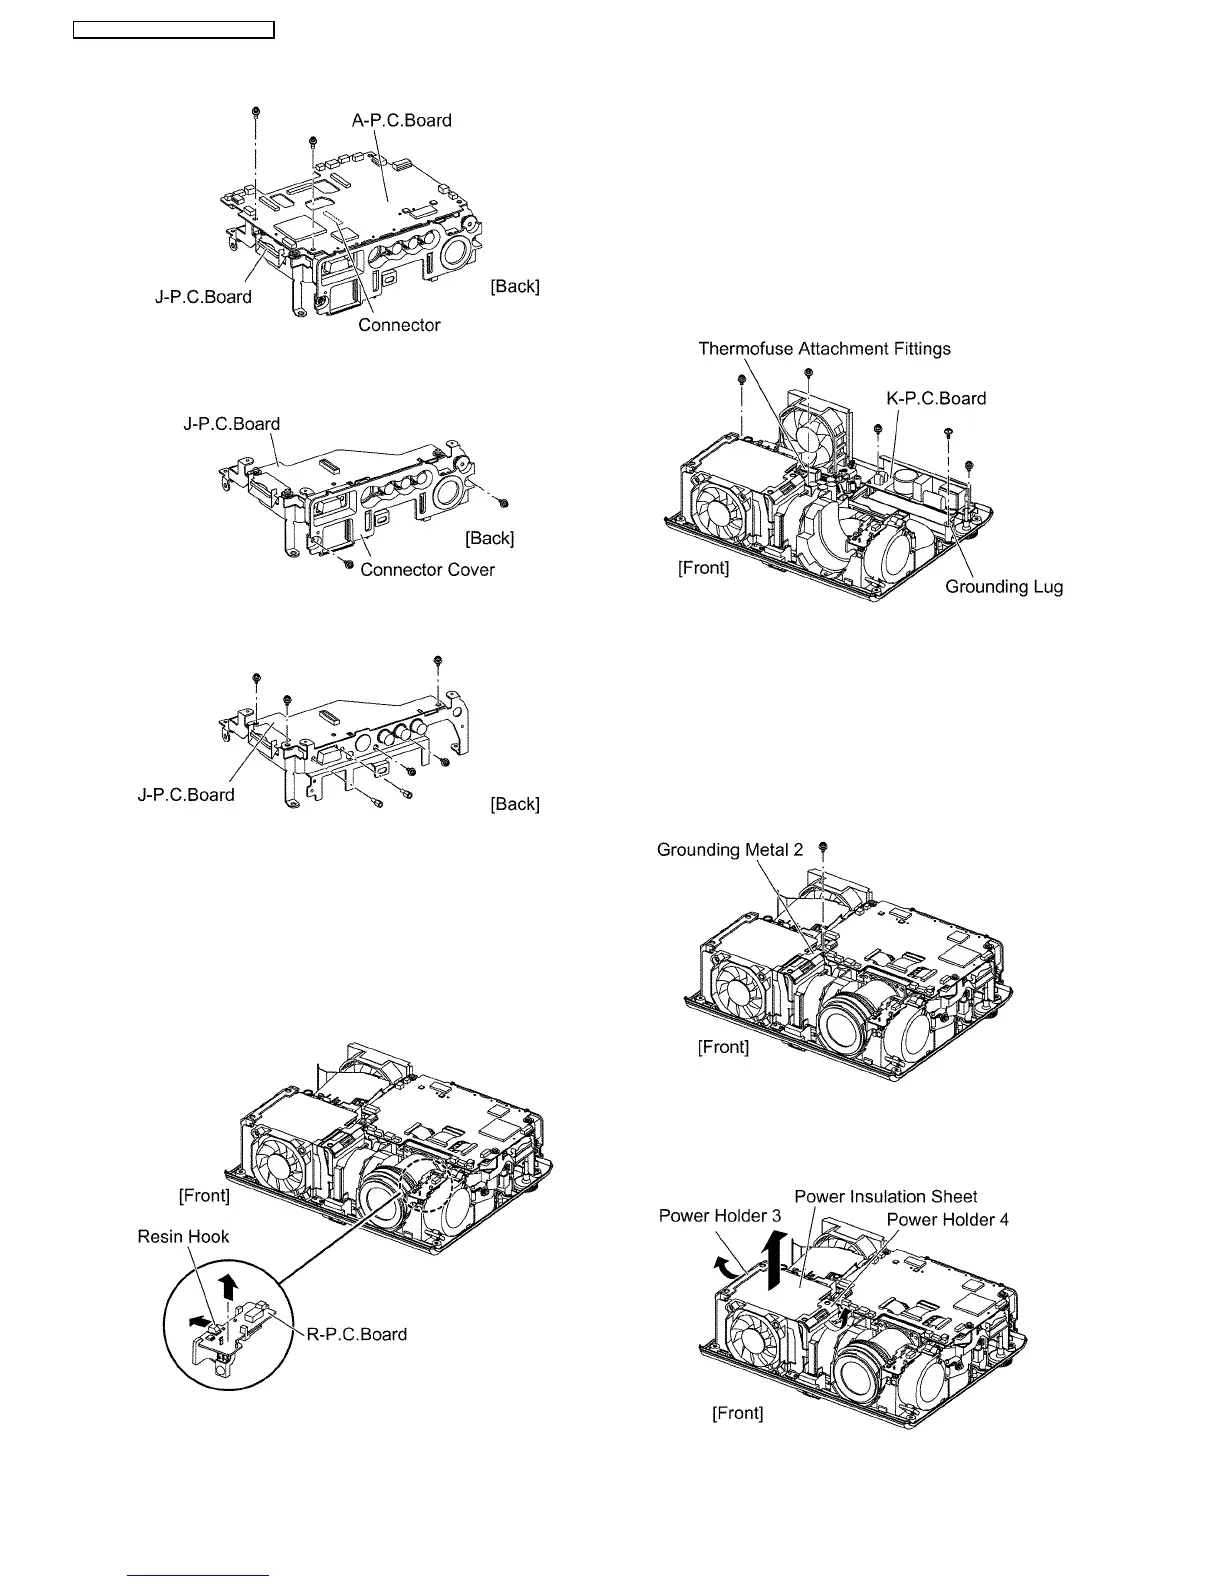
6. Unscrew the 2 screws and remove the connector cover.
7. Unscrew the 7 screws and remove the J-P.C.Board.
6.5. Removal of R-P.C.Board
1. Remove the upper case according to the section 6.2.
"Removal of Upper Case".
2. While unhooking the resin hook, remove the R-P.C.Board.
Note:
·
Work carefully not to damage the resin hook.
6.6. Removal of K-P.C.Board
1. Remove the analysis block, LCD block and lens according
to the steps 1 through 6 in the section 6.11. "Removal of
Analysis Block and Lens".
2. Unscrew the 2 screws and remove the thermofuse
attachment fittings.
3. Unscrew the 1 screw and remove the grounding lug.
4. Unscrew the 2 screws and remove the K-P.C.Board.
6.7. Removal of B/Q-Module
1. Remove the lamp unit according to the section 6.10.
"Removal of Lamp Unit".
2. Remove the upper case according to the section 6.2.
"Removal of Upper Case".
3. Unscrew the 1 screw and remove the grounding metal 2.
4. Unhook each hook, and remove the power holders 3 and 4.
5. Remove the power insulation sheet.
12
PT-P1SDU / PT-P1SDE / PT-P1SDEA
 Loading...