PAUSE/
Adding
New
Sound on a
Recorded
Cassette
(Audio Dubbing)
To
perform audio
dubbing,
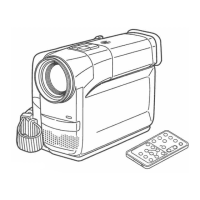
the Remote
Controller is
necessary.
You can add
music or
narration on a
recorded cassette.
+lf [AUDIO REC] on
the
Menu has been set to
[16bit],
performing
audio dubbing
will completely
erase
the
previously recorded
sound.
Therefore,
if
you
intend to
perform audio
dubbing but
also
want to keep
the original
sound,
be
sure
to set
[AUDIO REC]
on
the Menu to [12bit]
before
making the
original
recording.
It
is
not possible to
perform audio dubbing onto
recordings
made in the LP Mode.
(^14)
1 Insert the
recorded
cassette and set
the
[POWER
ON/OFF]
Switch
to
[ON].
2 Press the
[VCR/CAMERA]
Button
so
that
the [VCR]
Lamp
lights.
3
At the point
from
which you
want
to
insert the new
sound,
switch the
Movie
Camera over
to the Still
Playback
Mode.
4 Press the
[A.
DUB]
Button on
the
Remote
Controller.
Playing
Back
the Sound
Recorded
with Audio
Dubbing
+lf
you
set
[AUDIO REC] on the
Menu to
[12bit] for the
original recording, the sound added with
audio dubbing
and
the
original sound are played
back
as
follows
depending on the
setting
selected for
[AUDIO] on the
VCR Mode Menu (->
62,65):
ST1
: The original sound
alone is
played back.
ST2:
The dubbed sound
alone is played
back.
MIX: The original sound and the
sound added
with
audio
dubbing are played
back
together.
^Do not
perform audio
dubbing onto
unrecorded
parts of the tape.
This could
cause the
playback
picture and sound to be
distorted.
•
If
you
reset the Tape
Counter
to
zero at
the point where
you
want the audio dubbing to
end and
turn on the
Memory Stop
Function (-*76), the audio
dubbing
automatically stops
when the tape reaches that
point.
5
Press the Pause
Button [I I] on
the
Remote
Controller to
start audio
dubbing.
Stopping
Audio
Dubbing
Press the Pause
Button
[II] on the Remote
Controller.
The
Movie Camera is
again
in
the
Still Playback Mode.
-49-
 Loading...

