Do you have a question about the Panasonic PV-DV950 and is the answer not in the manual?
Read all safety and operating instructions before use. Adhere to all warnings.
Protect cords, avoid overloading, liquids, and unauthorized servicing.
Instructions for when service is needed and using replacement parts.
Avoid moisture, direct sun, extreme temperatures, and rough handling.
Clean lens with proper solution; avoid chemicals on the finish.
Powering the camera and charging the battery from AC outlet.
Lithium Ion Battery Pack for powering the camera.
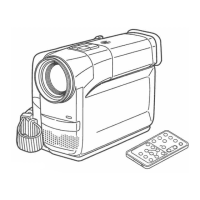
Wireless remote for operating camera functions.
Docking station for TV output, shoulder strap for portability.
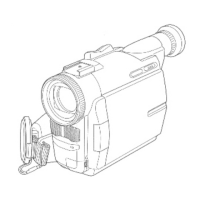
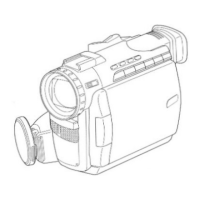
Protects the camera lens when not in use.
Buttons for rewind, fast-forward, pause, play, and stop.
Dial for functions, mode selector, menu access, and white balance.
LCD monitor, speaker, and viewfinder.
Eyepiece corrector, VCR/Camera mode, power switch, and cassette compartment.
Zoom lever for focal length adjustment, photoshot button.
LCD monitor, DV terminal for digital transfer.
Eject button, compartment window, and accessory shoe.
Battery eject lever and DC input cable slot cover.
Strap attachment points and external microphone input.
Lens, support leg, and tripod receptacle.
Multi terminal, remote sensor, focus button, microphone, lens cap, WB sensor, tally LED.
Connect AC adapter and cord for power.
Charge battery on AC adapter before first use.
Steps to insert battery into camera and remove it.
Table shows charging time and max recording time.
Understanding the AC adapter's charge lamp signals.
Steps to insert and secure a Mini DV cassette.
Extended recording time with potential picture quality changes.
Adjusting the viewfinder for clear viewing.
Opening, positioning, and adjusting the LCD screen.
Attaching and using the lens cap for protection.
Adjusting the grip belt for secure handling.
Attaching the shoulder strap for safe carrying.
How to start, pause, and stop recording.
Understanding the recording indicator light.
Playback the last few seconds of the recorded scene.
Turn LCD monitor forward to record yourself.
Reverses the image for mirror-like viewing.
Select manual mode, press focus button, adjust ring.
Revert to automatic focus by keeping button pressed.
Using the zoom lever to widen or enlarge the view.
Enhancing zoom up to 120x with quality trade-offs.
Focusing on very small subjects up close.
Record still pictures with sound for approx. 7 seconds.
Records in wide-screen format with black bars.
Minimizes camera shake for smoother video.
Capture still images during recording or playback.
Switching to VCR mode, rewinding, playing, and stopping.
Using the PUSH dial to control playback volume.
Enabling the display of recorded date and time.
Positioning the camera for easier viewing.
Locating scenes using cue and review buttons.
Functions for continuous search and fast-forward/rewind search.
Using remote buttons for slow motion in forward/reverse.
Advancing still pictures one by one using remote or jog dial.
Using the PUSH dial for still picture advance.
Steps to connect camera to TV for playback.
Using the headphone jack on the docking station.
Removing cassette, turning off power, retracting finder/monitor.
Steps to detach the docking station.
Viewing scenes during pause to find start point.
Locating the end of recorded parts or blank sections.
How index signals are automatically recorded.
Locating recorded still images using index.
Locating the start of recorded scenes marked with index.
Gradually fading picture and sound at scene start/end.
Automatic exposure settings for sports, portrait, low light, etc.
Adding visual effects like wipes, fades, and strobe.
Brightening image and recording in black and white.
Navigating the menu to select digital effects.
Restrictions when using digital functions with other modes.
Gradually replacing one scene with another like a curtain.
Gradually fading out one scene while fading in another.
Selecting modes like Indoor, Outdoor, or Lock.
Setting camera to manual, pointing at white, and locking WB.
Controlling exposure for creative effects or fast action.
Controlling aperture for brightness and depth of field.
Locking exposure to maintain consistent brightness.
Visual aid to prevent overexposure.
Normal and Frame modes for picture clarity.
Adjusting mic input for optimal sound recording.
Recording narration or music over existing audio.
Buttons for TV display output and date/time indication.
Buttons for tape counter and reset operations.
Buttons for audio dubbing and initiating recording.
Buttons for photoshot, start/stop, zoom, and volume.
Buttons for rewind, FF/cue, and play.
Buttons for slow motion, frame advance, and index search.
Buttons for stopping tape and accessing the menu.
Instructions for replacing the CR2025 battery.
Turning camera on and aiming the remote.
Matching camera and remote modes for separate operation.
Connecting the docking station for copying.
Steps to connect camera, VCR, and start copying.
Dubbing high-quality video using DV cable.
Connecting to PC via DV interface cable for capture and editing.
Controlling playback functions via an editing controller.
Connecting camera to a video printer to print images.
AC Adaptor, Battery Pack, Remote Control, DV Cable.
Selecting and setting menu items using dials and buttons.
How to close the menu screen.
List of camera settings like EIS, Zoom, WB, etc.
Settings like Zebra Pattern, Counter, Date/Time, Self-Rec.
Settings for Index Search, Blank Search, Audio Output, etc.
Steps to adjust the camera's internal clock.
Procedure to charge the battery for the clock function.
Adjusting screen brightness and color saturation.
Adjusting the viewfinder brightness.
Avoid rain, sand, dust, and magnetized equipment.
Handle with care, avoid insecticides and harsh cleaners.
Remove cassette and battery after use to prevent damage.
Identifying and resolving condensation issues.
Causes and remedies for dirty video heads.
Optimal use, lifespan, and handling of the battery.
Store in dry, stable temperature conditions.
Rewind, case storage, and protection from dust and magnets.
Cleaning LCD, handling lens hood.
Steps to clean dust from the viewfinder.
Setting the camera for continuous playback.
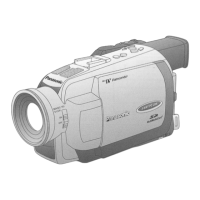
Overview of digital recording, features, and compatibility.
Explanation of focus and auto-focus system characteristics.
How WB corrects color casts from different light sources.
How the camera automatically adjusts white balance.
Understanding Kelvin values and light source effects on color.
How time code is recorded and its use in editing.
Using memory stop for precise rewinding and editing.
Indications for remaining battery and tape time.
Indicators for activated wide mode and digital zoom.
Displays activated digital picture effects.
Displays recording mode (SP/LP) and tape position.
Shows zoom level and camera/AE lock modes.
Indicators for EIS and audio recording settings.
Indications for recording, pause, playback, FF, REW, etc.
Displays manual shutter and iris settings.
Switching between tape counter, memory stop, and time code displays.
Displays mic level and index signal status.
Indicators for MF, WB modes, Zebra, and Wind-Cut.
Shows Programe AE mode and volume level.
Displays date/time, battery status, and warnings.
Camera not turning on or turning off automatically.
Problems starting recording, tape end, or condensation.
Battery discharging quickly or not holding charge.
No picture, mosaic patterns, or incorrect tape time display.
Remote not working, cassette stuck, or dubbing errors.
Recording format, lens, sensor, dimensions, weight.
Power source, consumption, dimensions, and weight.
Details on product warranty periods and exclusions.
How to get product support and find service centers.
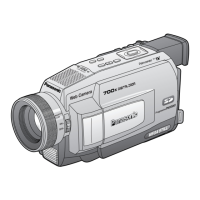
| Optical Zoom | 12x |
|---|---|
| Digital Zoom | 700x |
| Image Sensor Size | 1/4 inch |
| Image Sensor Type | CCD |
| White Balance Presets | Indoor, Outdoor |
| Digital Scene Transition | Yes |
| Recording Media | MiniDV Tape |
| Image Stabilization | Electronic |
| Video Resolution | 720 x 480 |
| Weight | 1.2 lbs |
| Microphone | Built-in |
| Connector Type | IEEE 1394 (FireWire), USB |
| Special Effects | Sepia, Black & White |
| White Balance | Automatic, Manual |
| Features | Backlight Compensation |
| Viewfinder | Color |
| Battery | Lithium-ion |
| Dimensions | 3.5 x 4.5 x 8.2 inches |
| Type | MiniDV Camcorder |