This document provides a comprehensive service manual for the National Panasonic Microcassette Recorder RN-Z36, covering its functions, technical specifications, usage, and maintenance.
Function Description
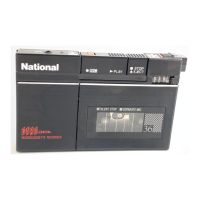
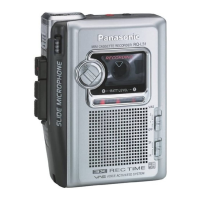
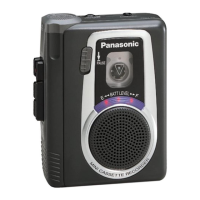
The RN-Z36 is a microcassette recorder designed for portable audio recording and playback. It features a silent auto-stop mechanism that automatically stops the tape at the end of recording or playback, preventing tape damage. The device also incorporates a two-speed selector for both recording and playback, offering standard (2.4 cm/s) and long-play (1.2 cm/s) options to optimize recording time or sound quality.
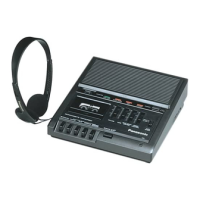
A key feature is the Quick FF and Quick REW function, allowing rapid tape winding in both forward and rewind directions. The recorder includes a separate microphone for enhanced recording flexibility and a separate speaker for playback, which can be connected to the main unit.
For power management, the unit can operate on batteries or an AC power source via an optional AC adaptor. It includes a battery check indicator to monitor battery life for both the main unit and the separate speaker.
Important Technical Specifications
Recorder (Main Unit):
- Power Consumption: 150 mW (for recording only).
- Power Output: 150 mW (RMS max.).
- Frequency Response: 300-4000 Hz.
- Program Time: 2 hours with RT-60 microcassette tape (at LP speed), 1 hour with RT-60 microcassette tape (at SP speed).
- Track System: 2 Track monaural recording and playback.
- Tape Speed: SP: 2.4 cm/s, LP: 1.2 cm/s.
- Fast Forward and Rewind Time: Approx. 120 seconds with RT-60MC microcassette tape.
- Input: Mic: Sensitivity 0.25 mV/applicable microphone impedance 200Ω-600Ω (φ2.5).
- Output: Monitor Jack: 8Ω (φ2.5).
- DC Input: 1.5 V (φ3).
- Dimensions (W×H×D): 54 mm × 85.7 mm × 14.3 mm.
- Weight: 69 g without batteries.
Separate Speaker:
- Power Requirement: Battery: 3V (two UM-3 "AA" size dry batteries).
- Power Output: 300 mW (RMS max.).
- Speaker: 50 mm (8Ω) PM dynamic speaker.
- Input Plug: Monaural φ300.
- Dimensions (W×H×D): 110 mm × 67 mm × 102 mm.
- Weight: 230 g without batteries.
Recording Specifications:
- Recording Bias Current: Around 550 μA.
- Bias Oscillation Frequency: Around 36 kHz.
- Standard Recording Input Level: Around -72 dB.
Usage Features
The RN-Z36 is designed for ease of use with clearly labeled controls.
Main Unit Controls:
- Fast Forward/Rewind Switch (◄◄FF ►►REW ◴QUICK!): For quick tape navigation.
- Separate Microphone: Connects for external recording.
- Recording/Battery Check Indicator (REC/BATT): Lights up during recording and indicates battery status.
- Mic Sensitivity Selector (MIC SENS): Adjusts microphone sensitivity.
- Volume Control (VOLUME): Adjusts playback volume.
- Monitor Jack [MONIT (8 Ω)] φ2.5: For connecting headphones or the separate speaker.
- Tape Counter and Reset Button: Tracks tape position and resets the counter.
- Cassette Compartment: Holds the microcassette tape.
- Stop/Eject Button (■STOP/▲EJECT): Stops tape operation and opens the cassette compartment.
- Playback Button (►PLAY): Initiates tape playback.
- Record Button (●REC): Initiates recording.
- Microphone Jack (MIC) [0.25 mV/200~600Ω] φ2.5: For connecting an external microphone. Note that recording with an external mic is not possible if a plug is in the EXT. MIC. jack.
- DC Input Jack [DC IN 1.5 V (+)]: For connecting an AC adaptor.
- Battery Compartment: For main unit batteries.
- Tape Speed Selector (TAPE SPEED): Switches between 2.4 cm/s (SP) and 1.2 cm/s (LP).
- Tone Selector (TONE): Adjusts audio tone.
- Battery Check Indicator (BATTERY): For separate speaker battery status.
- Battery/Speaker Cord Compartment (bottom): Stores the speaker cord.
- Speaker Cord: Connects the main unit to the separate speaker.
- Remote Pause Control (PAUSE): For pausing recording or playback remotely.
Operating Notes:
- When using the recorder, either the external microphone or microphone cord must be plugged in; otherwise, the RN-Z36 enters Pause mode.
- Recording with the microphone cord plugged into the recorder erases existing tape content.
- The separate speaker can be placed on the front space of the main unit.
- To prevent damage, do not bring magnetized objects (e.g., credit cards, recorded tapes) close to the front space of the Separate Speaker when it is attached to the main unit, as a strong magnet is used there.
Maintenance Features
The manual provides detailed instructions for checking battery life and disassembling the unit for service.
Battery Life Check (Main Unit):
- When batteries weaken, tape speed slows, sound distorts, and volume decreases.
- To check:
- Open the Cassette Compartment cover by pressing the Stop/Eject Button.
- Press the Record Button.
- If the Recording/Battery Check Indicator goes out or dims, replace the battery.
- Note: Remove batteries if the set is not used for a long period or is used only from an AC power source to prevent leakage.
Battery Life Check (Separate Speaker):
- The Battery Check Indicator on the Separate Speaker shows battery condition.
- If the indicator dims or turns off, first check the main unit's battery. If the main unit's battery is not weak, replace the speaker's batteries.
Disassembly Instructions:
- Caution: Handle with care due to flexible printed circuit board and fragile head leads.
- Removing the Upper Cabinet Ass'y:
- Remove battery cover (A).
- Remove separate microphone (B).
- Remove screws (C) and press STOP/EJECT to open cassette lid.
- Lift and unhook cassette lid (D).
- Remove spacer (E).
- Remove screws (F) and front cabinet ass'y (G).
- Remove jack holder (H).
- Removing the Bottom Cabinet:
- Remove screws (1). Note: Removing screws (L) and (N) will cause fastening plates (M) and (O) to fall out.
- Unhook rear cabinet ass'y from battery case locks (J).
- Remove bottom cabinet (K).
- Remove screw (L) and fastening plate (M).
- Remove screw (N) and fastening plate (O).
- Removing the Print Circuit Board:
- Slightly lift PC board end and pull out mic sensitivity select switch knob (P). Do not lift too high to avoid damaging pattern foil.
- Remove switch holder (Q).
- Unsolder motor lead wires (R).
- Remove screws (S), (T) and unsolder (U), (V).
- Remove tape speed selector switch knob (W) and cover-B (X).
- Remove screw (Y) securing recording switch.
- Unsolder head lead wires (Z) and remove PC board ass'y.
- Disassembly Procedures for Major Mechanical Parts: Detailed steps for removing components like R/P Head, Supply Reel Table, Takeup Reel Table, Pinch Roller, Flywheel Holding Plate, and Motor, with specific notes on reassembly and adjustments (e.g., azimuth adjustment for head, motor speed alignment).
- Checking IC1: An insulation sheet is attached to IC1. Remove it carefully for checking, ensuring not to peel or cut foil. Replace the sheet or use insulation tape after checking to prevent contact with surrounding components.