2-40
Design of VRF SYSTEM
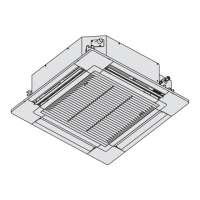
3. How to install the indoor unit
(2) For the Right and Right Bottom Piping
(3) For the Embedded Piping
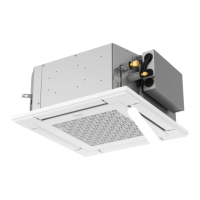
Fig. 2-92
How to keep the cover
In case of the cover is cut, keep the cover at the rear of chassis
as shown in the illustration for future reinstallation.
(Left, right and 2 bottom covers for piping.)
Cover for piping
Step 1
↓
Step 2
↓
Step 3
↓
• Insert the cables from bottom of
the unit through the control board
hole until terminal board area.
Step 4
Pull out the Indoor piping
Install the Indoor Unit
Insert the power supply cord
and connection cable
Secure the Indoor Unit
Right and Right Bottom piping
Tape it with piping
in a position as
mentioned in
Fig. below.
Drain hose
Cover for
the right
piping
Cover for
the left
piping
Cover for the
bottom piping
Piping
Fig. 2-93
Step 1
↓
Step 2
↓
•
Step 3
↓
•
Step 4
Replace the drain hose
Bend the embedded piping
Pull the connection cable into Indoor
Unit
Cut and flare the embedded piping
↓
•
Use a spring bender or equivalent
to bend the piping so that the
piping is not crushed.
The power supply cord and indoor
unit and outdoor unit connection
cable can be connected without
removing the front grille.
When determining the dimensions
of the piping, slide the unit all the
way to the left on the installation
plate.
Step 5
↓
Step 6
↓
Step 7
↓
Step 8
Install the Indoor Unit
Connect the piping
Insulate and finish the piping
Secure the Indoor Unit
TDxxxxxx-002WAYVRF.indb40TDxxxxxx-002WAYVRF.indb40 2014/01/3017:52:322014/01/3017:52:32
 Loading...