
R
rwaltonSep 3, 2025
Why can't I add markers on my Panasonic Home Theater System?
- JJordan ArcherSep 3, 2025
You cannot add markers with DVD-RAM. Also, if the disc’s elapsed play time doesn’t appear on the unit’s display, you cannot add markers.
Why can't I add markers on my Panasonic Home Theater System?
You cannot add markers with DVD-RAM. Also, if the disc’s elapsed play time doesn’t appear on the unit’s display, you cannot add markers.
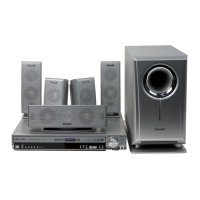
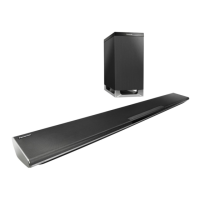
Why my Panasonic SC-HT730 Home Cinema speakers have no power?
The Sleep timer was working and had reached the set time limit. Insert the AC power supply cord and system cable securely.
Why do I see error messages on my Panasonic SC-HT730 and how to enable on-screen display?
If you see messages like “Cannot display group xx, content xx” or “This disc may not be played in your region” on your Panasonic Home Cinema speakers, the operation is prohibited by the unit or disc, or you are trying to display incompatible contents. If there is no on-screen display, select “On” in “On-Screen Messages” in the “Display” tab.
Why I cannot add markers on my Panasonic Home Cinema speakers?
You cannot add markers with DVD-RAM. Also, if the disc’s elapsed play time doesn’t appear on the unit’s display, you cannot add markers.
What to do if I cannot operate the TV with my Panasonic Home Cinema speakers remote?
If you cannot operate the TV with your Panasonic Home Cinema speakers remote, press [TV] first to operate the television. Also, check the remote control code for the TV manufacturer.
How do I fix ghosting and progressive output issues on my Panasonic Home Cinema speakers?
If you notice ghosting when progressive output is on, pictures not in progressive output, or closed captions not displayed on your Panasonic Home Cinema speakers, change “Video Output Mode” in Picture Menu to “480i.” Alternatively, press [PROGRESSIVE] on the main unit so “PRG” is displayed.
Why do I hear humming from my Panasonic SC-HT730 Home Cinema speakers?
If you hear humming during playback with your Panasonic Home Cinema speakers, it might be due to an AC power supply cord or fluorescent light being near the subwoofer. Try to keep other appliances and cables away from the subwoofer.
How to fix distorted picture on Panasonic Home Cinema speakers?
If the picture from your Panasonic Home Cinema speakers is distorted, doesn't fit the screen, or the menu isn't displaying correctly, ensure the unit is connected directly to the television and not through a video cassette recorder. Try changing the “TV Aspect” in the “Video” tab and adjusting the Zoom setting. Restore the zoom ratio to “a1.00”. Also, set “Subtitle Position” in Display Menu to “0” and “4:3 Aspect” in Display Menu to “Normal”. If you are using a TV indoor antenna, change to an outdoor antenna and separate the antenna wire of the television from the unit.
What to do if my Panasonic Home Cinema speakers are not responding?
If your Panasonic Home Cinema speakers are unresponsive, DVDs won't play, or there's no picture or sound, first turn the unit off and then back on, as the issue might stem from external factors like lightning or static electricity. Also, ensure the batteries in the remote are not depleted and replace them if necessary. Check the video or audio connections to ensure they are properly connected. If CD Mode is on, turn it off by pressing [SHIFT]i[CD MODE]. Finally, ensure that the DVD-RAM has something recorded on it.
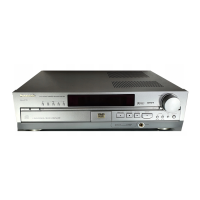
What to do if my Panasonic Home Theater System remote isn't responding?
If your Panasonic Home Theater System isn't responding to the remote, it could be due to a few reasons. First, the batteries might be depleted, so try replacing them with new ones. Also, the unit may not be operating properly due to lightning, static electricity or some other external factor, so try turning the unit off and then back on.
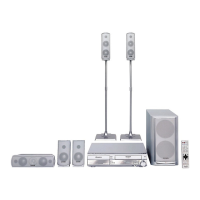
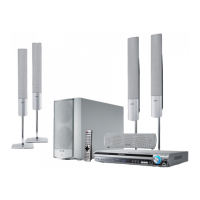
Essential safety guidelines for operating the audio system.
Step-by-step instructions for assembling and attaching front speakers to stands.
Guidance on wall-mounting speakers and fitting alternative stands.
Advice on optimal placement of speakers for best sound and stability.
Detailed instructions for connecting all speakers to the main subwoofer unit.
How to connect the system to televisions via VIDEO IN or COMPONENT VIDEO IN terminals.
Instructions for connecting antennas, system cables, and power supply.
How to use the remote control and perform initial system setup.
A detailed overview of all buttons and functions on the remote control and main unit.
Lists playable discs and provides essential handling and caution advice.
Steps for powering on, loading discs, and starting basic playback.
Using the remote for stop, pause, skip, search, and frame-by-frame playback.
Features like disc information, CD sequential play, quick replay, and CM skip.
Functions for zoom ratio, play speed, angle selection, soundtracks, subtitles, and repeat play.
How to create custom playlists or play discs/tracks in random order.
Navigating menus to play JPEG files or HighMAT discs.
How to play items in order, search by title, or play from selected tracks.
Specific navigation for HighMAT discs, RAM discs, and play lists.
Accessing and using the main menu, submenus, and other settings.
Adjusting picture modes, video output, and transfer modes for optimal display.
Configuring audio settings, Dolby Pro Logic II, and sound enhancers.
Settings for DVD playback modes, bit rate display, and GUI options.
System settings for audio language, subtitles, menus, ratings, and TV aspect.
Setting speaker delay times for optimal multi-channel audio synchronization.
How to tune into FM and AM radio stations using automatic or manual methods.
Adjusting the FM tuning step for reception.
Guidance on connecting outdoor antennas for improved radio reception.
Configuring sound effects like Center Focus, Dolby Pro Logic II, Super Surround, and bass enhancement.
Instructions for connecting and operating televisions, VCRs, and tape decks.
How to set the remote control to operate other brands of televisions and VCRs.
Technical details and specifications for the audio system components.
Solutions for power, playback, display, sound, and subtitle problems.
Guidelines for seeking professional service and performing basic maintenance.
Definitions of technical terms used in the manual.
Details on warranty terms, coverage limits, and exclusions for the product.
Information on contacting customer service and ordering replacement parts or accessories.
Advice on safe listening levels and identifying supplied accessories.
| Screen shape | Flat |
|---|---|
| Response time | - ms |
| Display diagonal | 40 \ |
| Display brightness | - cd/m² |
| Display technology | LED |
| Native aspect ratio | 16:9 |
| Display diagonal (metric) | 100 cm |
| Supported graphics resolutions | 1920 x 1080 (HD 1080) |
| Motion interpolation technology | BMR 600 Hz |
| Dynamic contrast ratio marketing name | High Contrast |
| 3D | No |
| Power consumption (average) | - W |
| Tuner type | Analog & digital |
| Analog signal format system | - |
| Digital signal format system | DVB-C, DVB-S2, DVB-T, DVB-T2 |
| Smart modes | Cinema, Dynamic, Game, Personal, Sports, True Cinema |
| Sound modes | Music, Speech, Standard |
| RMS rated power | 20 W |
| Number of speakers | 2 |
| USB 2.0 ports quantity | USB 2.0 ports have a data transmission speed of 480 Mbps, and are backwards compatible with USB 1.1 ports. You can connect all kinds of peripheral devices to them. |
| Ethernet LAN (RJ-45) ports | 1 |
| Common interface Plus (CI+) version | 1.3 |
| USB 3.2 Gen 1 (3.1 Gen 1) Type-A ports quantity | 0 |
| Product color | Black |
| AC input voltage | 220 - 240 V |
| AC input frequency | 50 - 60 Hz |
| Power consumption (off) | 0.3 W |
| Power consumption (standby) | 0.5 W |
| Power consumption (typical) | 46 W |
| Number of OSD languages | 27 |
| Audio formats supported | AAC, FLAC, MP3, WAV, WMA |
| Image formats supported | JPEG |
| Video formats supported | 3GPP, AVI, FLV, HEVC, M4V, MKV, MP4, PS, TS, VOB, VRO, WMV |
| Digital Living Network Alliance (DLNA) specification | DMP, DMR, DMS, DTCP-IP |
| Depth (with stand) | 239 mm |
|---|---|
| Height (with stand) | 569 mm |
| Depth (without stand) | - mm |
| Width (without stand) | 902 mm |
| Weight (without stand) | - g |