15
TQBJ2216
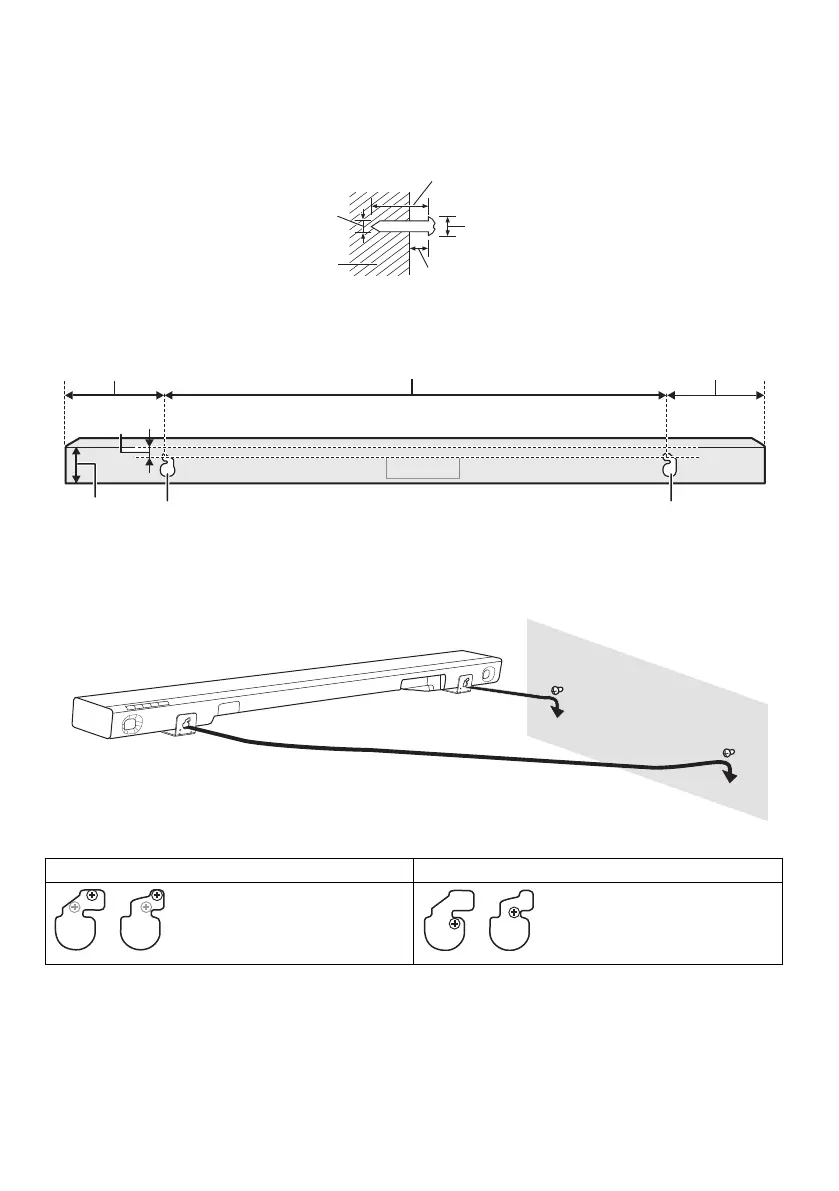
3 Drive the screws into the wall.
• Use the measurements indicated below to identify the screwing positions on the wall.
• Leave at least 100 mm of space above of the main unit to allow enough space for fitting the main
unit.
• Be sure to use a level to ensure that both mounting holes are level to each other.
Front view (semi-transparent image)
4 Fit the main unit securely onto the screws.
DO DO NOT
Move the speaker so that the
screw is in this position.
In this position, the speaker will
likely fall if moved to the left or
right.
> 30 mm
Ø7.0 mm - Ø9.4 mm
3.5 mm - 4.5 mm
Wall or pillar
Ø4.0 mm
129 mm
694 mm
139 mm
53 mm
Wall mounting holeWall mounting hole
26 mm
htb600.400_TQBJ2216_en.fm Page 15 Thursday, May 14, 2020 2:22 PM
 Loading...