This document provides supplementary instructions for Panasonic Personal Computers and Handheld Computers equipped with GSM/GPRS modems, detailing how their operation differs from the standard Operating Instructions. The primary function of these devices, when equipped with GSM/GPRS, is to enable communication using radio frequencies.
Safety Precautions
Before using the GSM/GPRS modem, several safety precautions must be observed. These guidelines are crucial for the safe operation, usage, service, and repair of the device.
- Medical Facilities: When in hospitals or other healthcare facilities, users must observe restrictions on mobile device use. The GSM/GPRS modem should be switched off if instructed by posted guidelines in sensitive areas, as medical equipment can be sensitive to RF energy.
- Medical Implants: The operation of cardiac pacemakers, other implanted medical equipment, and hearing aids can be affected by interference from the GSM/GPRS modem if placed close to the device. Users with such implants should consult their physician or the device manufacturer to ensure proper shielding. Pacemaker patients are advised to keep the GSM/GPRS modem away from their pacemaker while it is on.
- Aircraft: The GSM/GPRS modem must be switched off before boarding an aircraft and users must ensure it cannot be switched on inadvertently. Operating wireless appliances in an aircraft is forbidden to prevent interference with communication systems. Failure to comply can lead to suspension of cellular services, legal action, or both.
- Flammable Environments: The GSM/GPRS modem should not be operated in the presence of flammable gases or fumes. It must be switched off near petrol stations, fuel depots, chemical plants, or where blasting operations are in progress, as operating electrical equipment in potentially explosive atmospheres can pose a safety hazard.
- RF Interference: The GSM/GPRS modem transmits and receives radio frequency energy when switched on. Users should be aware that interference can occur if the device is used close to TV sets, radios, computers, or inadequately shielded equipment. Special regulations should be followed, and the device should be switched off wherever forbidden or if interference or danger is suspected.
- Driving Safety: Road safety is paramount. The GSM/GPRS modem should not be used while driving a vehicle unless it is securely mounted in a holder for hands-free operation. Before making a call, the vehicle should be parked. Hands-free devices must be installed by qualified personnel, as faulty installation or operation can create a safety hazard.
- Emergency Calls: It is important to note that GSM/GPRS modems operate using radio signals and cellular networks, and a connection cannot be guaranteed in all conditions. Therefore, users should never rely solely on any wireless device for essential communications, such as emergency calls. To make or receive calls, the modem must be switched on and within a service area with adequate cellular signal strength. Some networks may not allow emergency calls if certain network services or phone features (e.g., lock functions, fixed dialing) are active; these may need to be deactivated. A valid SIM card must also be properly inserted.
Usage Features
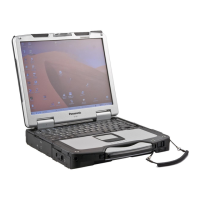
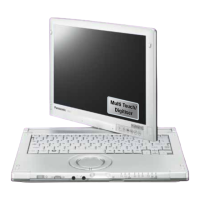
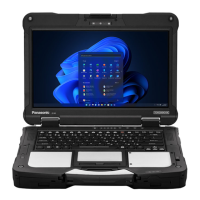
The manual details the names and functions of parts relevant to GSM/GPRS operation, including the antenna and SIM card slot for various models (CF-07, CF-28, CF-72, CF-M34 Series).
LED Description:
The device includes LEDs to indicate the status of the GSM/GPRS modem:
- GSM/GPRS Switch (Power Button): The GSM/GPRS modem powers up independently from the computer's power status and can remain on even when the computer is off, depending on the Setup Utility settings.
- Power On Indication (Green): A green LED signals when the GSM/GPRS modem has been powered on.
- Status Indication (Green):
- Off: GSM/GPRS modem is off or in SLEEP/Alarm mode.
- 600 ms On/600 ms Off: Indicates no SIM card, no PIN entered, network search, user authentication, or network login in progress.
- 75 ms On/3 s Off: Logged to network (monitoring control channels, user interactions), no call in progress.
- 75 ms On/75 ms Off/75 ms On/3 s Off: One or more GSM/GPRS contexts activated.
- Flashing: Indicates GSM/GPRS data transfer. The LED flashes within 1 second of data packet exchange, with a flash duration of approximately 0.5 seconds.
- On: Depending on call type: for voice calls, connected to remote party; for data calls, connected to remote party or exchanging parameters during call setup/disconnection.
- Ring Indication (Amber) (CF-28, CF-72, CF-M34 Series): The LED flashes when the GSM/GPRS modem receives a ring.
Installing/Removing a SIM Card:
The SIM card is essential for GSM/GPRS functionality.
- Caution: Do not install or remove the SIM card while the device is in standby or hibernation mode, or when the power is on.
- CF-07 Series: The SIM card is pre-installed. For replacement, contact Panasonic Technical Support.
- CF-28 Series:
- Power off the computer and GSM/GPRS modem.
- Remove the computer's cover, then remove the battery pack.
- Installing: Slide the SIM card at an angle, snap it into place by pushing down, and then lock the latch. Ensure the SIM card is not inserted upside down.
- Removing: Unlock the latch, lift up the card, and gently remove it from the slot.
- Replace the cover.
- CF-72 Series:
- Power off the computer and GSM/GPRS modem.
- Installing: Set the SIM card into the socket, turn the socket over, and insert the socket into the SIM card slot. Ensure the SIM card is not inserted upside down.
- Replace the cover.
- CF-M34 Series:
- Caution: To remove the cover, contact Panasonic Technical Support. Removing the cover may void the computer's waterproof performance warranty.
- Power off the computer and GSM/GPRS modem.
- Remove the computer's cover, then remove the battery pack.
- Installing: Slide the SIM card at an angle, snap it into place by pushing down, and then lock the latch. Ensure the SIM card is not inserted upside down.
- Removing: Press the button, remove the socket, and then remove the SIM card from the socket.
- Replace the cover.
Using GSM/GPRS (Windows 2000):
This section outlines the process for setting up a modem driver and the Dial-up network for GPRS.
- Turn on: Power on the computer and GSM/GPRS modem, then raise the antenna.
- Install Modem Driver:
- If reinstalling the OS, the modem driver must be reinstalled.
- Navigate to [Start] - [Settings] - [Control Panel] - [Phone and Modem Options] - [Modems].
- Select [Add], check [Don't detect my modem; I will select it from a list], then [Next].
- Select manufacturers and models, setting to [Standard Modem type] and [Standard 19200 bps Modem], then [Next].
- Select the COM port connected to the GSM/GPRS modem, then [Next].
- Select [Finish].
- Select [Standard 19200 bps Modem], then [Properties] - [General].
- Set [Maximum Port Speed] to [57600] (recommended), then select [Advanced].
- Enter extra initialization commands (refer to "Appendix (GPRS AT commands)"), then select [Change Default Preferences] - [Advanced]. The example shows settings for a PDP context (CID=1, PDP type=ip, APN=internet.t-d1.de), noting that the APN must be replaced with the user's network provider's APN address.
- Set necessary settings and select [OK].
- Select [Diagnostics] - [Query Modem] to confirm driver installation, then [OK].
- Select [OK].
- Set up the Dial-up network: Settings may vary by service provider.
- Select [My Computer] - [Network and Dial-up Connections] - [Make New Connection].
- Select [Next].
- Select [Dial-up to the Internet], then [Next].
- Select [I want to set up my Internet connection manually, or I want to connect through a local area network (LAN)], then [Next].
- Select [I connect through a phone line and a modem], then [Next].
- Select [Standard 19200 bps Modem], then [Next].
- Enter [99**1#] or [*99#] at [Telephone number], then [Next]. Remove the check mark.
- Enter the user name and password provided by the local provider, then [Next].
- Enter a suitable connection name, then [Next].
- Select [No], then [Next].
- Remove the check mark for [To connect to the Internet immediately, select this box and then click Finish.], then [Finish].
- Select [My Computer] - [Network and Dial-up Connections], right-click the newly created connection, then select [Properties].
- Select [Networking]-[Properties].
- Set necessary settings and select [OK], then [OK].
Getting Started:
- Register to the GSM network:
- To use GPRS services, the computer must be registered to the GSM network, requiring PIN authentication.
- If the SIM card is unlocked, the device logs on automatically.
- If the SIM card is locked, use a terminal program (8 Databits, No Parity, 1 Stopbit, flow control, 57600 bps) to enter the PIN using the AT+CPIN command (e.g., AT+CPIN=1234). Close the terminal program afterward.
- Define the PDP context:
- A PDP context must be defined to activate a dial-up network connection, informing the network about connection parameters.
- If no entry is made in [Extra Settings] of the modem properties (page 12) and the dial-up network starts with *99#, default PDP context values are used.
- Note: Predefining a PDP context may be required if the network provider requests an APN. In such cases, either use [Extra Settings] or define it manually via a terminal program.
- If [Extra Settings] are filled, use 99**# as the phone number entry to activate the PDP context with predefined values. Using *99# will ignore predefined values.
- Manual definition via terminal program (57600 Baud, 8 Databits, No Parity, 1 Stopbit, flow control) using the “AT+CGDCONT” command (e.g., AT+CGDCONT=1,ip,internet.t-d1.de ). Close the terminal program afterward.
- Define the QoS profile:
- Optional QoS parameters (delay class, mean throughput rate) can be set before activating the PDP context via a terminal program (57600 Baud, 8 Databits, No Parity, 1 Stopbit, flow control).
- Use “AT+CGQMIN" and/or “AT+CGQREQ" commands (e.g., AT+CGQREQ=1,3,4,3,0,0 ). Close the terminal program afterward.
- Note: QoS AT commands are only used when a PDP context is defined. To activate with predefined QoS values, use 99**# as the phone number entry. Using *99# will ignore predefined values.
- Set up a GPRS call:
- Select [My Computer] - [Network and Dial-up Connections].
- Select the connection created earlier.
- Enter the user name and password requested by the local provider, then select [Dial].
Dealing with Problems:
- Modem does not power on: Check if the battery is fully charged or if the AC adaptor is connected.
- Computer does not recognize the modem:
- Verify the modem is powered on.
- Check if operating environment settings have been changed.
- Confirm [Wireless Modem] is set to [Auto] or [Enable] in Setup Utility, and check [Power SYNC with PC] setting.
- Cannot send/receive (no GSM/GPRS network contact; low Signal strength):
- If indoors, move closer to a window.
- Ensure the antenna is in the upright position.
- Modem and computer on, but no network contact:
- Insufficient coverage in the immediate physical area. Try moving near a window or outside.
- Ensure the antenna is in the upright position.
- Verify GSM/GPRS network subscription is activated.
- Check if operating environment settings have been changed.
Appendix (Setup Utility):
The [Advanced] menu of the Setup Utility includes parameters for Wireless Modem settings:
- Wireless Modem: Disable, Enable, Auto.
- I/O IRQ*: 3F8/IRQ4, 2F8/IRQ3 (CF-07, CF-28, CF-72, CF-M34 Series), 3E8/IRQ11, 2F8/IRQ10 (CF-28, CF-72 Series), 3E8/IRQ5, 2F8/IRQ7 (CF-M34 Series). This item is displayed only when [Wireless Modem] is set to [Enable].
- Ring Resume: Disable, Enable (CF-28, CF-M34 Series).
- Power SYNC with PC: Independent, On & Off, Off Only.
Appendix (GPRS AT commands):
These commands allow application software or manual terminal program input to establish a PDP context and activate the PPP stack for GPRS data transmission.
- Entering the PIN (AT+CPIN): Refer to page 17. Example: AT+CPIN=1234 .
- Defining a PDP context (AT+CGDCONT): Refer to page 18. Example: AT+CGDCONT=1,ip,internet.t-d1.de .
- Defining a QoS profile (AT+CGQREQ, AT+CGQMIN): Refer to page 18. Example: AT+CGQREQ=1,3,4,3,0,0 .
- GPRS attach (AT+CGATT): The modem must be GPRS attached to use the service. Example: AT+CGATT=1.
- Note: GPRS attach may occur automatically before PDP context and QoS profile definition.
- PDP context activation (AT+CGACT): Activates a PDP context for data transmission. Example: AT+CGACT=1,.
- Note: Multiple contexts can be activated. If GPRS attach hasn't occurred, it will be done automatically.
- Entering the GPRS data mode (AT+CGDATA): Sets the modem in GPRS data mode and activates the PPP stack. Example: AT+CGDATA=PPP,.
- Note: The OS initiates driver activation for TCP/IP connection. Users are responsible for adapting software and providing drivers.
Modem compatible PDP context activation:
- No preceding PDP context activation: Discrete AT commands can be replaced by the ATD command. Example: ATD*99#.
- Preceding PDP context activation: If QoS and PDP context parameters are defined, use AT commands as described in "Discrete PDP context activation." Example: AT+CGDCONT=1,IP,volume.d2gprs.de, AT+CGQREQ=1,3,4,3,0,0, ATD99**1#.
Shutting down the connection:
- Dial-Up Network: The GPRS data connection can be shut down via the "hang up" button, but the PDP context remains active.
- AT+CGACT: The PDP context can be stopped with AT+CGACT=0,.
- AT+CGATT: Detaching with AT+CGATT=0, prevents further GPRS data connections until reattaching.
- Note: CGATT also deactivates the PDP context if not already done.
- ATH: This command closes a data connection, deactivates the PDP context, and detaches the modem.
- Note: ATH closes all ongoing voice and data connections.