White/Sticky
Brown Rice
Timer
Cooking
Timer
Porridge
Cake
Slow Cook
Steam
12
Functions
Cake
Important Information
• Baking time depends on quantity and type of cake.
• Please wear the gloves while taking out the pan.
• Leaving the cake inside the pan will cause the cake to be
wet.
• After baking, some oil stains may remain in the pan. This
is normal.
Preparations
• Prepare cake mix. (Refer to the instruction from the cake mix you purchased or as instructed in the recipe book.)
• Coat the inner surface area (bottom and sides) of the pan with butter (or cooking oil), pour the complete mixture
into the pan and close the lid.
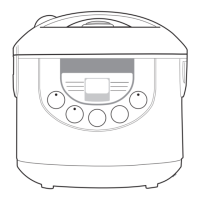
Operations
(Cooking with the Cake function.)
Press
Menu
button to select Cake function.
• The
Start
indicator light fl ashes and 40M (40 minutes) will appear on LCD display (as the default baking
time for Cake function).
1
Press
Cooking
Timer
button to set the cooking time as your desire.
• You can set the cooking time from 20 to 65 minutes (5 minutes increment).
• Keeping the button pressed will make setting faster.
2
Press
Start
button.
• The
Start
indicator lights up and the cooking starts.
• The LCD display will show remaining time in 1 minute decrement.
3
The cooking is over
• When cooking is over, the electronic warm jar beeps and automatically
switches to the Keep Warm function (The
Start
indicator turns off and the
Keep Warm
Off
indicator lights up automatically).
• However, we do not recommend using the Keep Warm function as it may
affect the taste. Press the
Keep Warm
Off
button to exit the Keep Warm function and
unplug the power plug.
• Bring out the pan and leave it cool for 2-3 minutes. Then put the pan upside
down onto a tray or grill.
• Decorate the cake surface as your desire.
Pan
Hand glove
Bread / Cake
Cooking
Timer
Cake
2004_SR-TMH18_10_EN-HK.indd 122004_SR-TMH18_10_EN-HK.indd 12 4/20/2016 8:41:04 AM4/20/2016 8:41:04 AM
 Loading...