EasyManua.ls Logo

Panasonic TX-32PS11P User Manual

Panasonic TX-32PS11P
36 pages
To Next Page IconTo Next Page
Page #1 background imageLoading...
Page #1 background image
D
VRQ
L
Fk
3
DQDVRQ
L
Fk
3
DQDVRQ
L
Fk
3
DQDVRQ
L
Fk
3
DQDVRQ
L
Fk
3
DQDVRQ
L
Fk
3
DQDVRQ
L
Fk
3
DQDVRQ
L
Fk
3
DQ
D
R
QLFk3DQDVRQLFk3DQDVRQLFk3DQDVRQLFk3DQDVRQLFk3DQDVRQLFk3DQDVRQLFk3DQDVRQLFk3DQDV
R
F
k3DQDVRQLFk3DQDVRQLFk3DQDVRQLFk3DQDVRQLFk3DQDVRQLFk3DQDVRQLFk3DQDVRQLFk3DQDVRQ
L
3
DQDVRQLFk3DQDVRQLFk3DQDVRQLFk3DQDVRQLFk3DQDVRQLFk3DQDVRQLFk3DQDVRQLFk3DQDVRQLF
k
D
QDVRQLFk3DQDVRQLFk3DQDVRQLFk3DQDVRQLFk3DQDVRQLFk3DQDVRQLFk3DQDVRQLFk3DQDVRQLFk3
D
D
VRQLFk3DQDVRQLFk3DQDVRQLFk3DQDVRQLFk3DQDVRQLFk3DQDVRQLFk3DQDVRQLFk3DQDVRQLFk3DQ
D
R
QLFk3DQDVRQLFk3DQDVRQLFk3DQDVRQLFk3DQDVRQLFk3DQDVRQLFk3DQDVRQLFk3DQDVRQLFk3DQDV
R
F
k3DQDVRQLFk3DQDVRQLFk3DQDVRQLFk3DQDVRQLFk3DQDVRQLFk3DQDVRQLFk3DQDVRQLFk3DQDVRQ
L
3
DQDVRQLFk3DQDVRQLFk3DQDVRQLFk3DQDVRQLFk3DQDVRQLFk3DQDVRQLFk3DQDVRQLFk3DQDVRQLF
k
D
QDVRQLFk3DQDVRQLFk3DQDVRQLFk3DQDVRQLFk3DQDVRQLFk3DQDVRQLFk3DQDVRQLFk3DQDVRQLFk3
D
D
R
Q
L
3
Q
R
Q
L
3
Q
R
Q
L
3
Q
R
Q
L
3
Q
R
Q
L
3
Q
R
Q
L
3
Q
R
Q
L
3
Q
R
Q
L
3
Q
D
74%(80
7;363
2SHUDWLQJ ,QVWUXFWLRQV
&RORXU 7HOHYLVLRQ
(QJOLVK

Other manuals for Panasonic TX-32PS11P

Question and Answer IconNeed help?

Do you have a question about the Panasonic TX-32PS11P and is the answer not in the manual?

Panasonic TX-32PS11P Specifications

General IconGeneral
Screen Size32 inches
Display TechnologyCRT
Aspect Ratio4:3
TunerAnalog
ConnectivitySCART
Dimensions (W x H x D)500 mm

Summary

Warnings and Precautions

General Safety Warnings

Covers electrical safety, environmental factors, and safe usage practices for the TV.

Cabinet and Picture Tube Care

Instructions for cleaning and handling the TV's exterior and screen to prevent damage.

Environmental and Usage Guidelines

Advises on equipment disposal and specific usage advice for games/computers.

Sleep Feature

Describes the automatic standby function that activates after 30 minutes of inactivity.

Accessories

Included Items

Lists the operating instruction book, remote control, and batteries provided with the TV.

Remote Control Battery Installation

Guidance on correctly inserting batteries into the remote control.

Quick Start Guide

Initial Connection Steps

Connecting aerial and ancillary equipment, and powering on the TV.

Basic Setup Procedure

Selecting country and language for initial TV setup and auto-tuning.

Basic Controls

Front Panel Button Functions

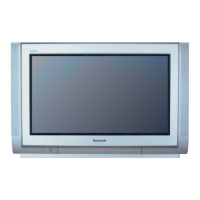
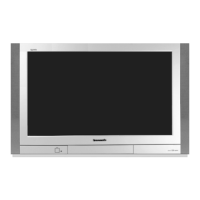
Description of buttons located on the television's front panel.

Remote Control Button Functions

Explanation of all buttons on the remote control and their uses.

Menu Structure Overview

Main Menu Options

Overview of the primary menu categories: Viewing, Picture, Sound, Setup.

Menu Navigation

Accessing and understanding Picture, Sound, Setup, and Tuning menus.

Aspect Controls Navigation

Accessing picture aspect ratio adjustments.

Using the On-Screen Displays

Menu Navigation Basics

How to navigate through menus using remote control buttons.

Picture Settings Adjustments

Adjusting Contrast, Brightness, Colour, and Sharpness levels.

Sound Settings Adjustments

Adjusting Volume, Bass, Treble, and Balance.

Advanced Settings Access

Accessing timer, Q-Link, and other setup options.

Aspect Controls

Panasonic Auto Aspect Ratio

Automatic detection and adjustment of picture aspect ratio based on signal.

16:9 Aspect Ratio Display

How to view widescreen content correctly without distortion.

14:9 Aspect Ratio Display

How to view 14:9 content without distortion.

Just and 4:3 Aspect Ratio

Expanding 4:3 content or viewing standard 4:3 pictures.

Zoom Aspect Ratios

Using Zoom1, Zoom2, and Zoom3 for aspect adjustments.

Hold Control

Freezing the Picture

How to use the HOLD button to freeze the current image.

Main Menu Functions

Viewing Mode Selection

Choosing between Dynamic, Normal, and Cinema screen settings.

Accessing Picture Menu

Navigating to the Picture adjustments menu.

Accessing Sound Menu

Navigating to the Sound adjustments menu.

Accessing Setup Menu

Navigating to the Setup options menu.

Picture Menu

Viewing Mode Customization

Storing settings for Dynamic, Normal, and Cinema viewing modes.

Picture Quality Adjustments

Fine-tuning Contrast, Brightness, Colour, and Sharpness levels.

Colour Balance and Noise Reduction

Adjusting colour tone and picture interference (P-NR).

Sound Menu

Volume and Frequency Control

Adjusting overall volume levels and Bass/Treble frequencies.

Balance and MPX Settings

Adjusting speaker balance and audio mode (Stereo/Mono).

Sound Mode and Ambience

Enhancing sound with music/speech modes and spatial effects.

Setup Menu Options

AV Output and Timer Configuration

Setting signals for AV1/AV2 and configuring the auto-off timer.

Q-Link, Text Language, and Tuning

Managing data communication, teletext language, and tuning access.

OSD Language and Geomagnetic Correction

Selecting display language and adjusting picture tilt/patches.

Tuning Menu Features

Programme Management and Auto Setup

Editing channels and performing automatic station scans.

Manual/Fine Tuning and Colour System

Tuning specific channels manually and setting transmission standards.

Volume Correction and Decoder

Adjusting station volumes and configuring external decoders.

Tuning Menu: Programme Edit

Editing Programme Positions

Storing, deleting, and moving channels within the programme list.

Managing Channel Data

Options for adding, moving, and deleting programmes from the list.

Tuning Menu: Programme Edit (Continued)

Adding and Moving Channels

Inserting new programmes and rearranging existing ones.

Manual Channel Tuning

Directly entering channel numbers via the menu.

Tuning Menu: Programme Edit (Advanced)

Renaming and Locking Channels

Editing programme names and preventing access to channels.

Changing TV System

Selecting the correct broadcast system (PAL/SECAM).

Tuning Menu: Programme Data Transfer

Copying Programme Information to VCR/DVD

Transferring channel information to a compatible VCR/DVD via Q-Link.

Tuning Menu: Auto Setup (ATP)

Automatic Station Search

The process of automatically finding and storing channels.

Country and Region Settings

Selecting the correct region for optimal tuning.

Q-Link Data Transfer

Sending tuning data to connected VCR/DVD via Q-Link.

Tuning Menu: Manual Tuning

Manual Tuning via On-Screen Menu

Step-by-step guide for menu-based channel tuning.

Manual Tuning via Front Panel

Using physical buttons for manual channel tuning.

Tuning Menu: Manual Tuning (Front Panel)

Front Panel Tuning Operations

Detailed steps for using front panel tuning controls.

Accessing and Storing Tuning Settings

Navigating tuning modes and saving changes via front panel.

On-Screen Display Language

On-Screen Display Language Selection

Choosing the language for menu displays and on-screen information.

Q-Link Functionality

Q-Link Connection Requirements

SCART lead requirements and device compatibility for Q-Link.

Recording Programmes via Q-Link

Using the DIRECT TV REC button for recording programmes.

Understanding Recording Status

Interpreting messages related to recording status and errors.

Q-Link Features and Notes

Sharing Tuning Data

Ensuring VCR and TV have matching tuning information for reliable recordings.

Auto Power and Q-Link Features

VCR auto power control and disabling Q-Link.

Important Q-Link Notes

Compatibility checks and SCART lead verification.

VCR / DVD/R Operation

Basic VCR/DVD Controls

Operating standby, play, stop, and record functions.

Playback Navigation

Using fast forward, rewind, pause, and skip functions.

Programme Selection

Navigating VCR programme positions using up/down controls.

Teletext Operation

Teletext Basics and Modes

Understanding Teletext availability, LIST, and FASTEXT modes.

Teletext Page Navigation

Selecting pages using buttons or direct number entry.

Teletext Special Functions

Using MENU for reveal, update, and sub-coded pages.

Teletext Operation (Continued)

Teletext Page Management

Holding pages, storing favourites, and using the index.

Sub-Coded Page Access

Accessing specific teletext sub-pages for detailed information.

Audio / Video Connections

AV Input Selection

Switching between TV and AV sources using the TV/AV button.

Front AV Connections

Description of front panel audio and video inputs.

Rear AV Connections

Description of rear panel audio and video inputs and outputs.

Audio / Video Connections (Details)

SCART Socket Pinouts

Technical details for AV1 and AV2 SCART terminals.

S-Video Socket Information

Technical details for the S-Video connection.

Troubleshooting Guide

Picture Problem Diagnosis

Diagnosing and resolving common picture issues like snowy or distorted images.

Sound Problem Diagnosis

Diagnosing and resolving common sound issues like noisy or no sound.

For Your Guidance

Service and Support Information

Guidance on contacting Panasonic for service and repairs.

Technical Specifications Overview

Details on power, dimensions, weight, and receiving systems.

Connection Ports and Features

Specifics on AV inputs, outputs, and programme positions.
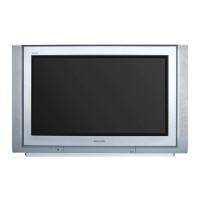
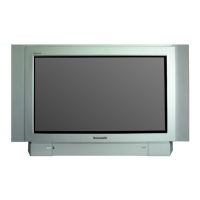
Related product manuals