EasyManua.ls Logo

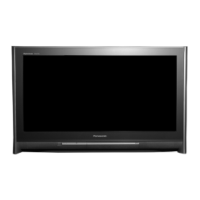
Panasonic TX-32PM2 User Manual

Panasonic TX-32PM2
44 pages
To Next Page IconTo Next Page
Page #1 background imageLoading...
Page #1 background image
D
VRQ
L
Fk
3
DQDVRQ
L
Fk
3
DQDVRQ
L
Fk
3
DQDVRQ
L
Fk
3
DQDVRQ
L
Fk
3
DQDVRQ
L
Fk
3
DQDVRQ
L
Fk
3
DQDVRQ
L
Fk
3
DQ
D
R
QLFk3DQDVRQLFk3DQDVRQLFk3DQDVRQLFk3DQDVRQLFk3DQDVRQLFk3DQDVRQLFk3DQDVRQLFk3DQDV
R
F
k3DQDVRQLFk3DQDVRQLFk3DQDVRQLFk3DQDVRQLFk3DQDVRQLFk3DQDVRQLFk3DQDVRQLFk3DQDVRQ
L
3
DQDVRQLFk3DQDVRQLFk3DQDVRQLFk3DQDVRQLFk3DQDVRQLFk3DQDVRQLFk3DQDVRQLFk3DQDVRQLF
k
D
QDVRQLFk3DQDVRQLFk3DQDVRQLFk3DQDVRQLFk3DQDVRQLFk3DQDVRQLFk3DQDVRQLFk3DQDVRQLFk3
D
D
VRQLFk3DQDVRQLFk3DQDVRQLFk3DQDVRQLFk3DQDVRQLFk3DQDVRQLFk3DQDVRQLFk3DQDVRQLFk3DQ
D
R
QLFk3DQDVRQLFk3DQDVRQLFk3DQDVRQLFk3DQDVRQLFk3DQDVRQLFk3DQDVRQLFk3DQDVRQLFk3DQDV
R
F
k3DQDVRQLFk3DQDVRQLFk3DQDVRQLFk3DQDVRQLFk3DQDVRQLFk3DQDVRQLFk3DQDVRQLFk3DQDVRQ
L
3
DQDVRQLFk3DQDVRQLFk3DQDVRQLFk3DQDVRQLFk3DQDVRQLFk3DQDVRQLFk3DQDVRQLFk3DQDVRQLF
k
D
QDVRQLFk3DQDVRQLFk3DQDVRQLFk3DQDVRQLFk3DQDVRQLFk3DQDVRQLFk3DQDVRQLFk3DQDVRQLFk3
D
D
R
Q
L
3
Q
R
Q
L
3
Q
R
Q
L
3
Q
R
Q
L
3
Q
R
Q
L
3
Q
R
Q
L
3
Q
R
Q
L
3
Q
R
Q
L
3
Q
D
74%(0
7 ;  3 0
2SHUDWLQJ ,QVWUXFWLRQV
&RORXU 7HOHYLVLRQ
8. 52, 6WDQGDUG
(QJOLVK
Question and Answer IconNeed help?

Do you have a question about the Panasonic TX-32PM2 and is the answer not in the manual?

Panasonic TX-32PM2 Specifications

General IconGeneral
BrandPanasonic
ModelTX-32PM2
CategoryTV
LanguageEnglish

Summary

Warnings and Precautions

High Voltage Warning

Warning about accessing internal parts and high voltage.

Cabinet and Picture Tube Care

Instructions for cleaning the TV cabinet and picture tube.

TV Games and Home Computers Precautions

Precautions for using the TV with games/computers to prevent screen damage.

Sleep Feature Explanation

Explanation of the automatic standby function.

Accessories Checklist

Inserting the Remote Control Batteries

Step-by-step guide for inserting batteries into the remote control.

Quick Start Guide

RF Cable Connection

Guide for connecting the TV using an RF cable.

Scart and RF Cable Connection with VCR

Guide for connecting TV to VCR/DVD using Scart and RF cables.

What is Q-Link?

Q-Link Connection of TV and VCR

Scart Connection for Q-Link

Details on connecting via Scart cable for Q-Link.

RF Connection for Q-Link

Details on connecting via RF cable for Q-Link.

Q-Link Connection with Satellite Receiver

Scart and RF Connections

Scart and RF connection details for TV, VCR, and Satellite Receiver.

Owner ID and Personal Details Setup

Owner ID and PIN Number Entry

Setting up Owner ID with a PIN number.

Personal Details Entry

Entering Name, House Number, and Postcode.

TV to VCR (DVD/R) Download

Geomagnetic Correction

Basic Controls: Front Panel and Remote

Power and Standby Controls

Main power and standby switches.

Navigation and Menu Buttons

Buttons for accessing menus and navigating options.

Special Function Buttons

Buttons for specific features like Teletext, Direct Record, Normalise.

Menu Structure Overview

Main Menu and Core Submenus

Overview of main menu and its primary branches (Picture, Sound, Setup).

Tuning and Advanced Settings

Overview of Tuning menu and Geomagnetic Correction.

Picture Aspect Ratio Control

Overview of Aspect Controls.

Using the On-Screen Displays

Main Menu Navigation

How to open and navigate the main menu.

Picture Menu Adjustments

How to adjust picture settings like contrast and brightness.

Menu Button Functions

Explanation of the MENU, TV/AV, and N buttons.

Aspect Controls

Panasonic Auto Aspect Ratio

How Panasonic Auto detects and sets aspect ratio.

16:9 Aspect Ratio

How to display a true 16:9 picture.

Aspect Ratio Modes

14:9 and 4:3 Aspect Ratios

How to display 14:9 and 4:3 pictures.

Zoom Aspect Ratio Modes

How Zoom1 and Zoom2 adjust aspect ratios.

Main Menu

Picture Menu

Accessing and adjusting picture quality settings.

Sound Menu

Accessing and adjusting sound quality settings.

Setup Menu

Accessing advanced features and tuning options.

Picture Menu

Viewing Modes

Selecting and adjusting Dynamic, Normal, and Cinema screen settings.

Picture Parameter Adjustments

Adjusting Contrast, Brightness, Colour, Sharpness, and P-NR.

Colour Balance

Setting the overall colour tone of the picture.

Sound Menu

Volume and Tone Adjustments

Adjusting Volume, Bass, and Treble.

Sound Settings

Adjusting Balance, NICAM, Mode, and Ambience.

Setup Menu

AV Output and Teletext Settings

Configuring AV outputs and Teletext options.

Q-Link and Power Settings

Configuring Q-Link and power-on preferences.

Tuning Menu Access

Entry point to tuning features.

Geomagnetic Correction

Using Geomagnetic Correction for picture alignment.

Tuning Menu

Programme Edit

Managing programme positions (add, delete, move).

Auto Setup

Automatic TV retuning process.

Manual and Fine Tuning

Manually tuning and fine-tuning stations.

Shipping Condition and Owner ID

Resetting to factory settings and setting owner information.

Tuning Menu - Programme Edit

Editing Programme Positions

Adding, deleting, and moving programme channels.

Locking Programme Positions

Preventing unauthorized access to channels.

Programme Edit Operations

Adding and Moving Programmes

Procedures for adding and repositioning channels.

Renaming Programme Positions

Changing the name of programme channels.

Programme Edit - Advanced Functions

Locking and Copying Programme Data

Locking channels and copying data to VCR/DVD.

Tuning Menu - Auto Setup

Performing Auto Setup

Step-by-step guide to automatically retune TV stations.

Q-Link Data Transfer during Auto Setup

Transferring programme data to VCR/DVD via Q-Link.

Tuning Menu - Manual Tuning

Manual Tuning Procedure

How to tune individual programme positions manually.

Manual Tuning Front Panel Operation

Programme Table Selection

Using the programme table to select tuned channels.

Tuning Menu - Shipping Condition

Resetting to Factory Settings

Restoring TV to original condition, clearing tuning data.

Tuning Menu - Owner ID

Setting Owner ID and PIN

Entering security code and PIN number.

Owner ID Data Entry

Entering Personal Details

Inputting Name, House Number, and Postcode.

Q-Link

Q-Link Compatibility and Connections

Requirements for Q-Link communication with VCRs.

Q-Link Features

Explanation of features like Preset Download and Direct TV Record.

Preset Download Procedure

Steps for downloading programme order from TV to VCR.

Q-Link - Direct TV Recording

Direct TV Recording Function

How to record the currently shown program.

TV/VCR Auto Power Features

Auto power on/standby and image view features.

VCR (DVD/R) and Satellite Receiver Installation

Tuning TV to VCR (DVD/R)

Steps to tune the TV to the VCR's RF output.

Scart Connection Guidelines

Using AV1 and AV2 Scart sockets for VCRs and receivers.

VCR / DVD/R Operation

Remote Control Functions

Explains basic VCR/DVD/R remote control buttons.

Teletext Operation

Teletext Modes and Page Selection

Explains LIST and FASTEXT modes and page selection.

Special Teletext Functions

Covers Full/Top/Bottom, Reveal, and Normalisation.

Teletext Advanced Functions

Hold and Favourite Page

Holding pages and storing favourite pages.

Update Display and News Flash

Using Update Display and News Flash features.

Sub Coded Page Access and Index

Accessing sub-coded pages and the index.

Audio / Video Connections

AV Select and Setup

How to select AV sources and general notes.

Front Sockets and Connections

Description of front panel audio/video inputs.

Rear Audio/Video Connections

Rear Socket Layout

Diagram and explanation of rear AV inputs.

Scart and S-Video Socket Information

AV1 SCART Terminal Pinout

Detailed pin configuration for AV1 SCART.

AV2 SCART Terminal Pinout

Detailed pin configuration for AV2 SCART.

S-Video 4 Pin Socket

Pin configuration for the S-Video socket.

Troubleshooting

Picture and Sound Symptoms

Common picture and sound issues and their causes.

Specifications

Technical Specifications

Detailed technical data for the TV model.

Receiving Systems and Band Names

Information on supported broadcast systems.

Customer Care and Disposal Information

Panasonic Contact Information

Contact details for customer support and sales.

Waste Electrical and Electronic Equipment Disposal

Guidelines for proper product disposal.
Related product manuals