EasyManua.ls Logo

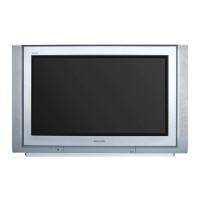
Panasonic TX-32PM11P User Manual

Panasonic TX-32PM11P
40 pages
To Next Page IconTo Next Page
Page #1 background imageLoading...
Page #1 background image
D
VRQ
L
Fk
3
DQDVRQ
L
Fk
3
DQDVRQ
L
Fk
3
DQDVRQ
L
Fk
3
DQDVRQ
L
Fk
3
DQDVRQ
L
Fk
3
DQDVRQ
L
Fk
3
DQDVRQ
L
Fk
3
DQ
D
R
QLFk3DQDVRQLFk3DQDVRQLFk3DQDVRQLFk3DQDVRQLFk3DQDVRQLFk3DQDVRQLFk3DQDVRQLFk3DQDV
R
F
k3DQDVRQLFk3DQDVRQLFk3DQDVRQLFk3DQDVRQLFk3DQDVRQLFk3DQDVRQLFk3DQDVRQLFk3DQDVRQ
L
3
DQDVRQLFk3DQDVRQLFk3DQDVRQLFk3DQDVRQLFk3DQDVRQLFk3DQDVRQLFk3DQDVRQLFk3DQDVRQLF
k
D
QDVRQLFk3DQDVRQLFk3DQDVRQLFk3DQDVRQLFk3DQDVRQLFk3DQDVRQLFk3DQDVRQLFk3DQDVRQLFk3
D
D
VRQLFk3DQDVRQLFk3DQDVRQLFk3DQDVRQLFk3DQDVRQLFk3DQDVRQLFk3DQDVRQLFk3DQDVRQLFk3DQ
D
R
QLFk3DQDVRQLFk3DQDVRQLFk3DQDVRQLFk3DQDVRQLFk3DQDVRQLFk3DQDVRQLFk3DQDVRQLFk3DQDV
R
F
k3DQDVRQLFk3DQDVRQLFk3DQDVRQLFk3DQDVRQLFk3DQDVRQLFk3DQDVRQLFk3DQDVRQLFk3DQDVRQ
L
3
DQDVRQLFk3DQDVRQLFk3DQDVRQLFk3DQDVRQLFk3DQDVRQLFk3DQDVRQLFk3DQDVRQLFk3DQDVRQLF
k
D
QDVRQLFk3DQDVRQLFk3DQDVRQLFk3DQDVRQLFk3DQDVRQLFk3DQDVRQLFk3DQDVRQLFk3DQDVRQLFk3
D
D
R
Q
L
3
Q
R
Q
L
3
Q
R
Q
L
3
Q
R
Q
L
3
Q
R
Q
L
3
Q
R
Q
L
3
Q
R
Q
L
3
Q
R
Q
L
3
Q
D
74%(80
7;3038
2SHUDWLQJ ,QVWUXFWLRQV
&RORXU 7HOHYLVLRQ
(QJOLVK

Other manuals for Panasonic TX-32PM11P

Question and Answer IconNeed help?

Do you have a question about the Panasonic TX-32PM11P and is the answer not in the manual?

Panasonic TX-32PM11P Specifications

General IconGeneral
Screen Size32 inches
Display TypeCRT
ResolutionStandard Definition
Aspect Ratio4:3
TunerAnalog
HDMI Ports0
SCART Ports2
VGA InputNo

Summary

Warnings and Precautions

High Voltage Warning

Warning regarding live parts accessible when the rear cover is removed.

Cabinet and Picture Tube Care

Instructions for cleaning the TV cabinet and picture tube.

TV Games and Computer Usage Precautions

Advice on preventing screen 'shadow' damage from extended use of games/computers.

Sleep Feature Operation

Explanation of the automatic standby mode after 30 minutes of inactivity.

Accessories

Included Accessories

List of items included with the television set.

Remote Control Battery Installation

Step-by-step guide on how to insert batteries into the remote control.

Quick Start Guide

Initial Setup and Connections

Instructions for connecting aerial, ancillary equipment, and powering on the TV.

Automatic Channel Tuning Process

Guide to country selection and automatic station setup (ATP).

Q-Link and Picture Adjustment

Information on Q-Link setup and initial picture correction.

Geomagnetic Correction

Adjusting Picture Tilt

How to use the Geomagnetic Correction feature to level the picture.

Front Panel Geomagnetic Correction

Using the front panel controls for Geomagnetic Correction.

Basic Controls

Front Panel Controls

Description of buttons and indicators on the TV's front panel.

Remote Control Overview

Explanation of buttons on the remote control and their functions.

Input/Output Sockets

Identification of audio and video connection sockets on the front panel.

Menu Structure

Main Menu Navigation

Overview of the main menu options: Picture, Sound, Setup, and Tuning.

Picture and Sound Menu Details

Sub-options within the Picture and Sound menus.

Setup and Tuning Menu Details

Sub-options within the Setup and Tuning menus, including Auto/Manual setup.

Aspect Control Options

List of aspect ratio adjustments available.

On Screen Display (OSD) Usage

Navigating Menus

How to use menu titles, sub-menus, and cursor controls.

Adjusting Picture Settings

Using OSD to adjust parameters like Contrast, Brightness, and Colour.

OSD Control Buttons

Explanation of MENU, cursor, OK, TV/AV, and N buttons.

Aspect Controls

Panasonic Auto Aspect Mode

How Panasonic Auto selects the best aspect ratio for the picture.

16:9 Aspect Ratio

Displaying a true 16:9 picture with no aspect distortions.

Aspect Control Modes

14:9 Aspect Ratio

Displaying a true 14:9 picture with no aspect distortions.

Just Aspect Mode

Expanding a 4:3 picture to fill the screen with horizontal stretching.

4:3 Aspect Ratio

Displaying a 4:3 picture at its standard size with no aspect distortions.

Zoom1 Aspect Mode

Displaying 16:9 letterbox or 4:3 pictures with no aspect distortions.

Aspect Control Modes (Continued)

Zoom2 Aspect Mode

Displaying 16:9 anamorphic letterbox pictures as full screen.

Zoom3 Aspect Mode

Displaying 21:9 letterbox pictures as full screen with slight stretching.

Hold Control

Freezing the Picture

Using the HOLD key to freeze the current picture display.

Main Menu

Accessing Menu Options

How to open and navigate the main menu system.

Viewing Mode Selection

Choosing between Dynamic, Normal, and Cinema screen settings.

Picture, Sound, and Setup Menus

Overview of the Picture, Sound, and Setup menu functions.

Picture Menu

Viewing Mode Settings

Selecting and storing screen settings like Dynamic, Normal, and Cinema.

Picture Adjustment Parameters

Adjusting Contrast, Brightness, Colour, Sharpness, and Colour Balance.

Picture Noise Reduction

Using P-NR to automatically reduce unwanted picture interference.

Sound Menu

Basic Sound Adjustments

Adjusting Volume, Bass, Treble, and Balance for sound quality.

Advanced Sound Settings

Configuring MPX, Mode, and Ambience for enhanced audio.

Setup Menu

AV Output and Teletext Settings

Configuring AV output, Teletext modes, and timer functions.

Picture and Language Settings

Adjusting flicker reduction, Q-Link, text, and OSD languages.

Tuning and Geomagnetic Settings

Accessing tuning menus and geomagnetic correction features.

Setup Menu Options

Q-Link and Text Language Configuration

Setting up Q-Link for VCR communication and selecting text character sets.

Tuning Menu Access and OSD Language

Accessing the tuning menu and selecting the On Screen Display language.

Geomagnetic Correction Explanation

Using Geomagnetic Correction to fix picture tilt or coloured patches.

Tuning Menu

Programme Edit and Auto Setup

Managing programme positions and automatically tuning stations.

Manual and Fine Tuning

Manually tuning individual programme positions and fine-tuning reception.

Colour System and Volume Correction

Setting transmission standards and adjusting volume levels per station.

Decoder Connection Setup

Configuring the TV for use with an external decoder via AV1 or AV2.

Programme Edit

Deleting Programme Positions

Instructions for removing unwanted channels from the programme list.

Programme Edit Interface

Overview of the programme edit screen and its functions.

Programme Editing Operations

Adding and Moving Programmes

Steps to add new channels and rearrange existing programme positions.

Tuning Programme Positions

Manually tuning specific programme positions and channel numbers.

Programme Position Settings

Renaming and Locking Programmes

How to rename channels and set access locks for programme positions.

Changing TV System Settings

Selecting the appropriate TV system (PAL/SECAM) for each programme.

Programme Information Transfer

Copying Programme Data to VCR/DVD/R

Transferring programme information from the TV to a VCR or DVD/R.

Programme Table

Navigating the Programme Table

Using buttons to select, scroll, and confirm programme positions.

Auto Setup (ATP)

Initiating Auto Setup

Steps to start the automatic tuning process after selecting the country.

Auto Setup Process and Data Transfer

How the TV searches for stations and sends data to VCR/DVD/R via Q-Link.

Manual Tuning

Manual Tuning Steps

Procedure for selecting a programme position and starting manual tuning.

Storing and Exiting Manual Tuning

How to store the tuned programme and exit the manual tuning menu.

Manual Tuning via Front Panel

Initiating Front Panel Tuning

Using front panel buttons to enter tuning mode and select functions.

Front Panel Tuning Operations

Steps for changing positions, starting search, and storing tuned stations.

OSD Language Selection

Accessing OSD Language Menu

Navigating through the menus to reach the OSD language selection.

Selecting Display Language

Choosing the desired language for on-screen display messages.

Q-Link Functionality

Q-Link Setup and Requirements

Connecting VCR/DVD/R and understanding Q-Link requirements.

Recording Programmes with Q-Link

Using the DIRECT TV REC button to record the current programme.

Q-Link Features

Sharing Tuning Information

Ensuring correct recordings by sharing tuning data between TV and VCR/DVD/R.

Auto Power and Q-Link Control

Using Auto Power functions and turning off Q-Link communication.

VCR / DVD/R Operation

Basic VCR/DVD/R Controls

Operating basic functions like Standby, Play, Stop, and Record.

Navigation and Playback Controls

Using Skip, Pause, and Programme Up/Down for playback control.

Teletext Operation

Teletext Modes Explained

Understanding LIST mode and FLOF (FASTEXT) for teletext.

Navigating Teletext Pages

Selecting pages, controlling display size, and revealing information.

Teletext List Store and Normalisation

Storing favourite teletext pages and resetting teletext settings.

Advanced Teletext Functions

Holding and Recalling Teletext Pages

Using Hold and Favourite Page (F.P.) functions for teletext.

News Flash and Updates

Displaying and updating news flashes and other information.

Sub Coded Pages and Index

Accessing sub-coded pages and returning to the main index.

Audio / Video Connections

AV Input Selection

Selecting AV sources and understanding automatic switching.

Front Panel Audio/Video Sockets

Description of headphone, S-Video, and RCA input/output sockets.

Rear Panel Connections

Rear Panel Audio and SCART Sockets

Details of rear panel audio output and AV1/AV2 SCART socket connections.

Connecting External Equipment

Diagrams showing connections for VCRs, satellite receivers, DVD players, etc.

Scart and S-Video Socket Details

AV1 SCART Pinout

Detailed pin configuration for the AV1 21-pin SCART terminal.

AV2 SCART and S-Video Pinouts

Pin configurations for the AV2 SCART and S-Video sockets.

Troubleshooting

Picture Issues and Solutions

Troubleshooting snowy, multiple, interference, and coloured patch picture problems.

Sound Issues and Solutions

Resolving no sound, noisy sound, and weak sound reception problems.

Service and Guidance

Service Information

Guidance on when to contact service and what information to provide.

Specifications

Power and Physical Specifications

Details on power, consumption, dimensions, weight, and picture tube size.

Tuning and Connectivity Specifications

Information on receiving systems, programme positions, teletext, and AV inputs.

Disposal Information

Disposal for Private Households

Instructions for disposing of electrical and electronic equipment correctly.

Disposal for Business Users and Other Countries

Guidance for business users in the EU and users outside the EU.

Related product manuals