Initial Setup | Operating the TV
9
Initial Setup
When you first turn on the TV, a series of steps will pop-
up to guide you to setup your TV.
●
These steps are not necessary if the setup has been
completed by your local dealer.
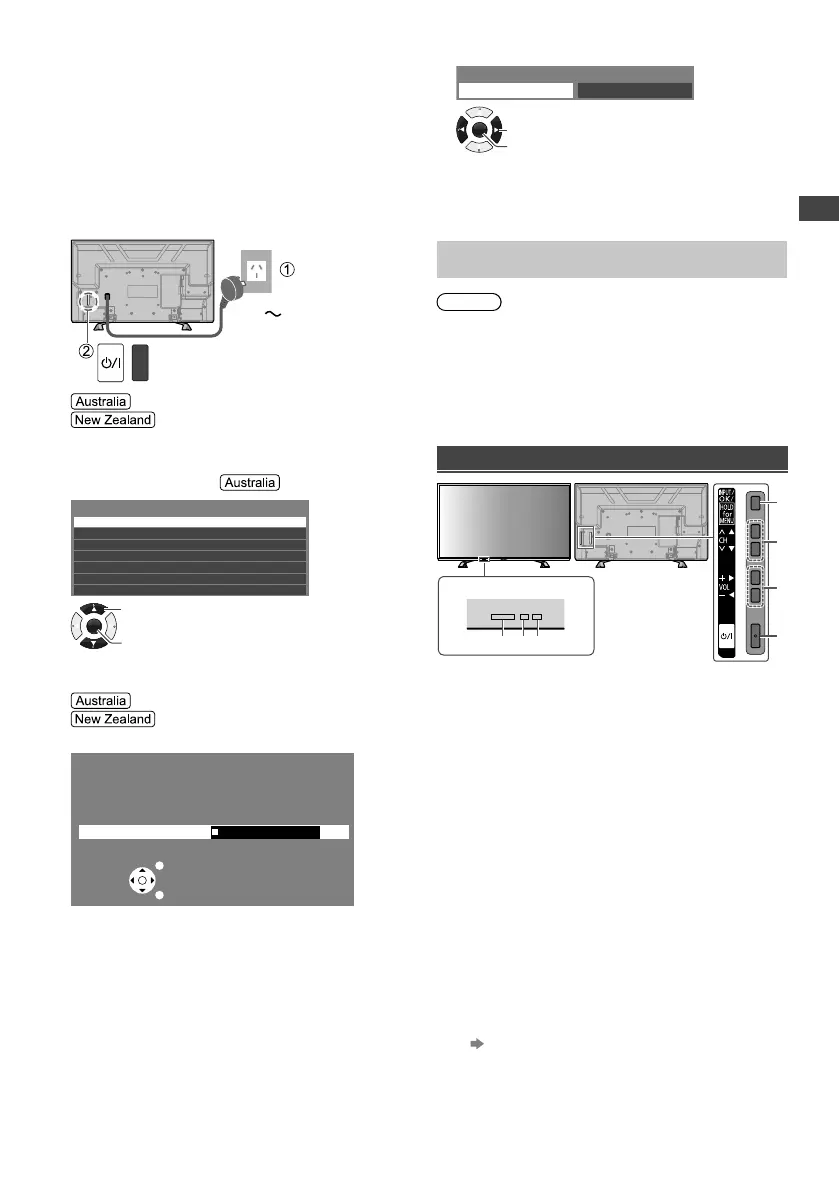
1 Plug the mains plug into the socket
outlet and turn on the TV.
It may take a few seconds before the screen is
displayed.
AC 220 - 240 V,
50/60 Hz
Proceed to steps 2, 3 and 4.
Scanning starts automatically when
you turn on the TV (step 3). After scanning is
completed, proceed to step 4.
2 Select your area.
New South Wales/Australian Capital Territory
Victoria
Queensland
South Australia
Western Australia
Northern Territory
Tasmania
Select State/Territory
OK
Access
Select
3 Scanning starts.
[Automatic Channel Search]
[Auto Tuning]
Example:
Automatic Channel Search
Status: Scanning...
Analogue : 0
Digital : 1
EXIT
RETURN
Scan
5%
●
This function searches and stores TV channels.
●
The stored channels and sorted channel order vary
depending on the area, broadcasting system and
conditions of signal reception.
4 Select [Home].
Please select your viewing environment.
Home Shop
OK
Confirm
Change
●
[Shop] is for shop display.
●
To change the viewing environment later on, you
need to initialise all settings by accessing [Shipping
Condition] (p. 15).
Setup is now complete and your TV is ready for
viewing.
Note
●
If tuning has failed, check the connection of the RF
cable, then follow the on-screen instructions.
Operating the TV
Using the TV controls
Indicators on the TV
56 7
1
3
2
4
1 Changes the input mode
Displays [Main Menu] when press and hold for
3 seconds
●
Press again and hold for 3 seconds to return to the
previous screen from submenus / exit from main
menu page.
2 Channel Up / Down
Cursor Up / Down
●
Makes selections in the menu system.
3 Volume Up / Down
Cursor Left / Right
●
Makes selections and / or adjustments when in the
menu system.
4 Mains power On / Off switch
●
Use to switch the mains power.
5 Remote control signal receiver
6 C.A.T.S. (Contrast Automatic Tracking System)
sensor
●
Senses brightness to adjust picture quality when
[Eco Mode] in the [Picture] menu is set to [On].
(p. 8)
7 Power LED
●
Red: Standby
Green: On
●
The LED blinks when the TV receives a command
from the remote control.