16
© Copyright 2008 Panoramic Corporation
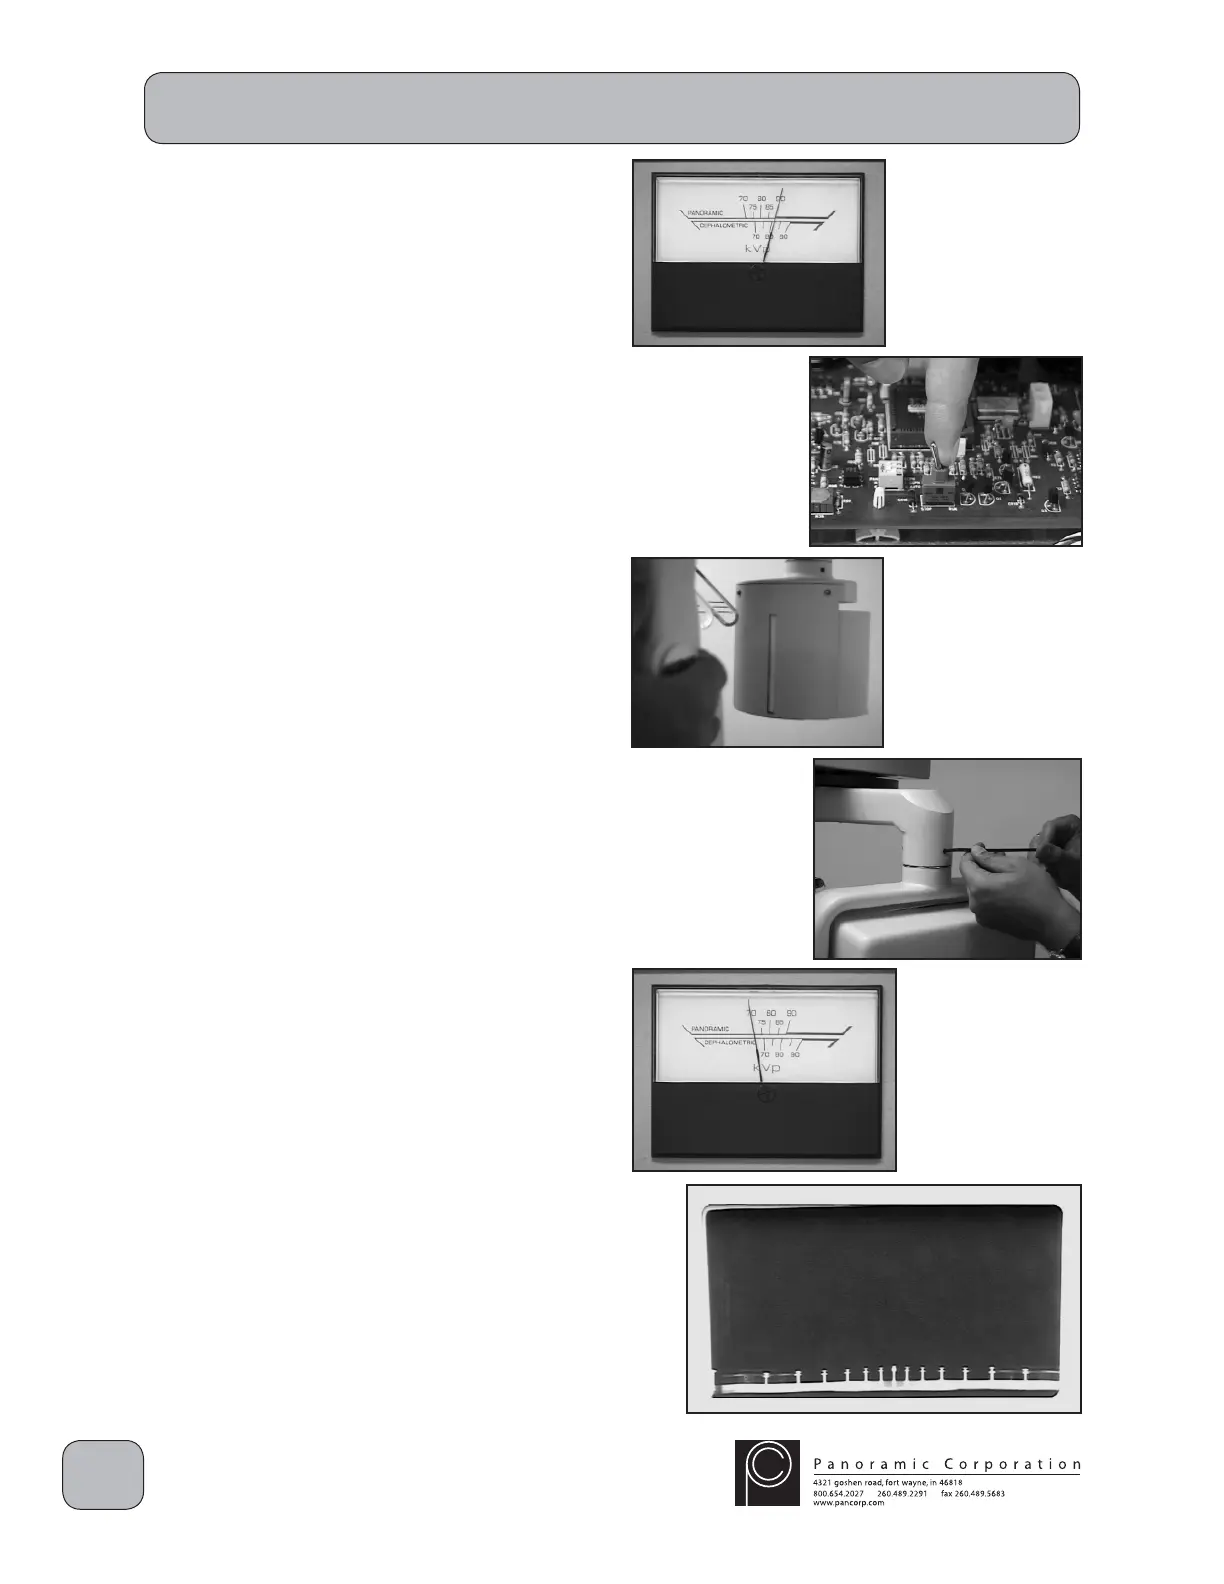
Perform X-ray Beam Alignment
1. Power the machine on.
2. Using the function switch on the control panel,
select PANORAMIC L.
3. Using the kVp setting knob on the control
panel, set the kVp meter to 90 kVp on the
PANORAMIC scale.
4. Toggle the RUN/STOP switch on the printed
circuit board in the overhead chassis to STOP.
5. Temporarily affi x a fl uorescent screen behind
the fi lm drum mask (slotted plate in front of the
fi lm drum).
CAUTION: X-rays will be emitted when the
exposure switch is depressed.
6. Darken the room and depress the exposure
switch.
7. The fl uorescent screen should glow, denoting
the presence of X-rays. Adjust the tubehead
so that the X-ray beam is centered horizontally
in the fi lm mask slot, and that the top edge of
the X-ray beam is aligned to the top edge of
the fi lm drum mask slot.
8. Tighten the 3 set screws locking the tubehead
assembly horizontally and the large allen bolt
on the right side of the tubehead locking it
vertically. Verify that the X-ray beam is still
centered.
9. Remove the fl uorescent screen.
10. Toggle the RUN/STOP switch on the printed
circuit board in the overhead chassis to RUN.
11. Using the kVp setting knob on the control
panel, set the kVp meter to 70 kVp on the
PANORAMIC scale.
12. Place a loaded fi lm cassette sleeve on the fi lm
drum and align the L1 pointer.
13. Depress the exposure switch for the entire 12
second exposure.
14. Process the fi lm to verify proper alignment.
The fi lm should be black with clear edges.
PC-1000 Installation
 Loading...