29
© Copyright 2008 Panoramic Corporation
PC-1000/Laser 1000 Installation
Remove Soft Tissue Shields
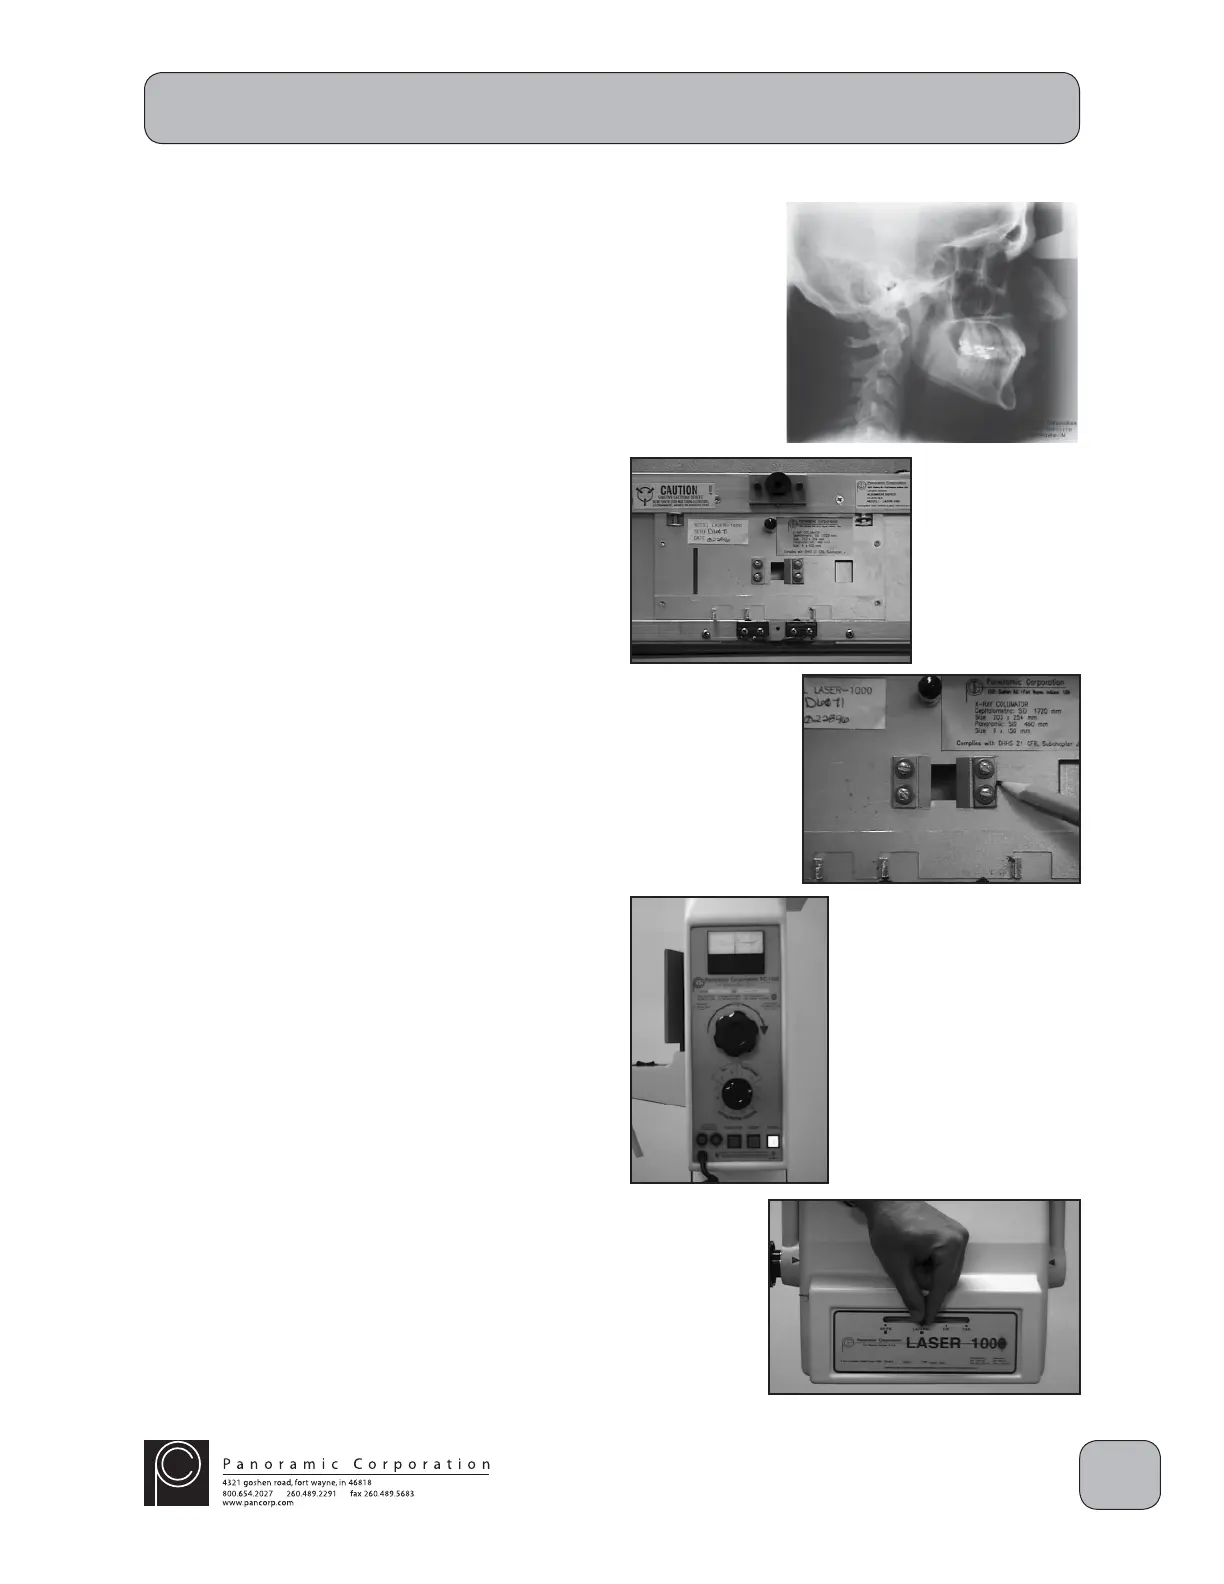
The PC-1000/Laser 1000 is shipped with 2 soft
tissue shields installed on the lateral collimator
on the front of the tubehead. The purpose of a
soft tissue shield is to gradually fi lter the X-rays
at the front edge of the cassette to allow the soft
tissue, i.e. nose, to be visible on the processed
fi lm. The shields are factory-installed at 20% or
approximately 2" on the processed fi lm. During
installation, in order to properly align the X-ray
beam to the cephalometric cassette, both of the
soft tissue shields can optionally be removed.
1. Remove the 2 small allen screws on each side
of the front tubehead cover and remove the
front tubehead cover. Do not stress the wires
to the laser alignment switch or LED.
2. With a pencil or awl, mark the current position
of both of the brass shields on the lateral
collimator.
3. Remove the 2 screws from the shields and
remove the shields.
4. Temporarily reinstall the front tubehead cover.
One of the soft tissue shields will be reinstalled
after the installation is complete.
Perform Cephalometric X-ray Beam Alignment
1. Power the machine on.
2. Using the function switch on the control panel,
select CEPHALOMETRIC 0.4.
3. Using the kVp setting knob on the control
panel, set the kVp meter to 70 kVp on the
CEPHALOMETRIC scale.
4. Slide the lever in the collimator assembly on
the front of the tubehead to the LATERAL
position.
NOTE: If the collimator is NOT fi rmly seated in its
locking notch:
a. the alignment laser will not fi re
b. when the exposure switch is depressed,
the machine will beep rapidly, but no
radiation will be emitted
 Loading...