42
© Copyright 2008 Panoramic Corporation
S0102
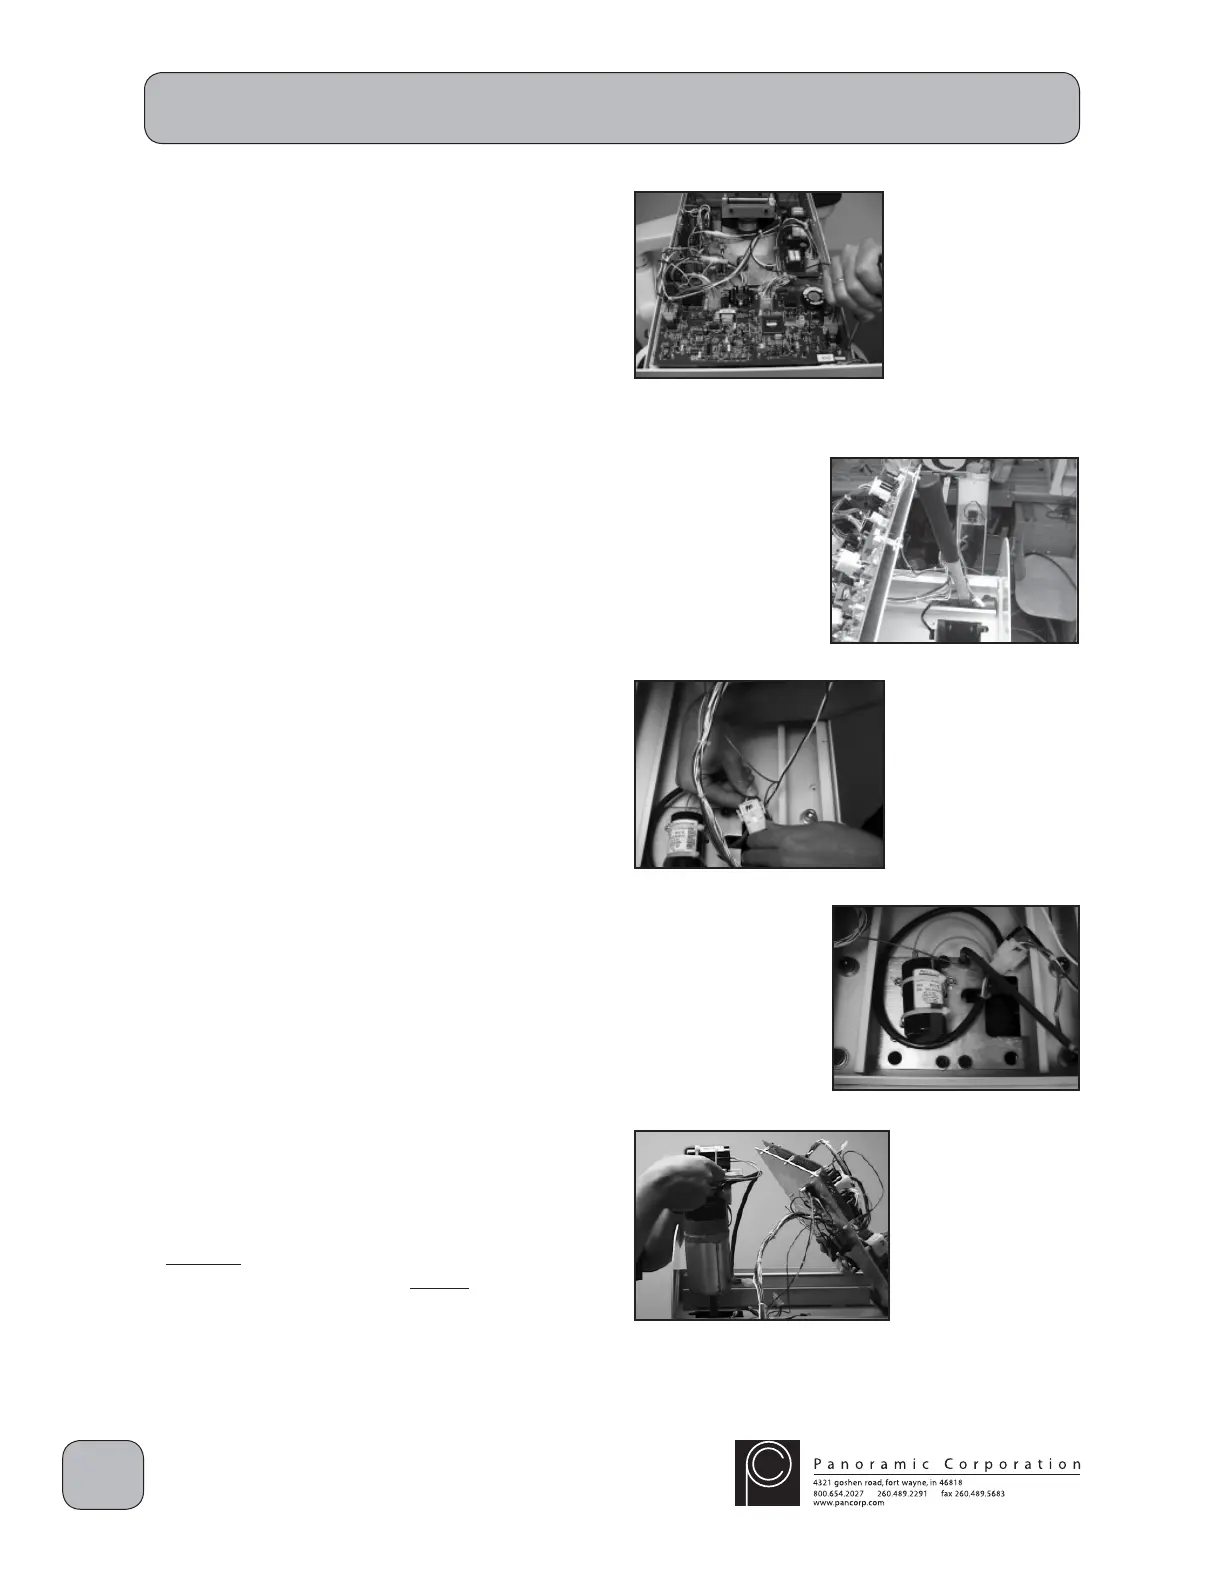
Screw Motor Assembly Exchange
1. Using the UP/DOWN switch on the chinrest
arm, lower the PC-1000 to its lowest position.
2. Power the PC-1000 off.
3. Remove the 6 screws on the underside of the
top cover and remove the top cover. Ensure
that the wiring on the control panel side is not
damaged when removing the top cover.
4. Remove the 4 screws on the aluminum chassis
in the overhead.
5. Prop the aluminum chassis up to allow access
to the screw motor assembly in the rear of the
machine.
6. Disconnect the molex connector J11/P11.
Remove the phillip head screw mounted to the
overhead chassis to disconnect the ground
wire for the screw motor.
7. Remove the 4 5/16" allen head bolts from the
top of the screw motor assembly. Be careful
not to drop the bolts inside the column.
8. Lift the entire screw motor assembly out of
the column. There is a bracket in the inner
column that the threaded screw shaft must
pass through before the assembly is free.
9. Remove all metal shims from under the metal
plate for the screw motor. Do not reuse them.
S0103
S0108
 Loading...